
Quick Help - Griffin
How to Access Genetec:
Use the login steps found here to connect to Genetec: https://fmd.uga.edu/departments/access_control/genetec_logon_steps/.
Navigation:
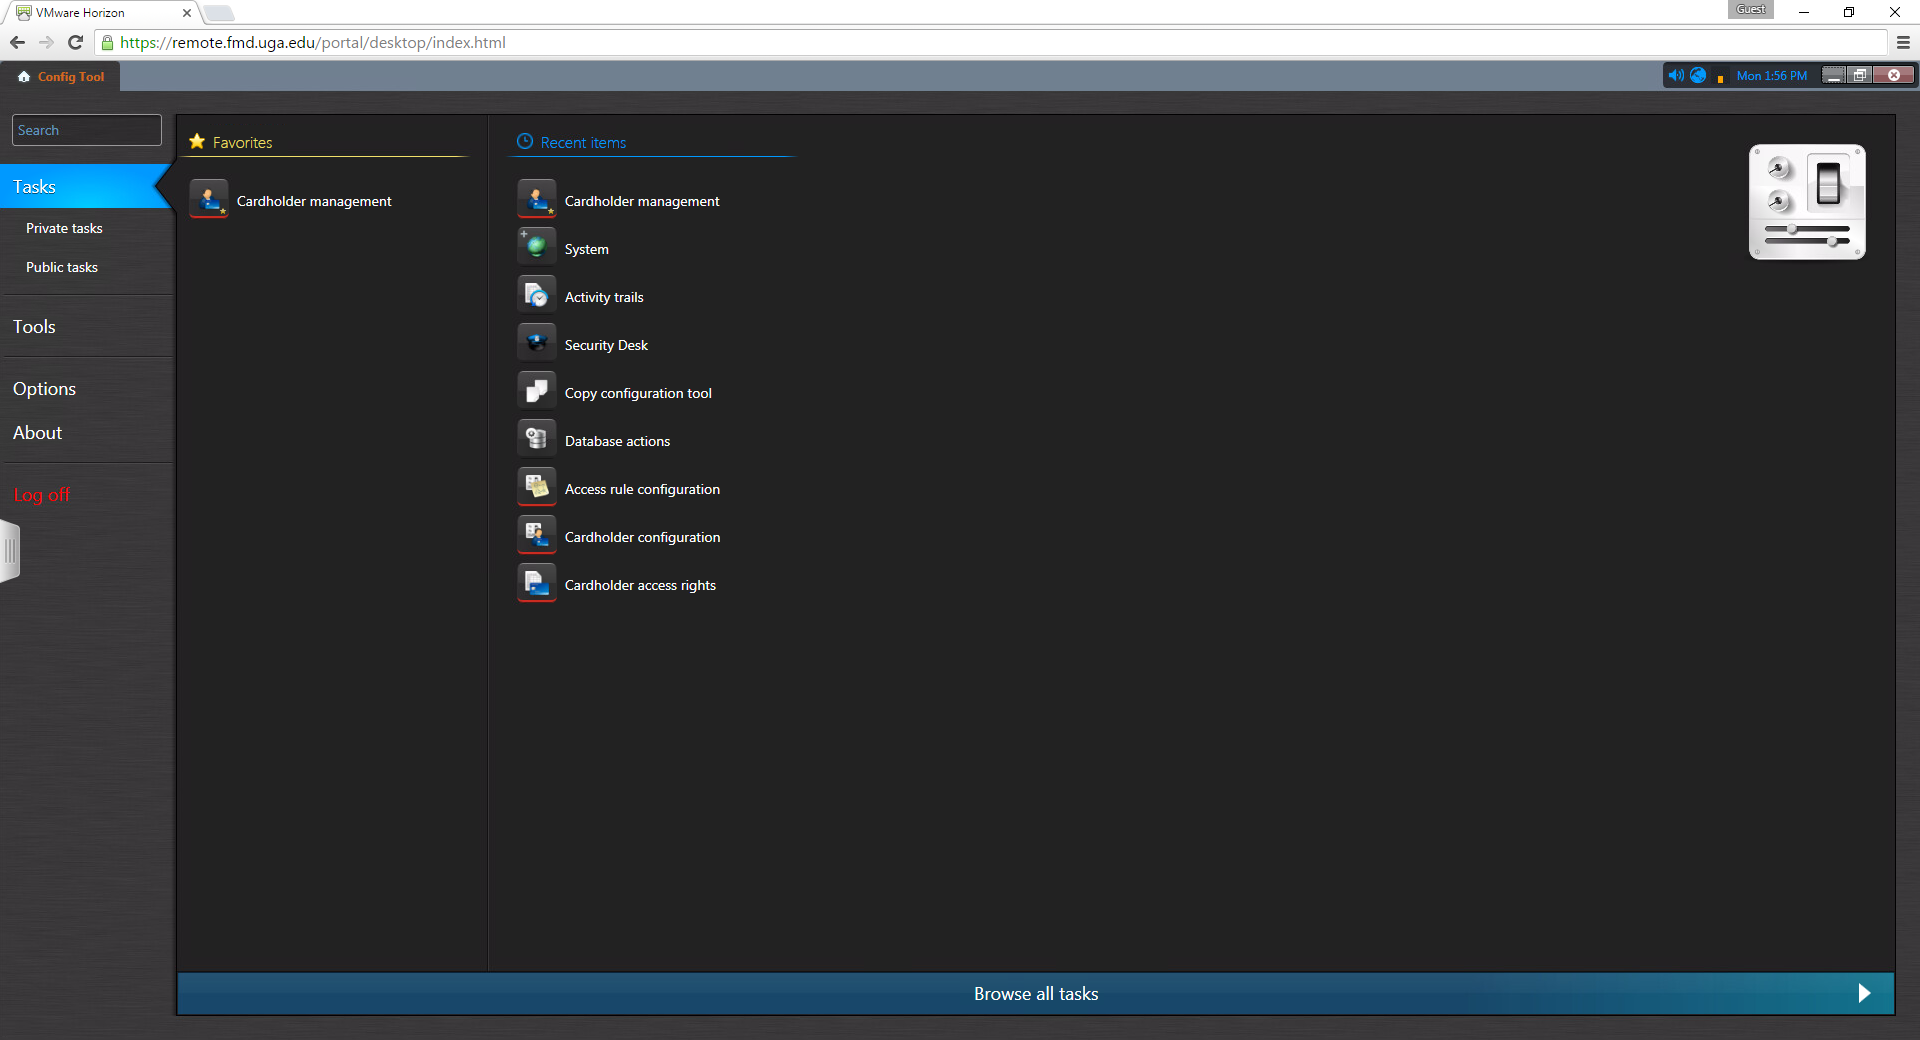
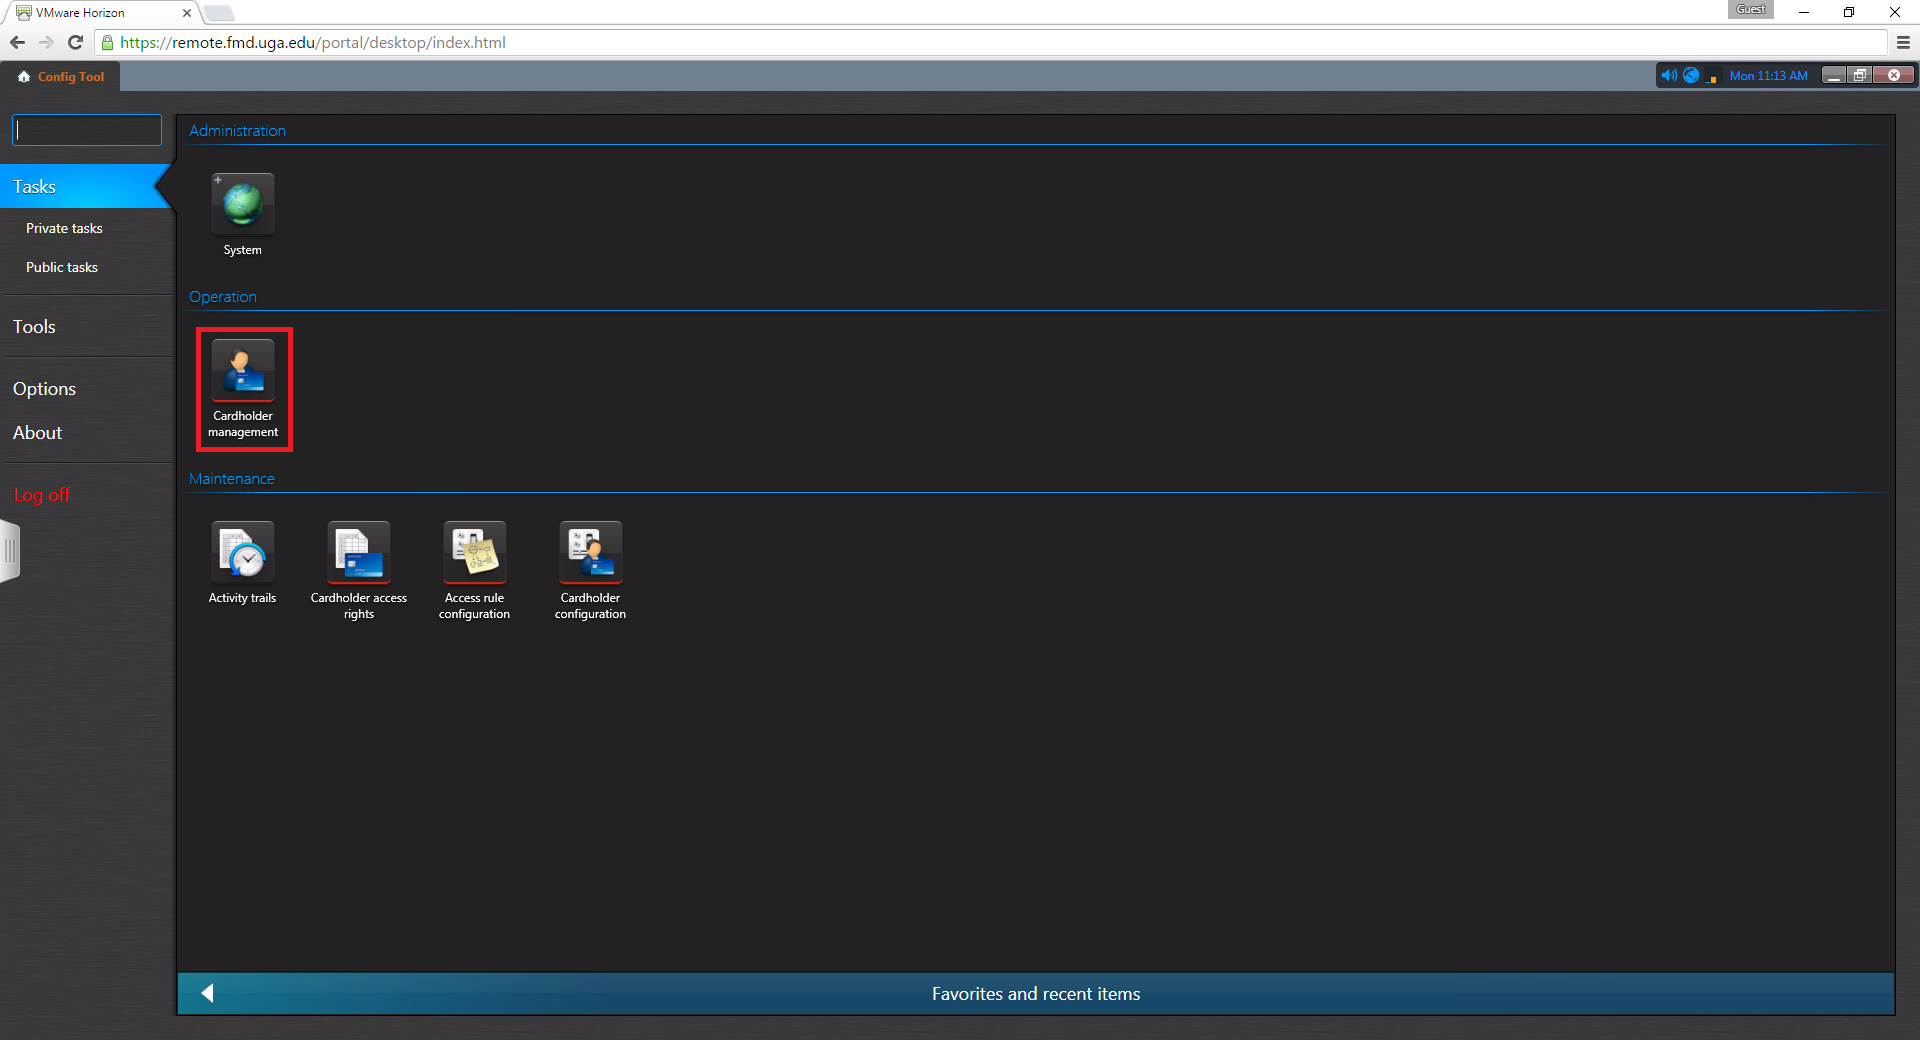
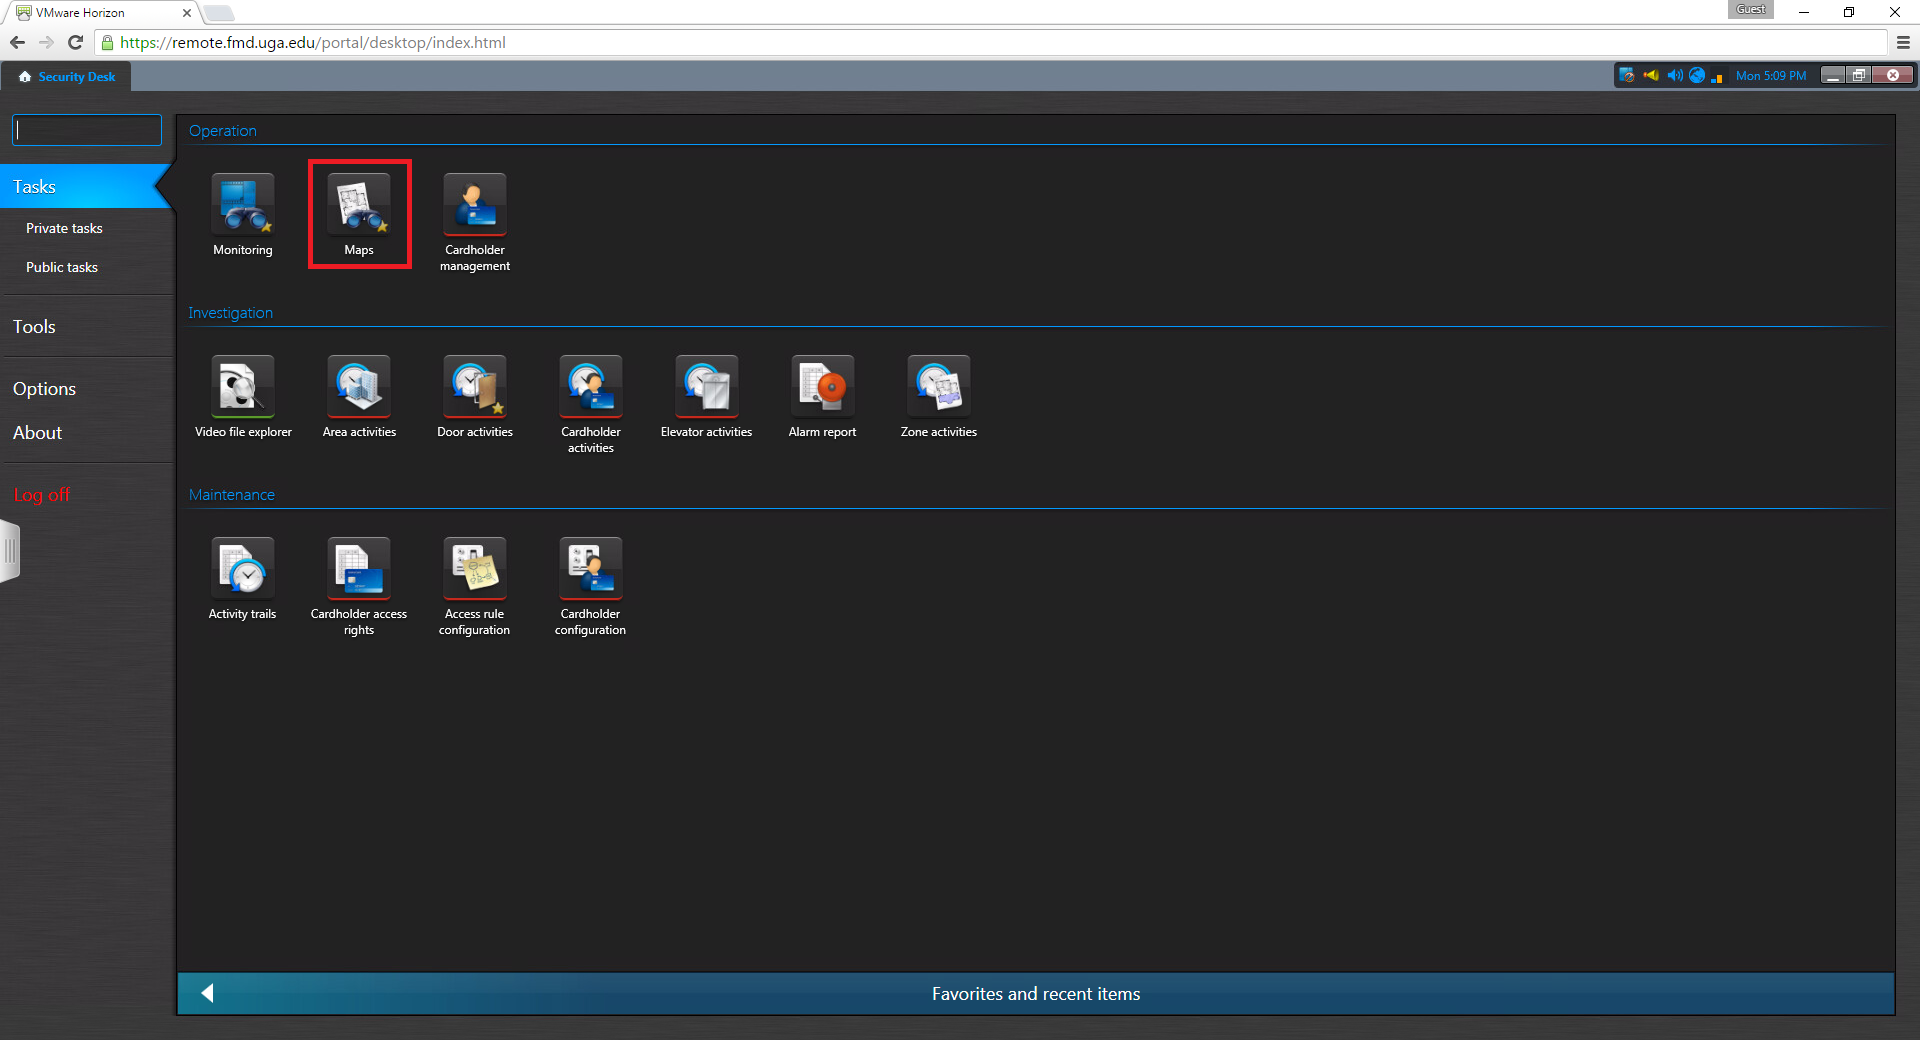
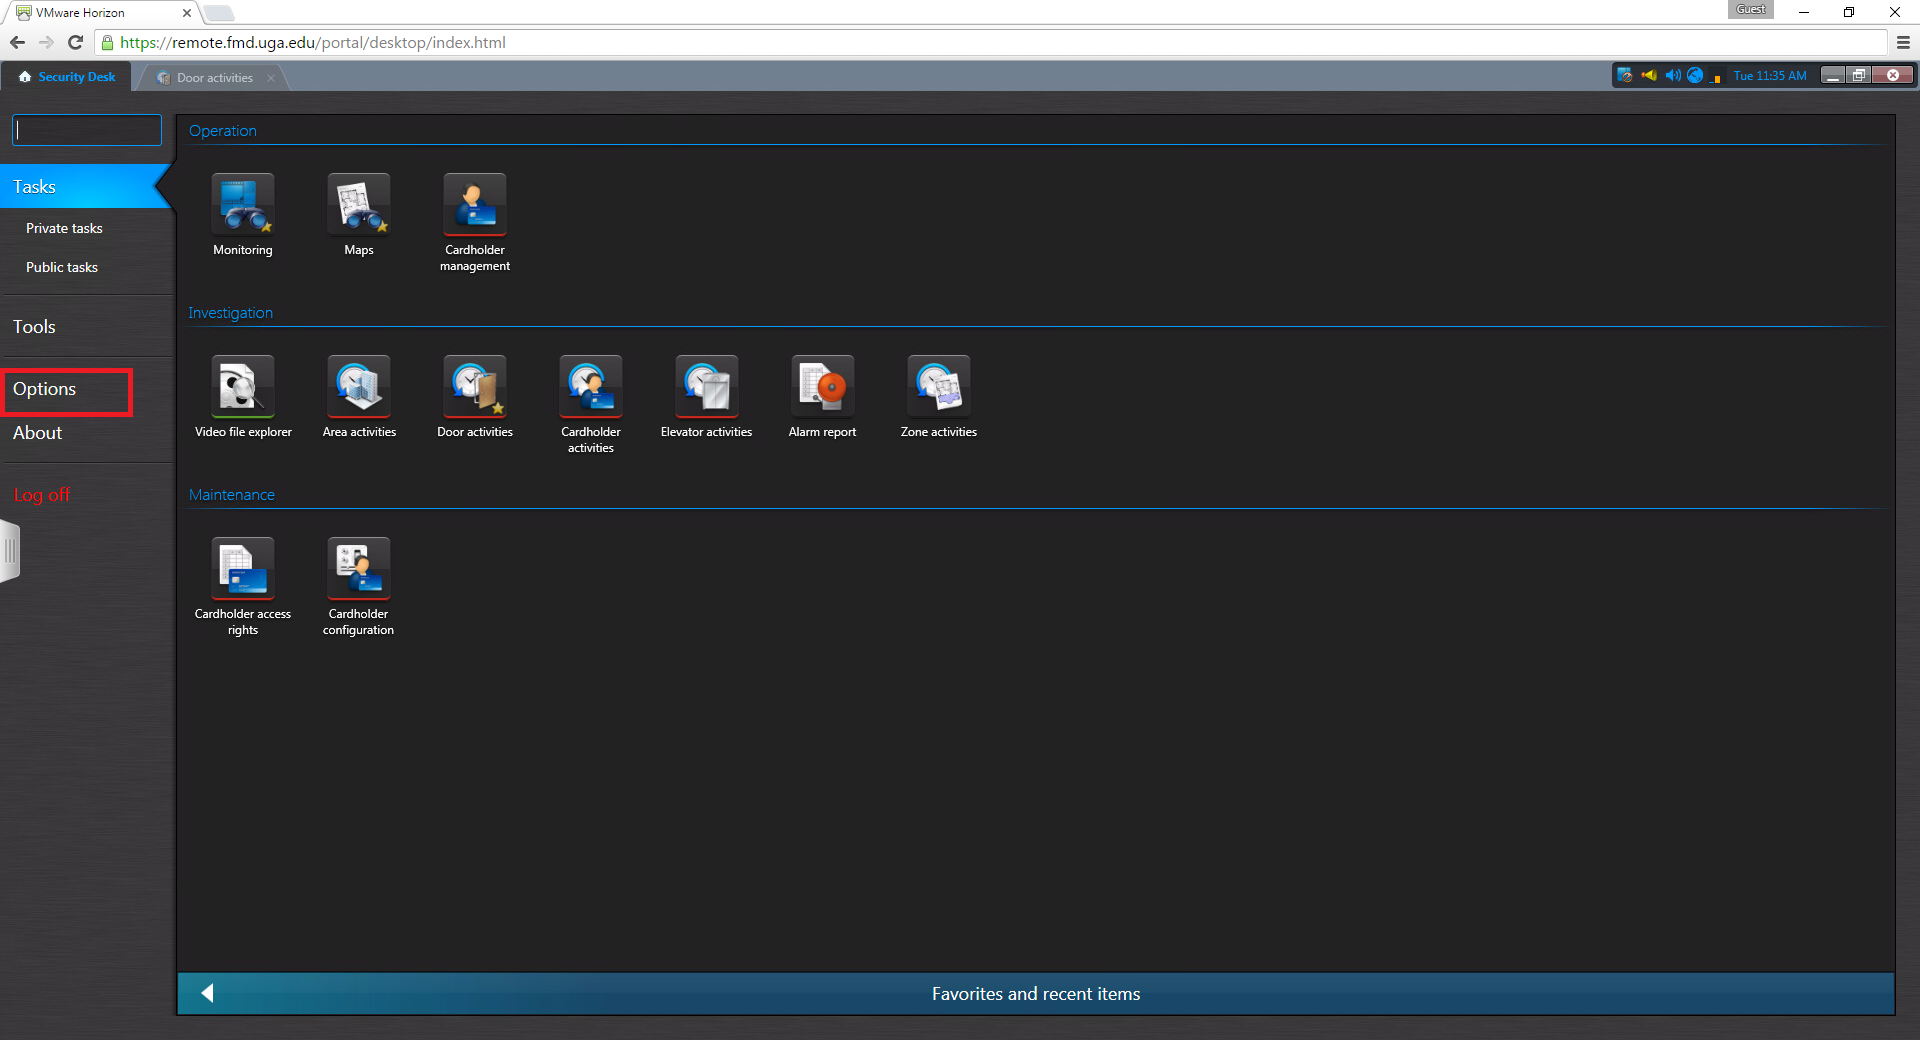
Once you've launched the Config Tool or Security Desk applications you'll be presented with one of two screens: The 'Favorites and recent items page' or the 'All Tasks' page. You can use the blue navigation bar at the bottom of the screen to move between the two screens. Also, you can access the 'Options' window from either of these screens. This window will allow you to customize some settings for your application if desired. Lastly, you can get to your 'Private Tasks' or 'Public Tasks' from either of these pages. How to setup and configure Private Tasks will be discussed in the reporting section of this guide.
 OR
OR 
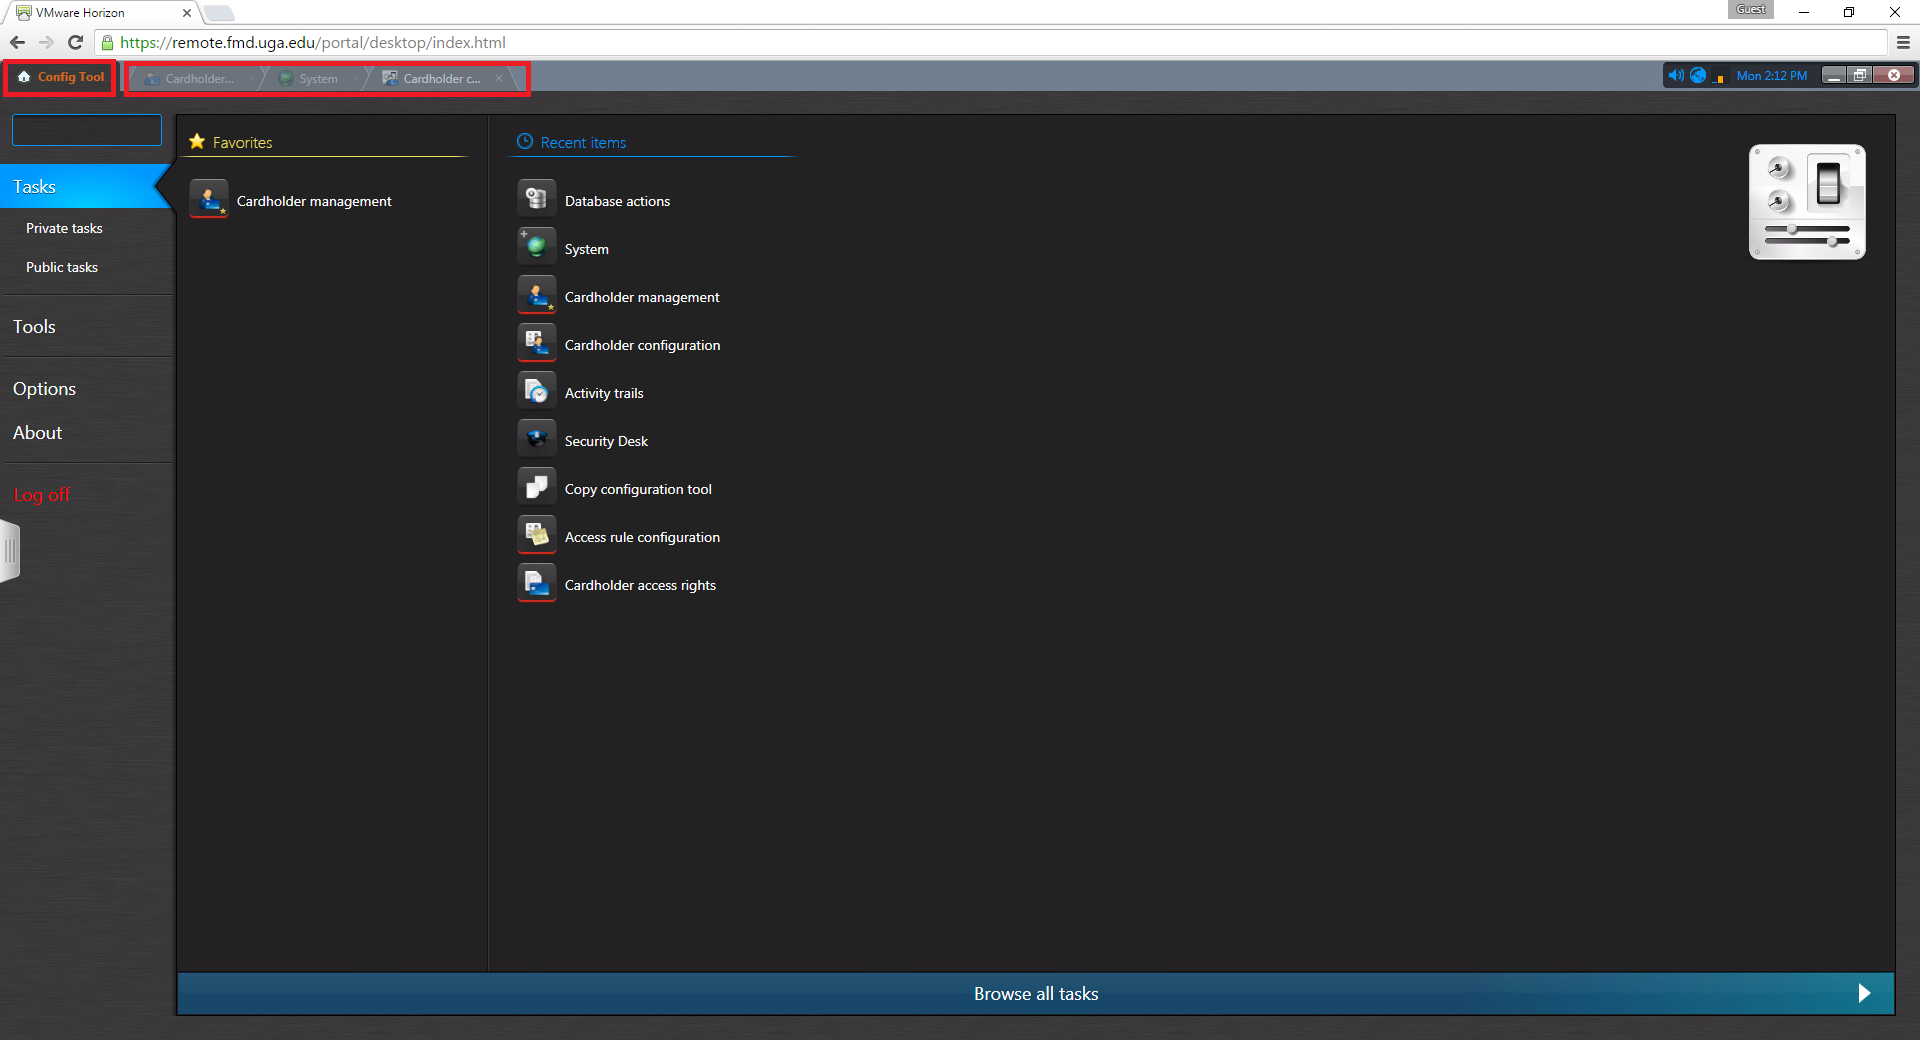
Once you launch tasks from either of these screens they will open up as tabs across the top of the application. You can use these tabs to navigate between multiple tasks that are open at the same time. You can also click on the far left tab that will have a small 'Home' icon and say either 'Config Tool' or 'Security Desk' to return to the main page at any time.
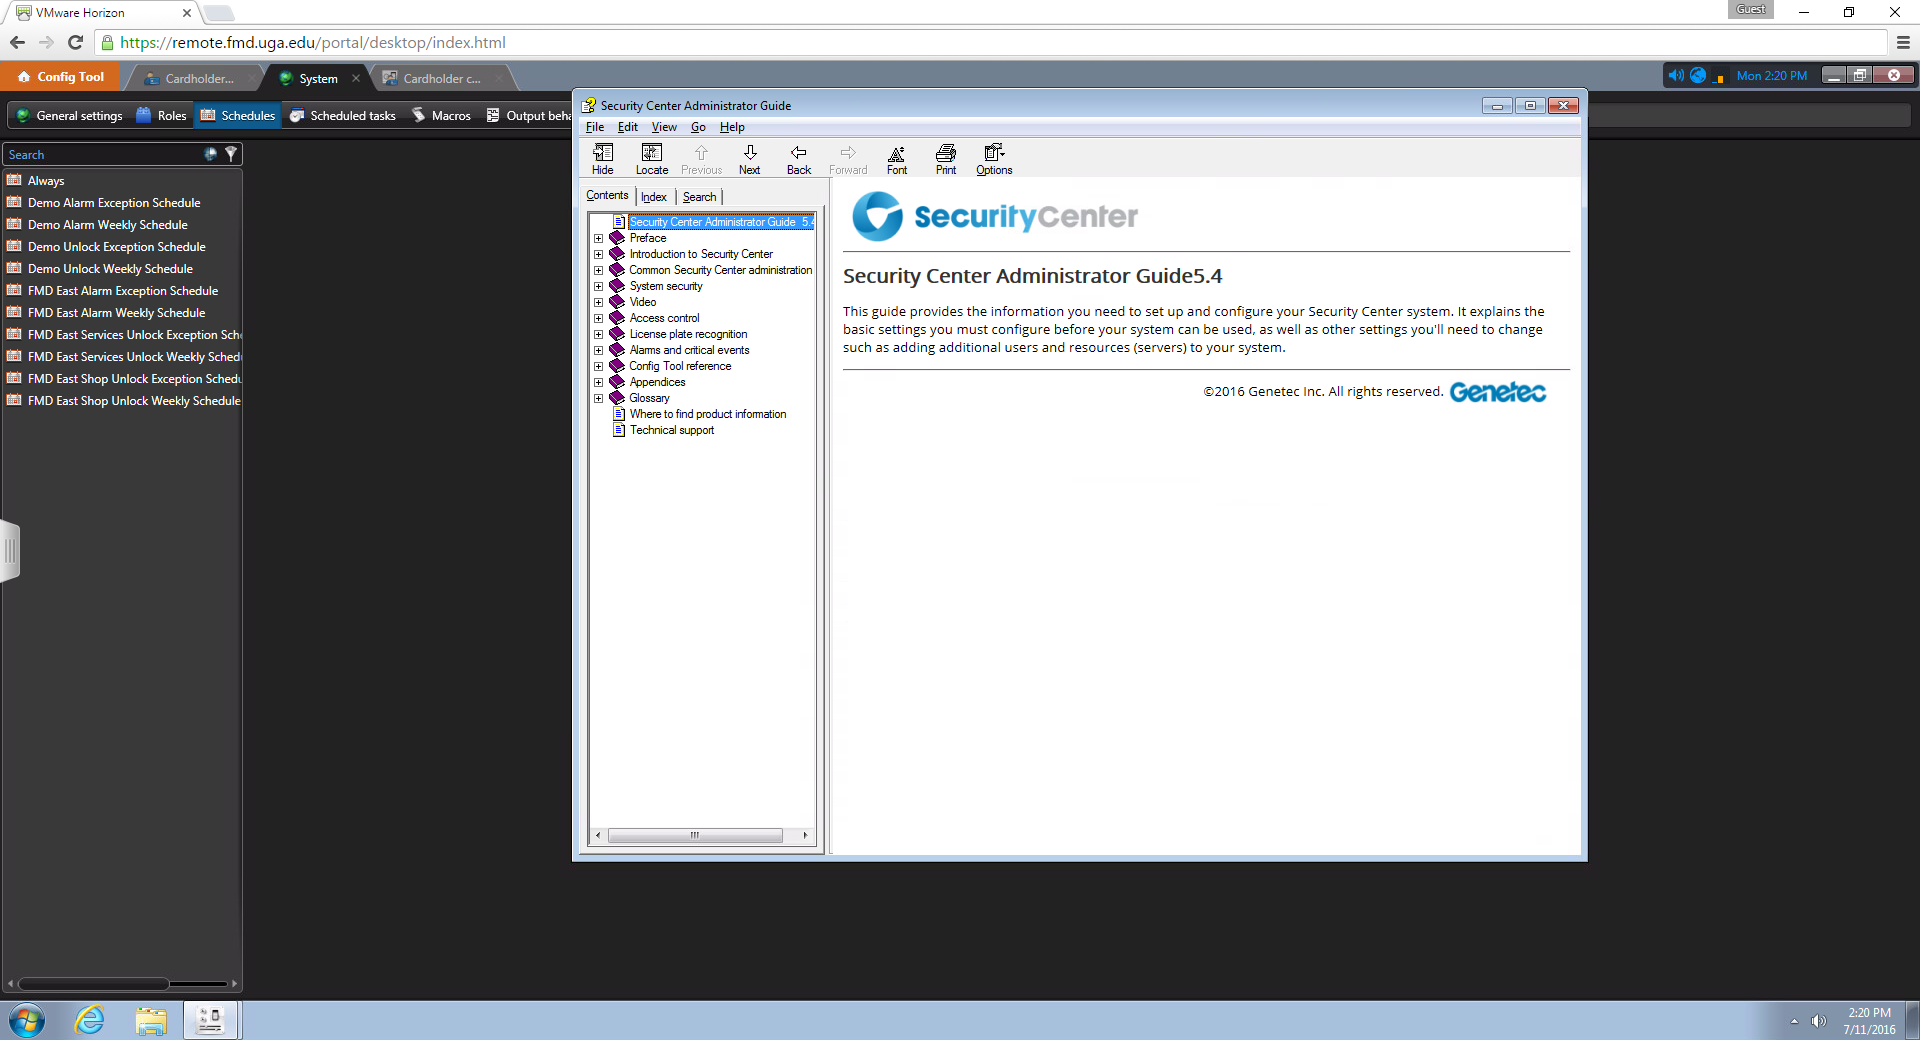
You can press 'F1' at any time while in the application to open a system help dialog.
Security Desk
Cardholders:
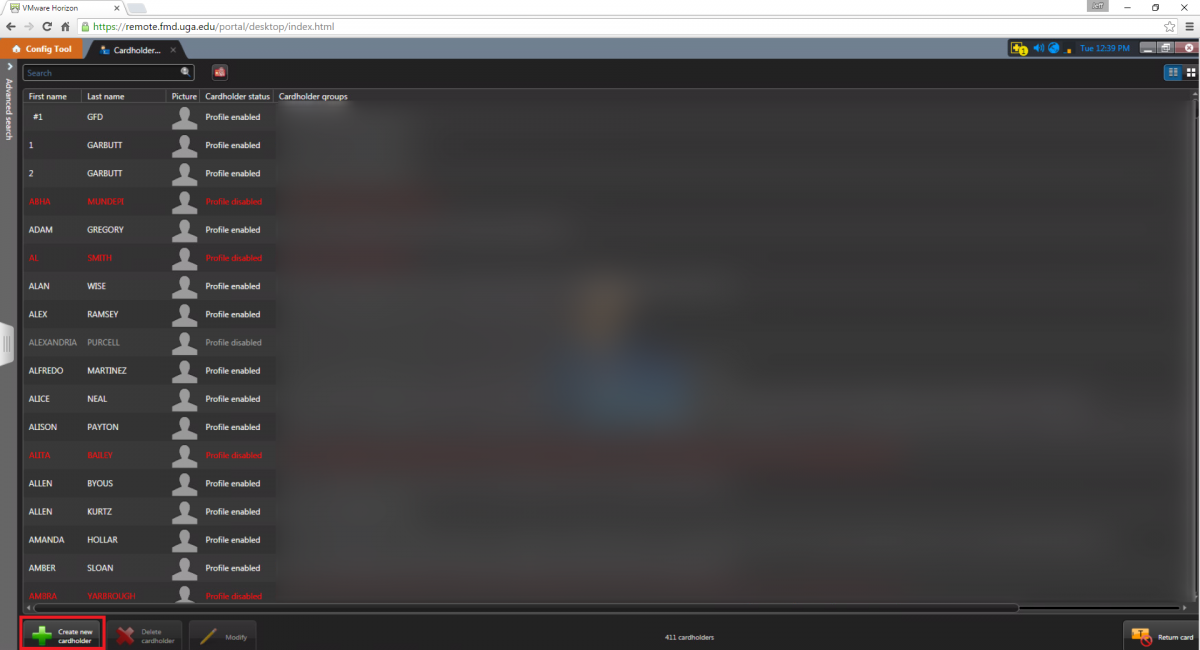
To add or find cardholders you'll need to launch the 'Cardholder Management' task. This task can be launched from either the Config Tool or the Security Desk.
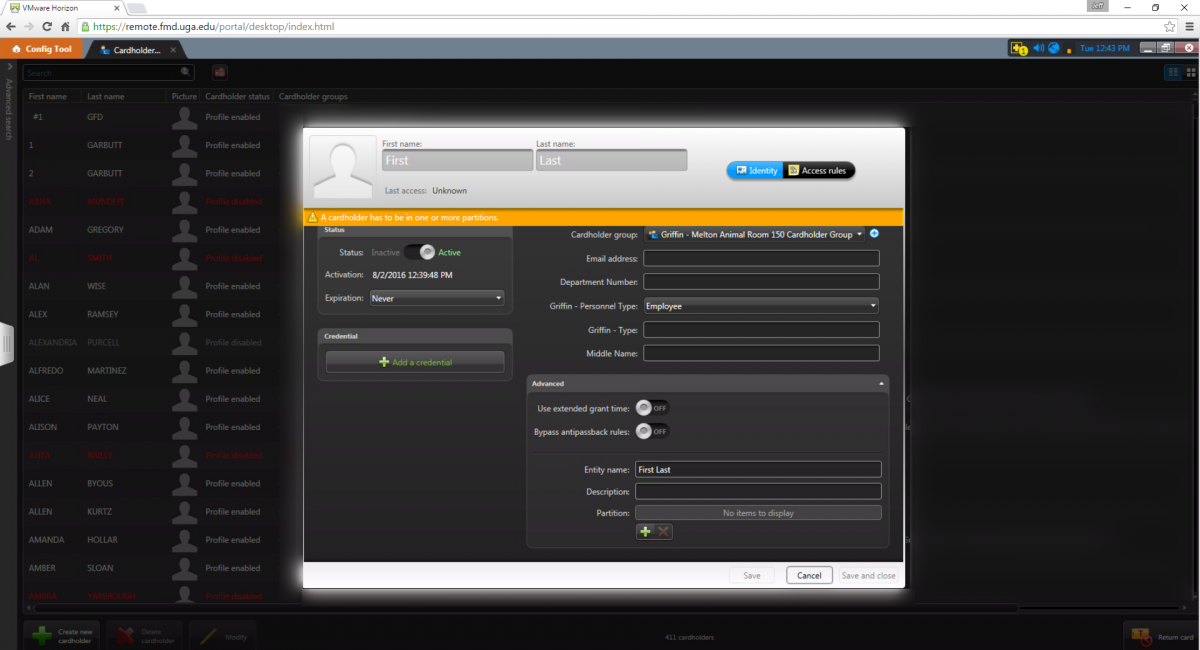
To create a Cardholder click on the 'Create New Cardholder' button on the bottom left of the screen. Once you've done this a new, blank cardholder will display.
You should follow these steps to setup the new Cardholder and their Credential(s)/Cards.
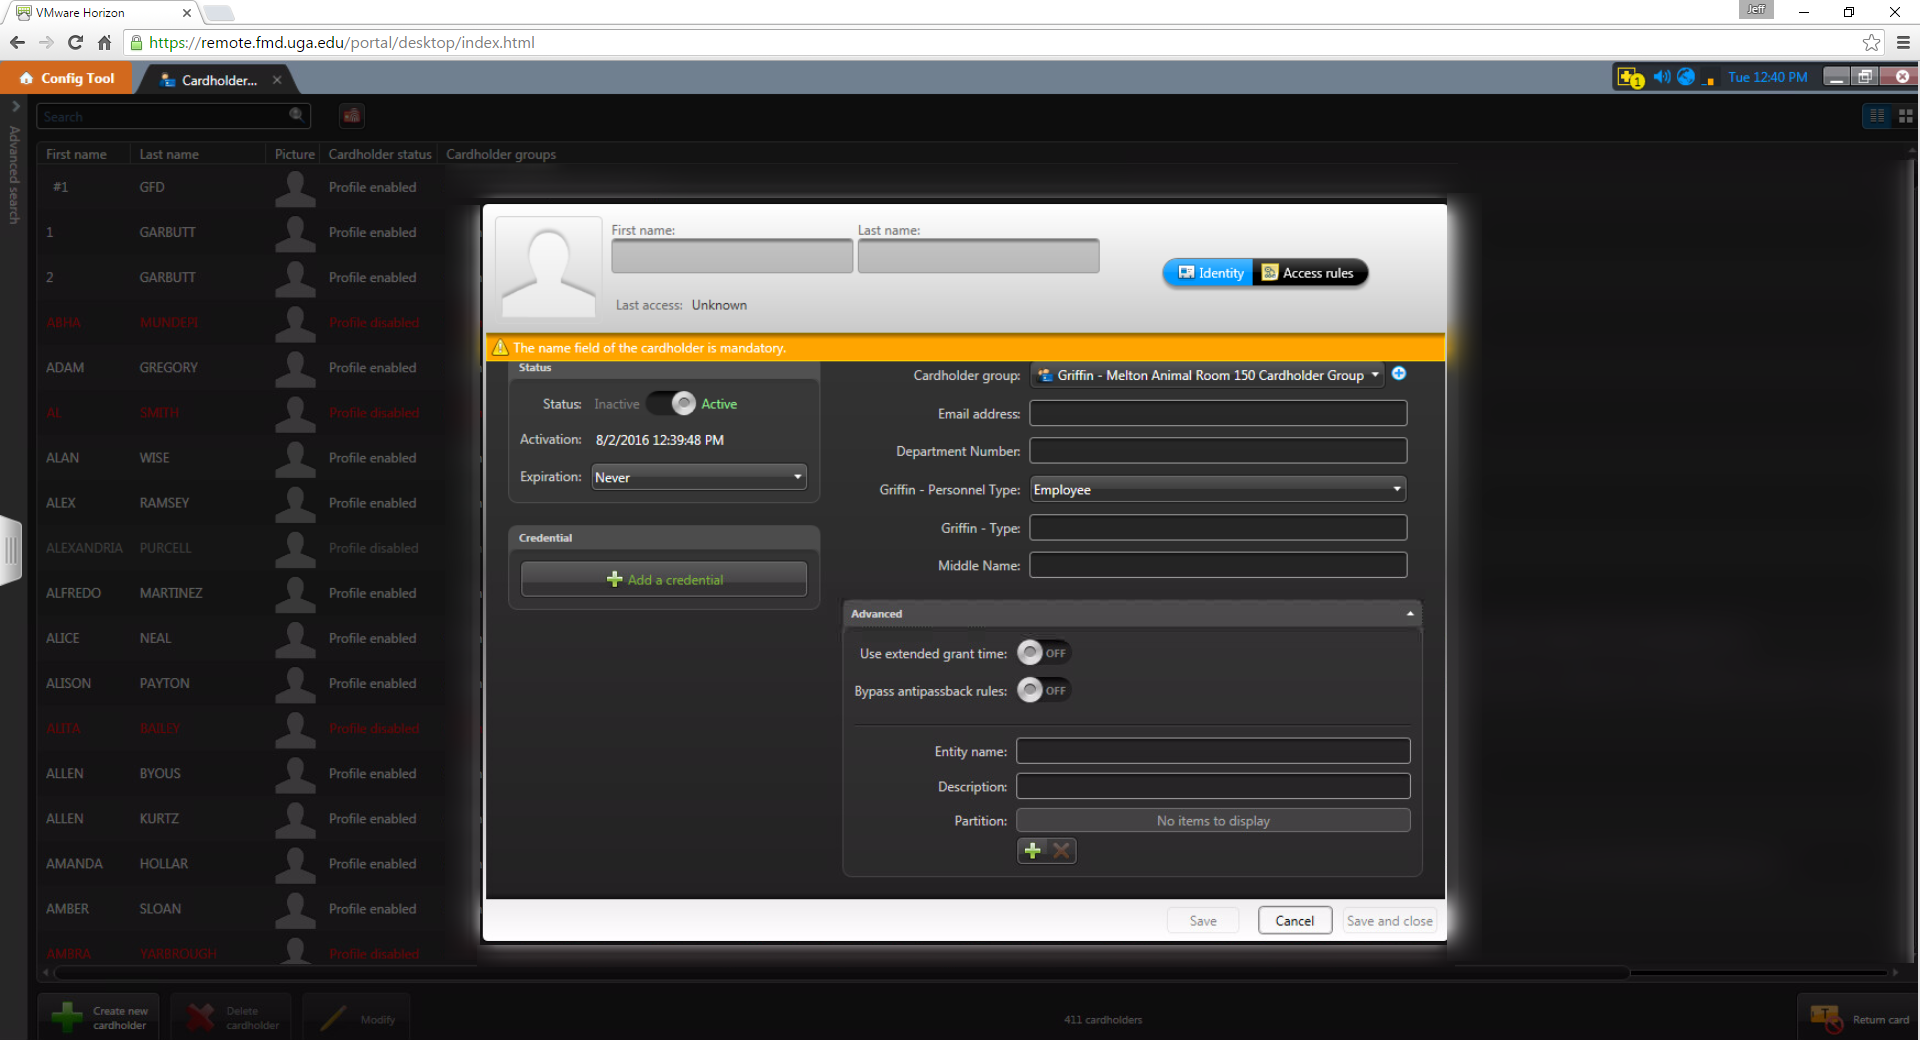
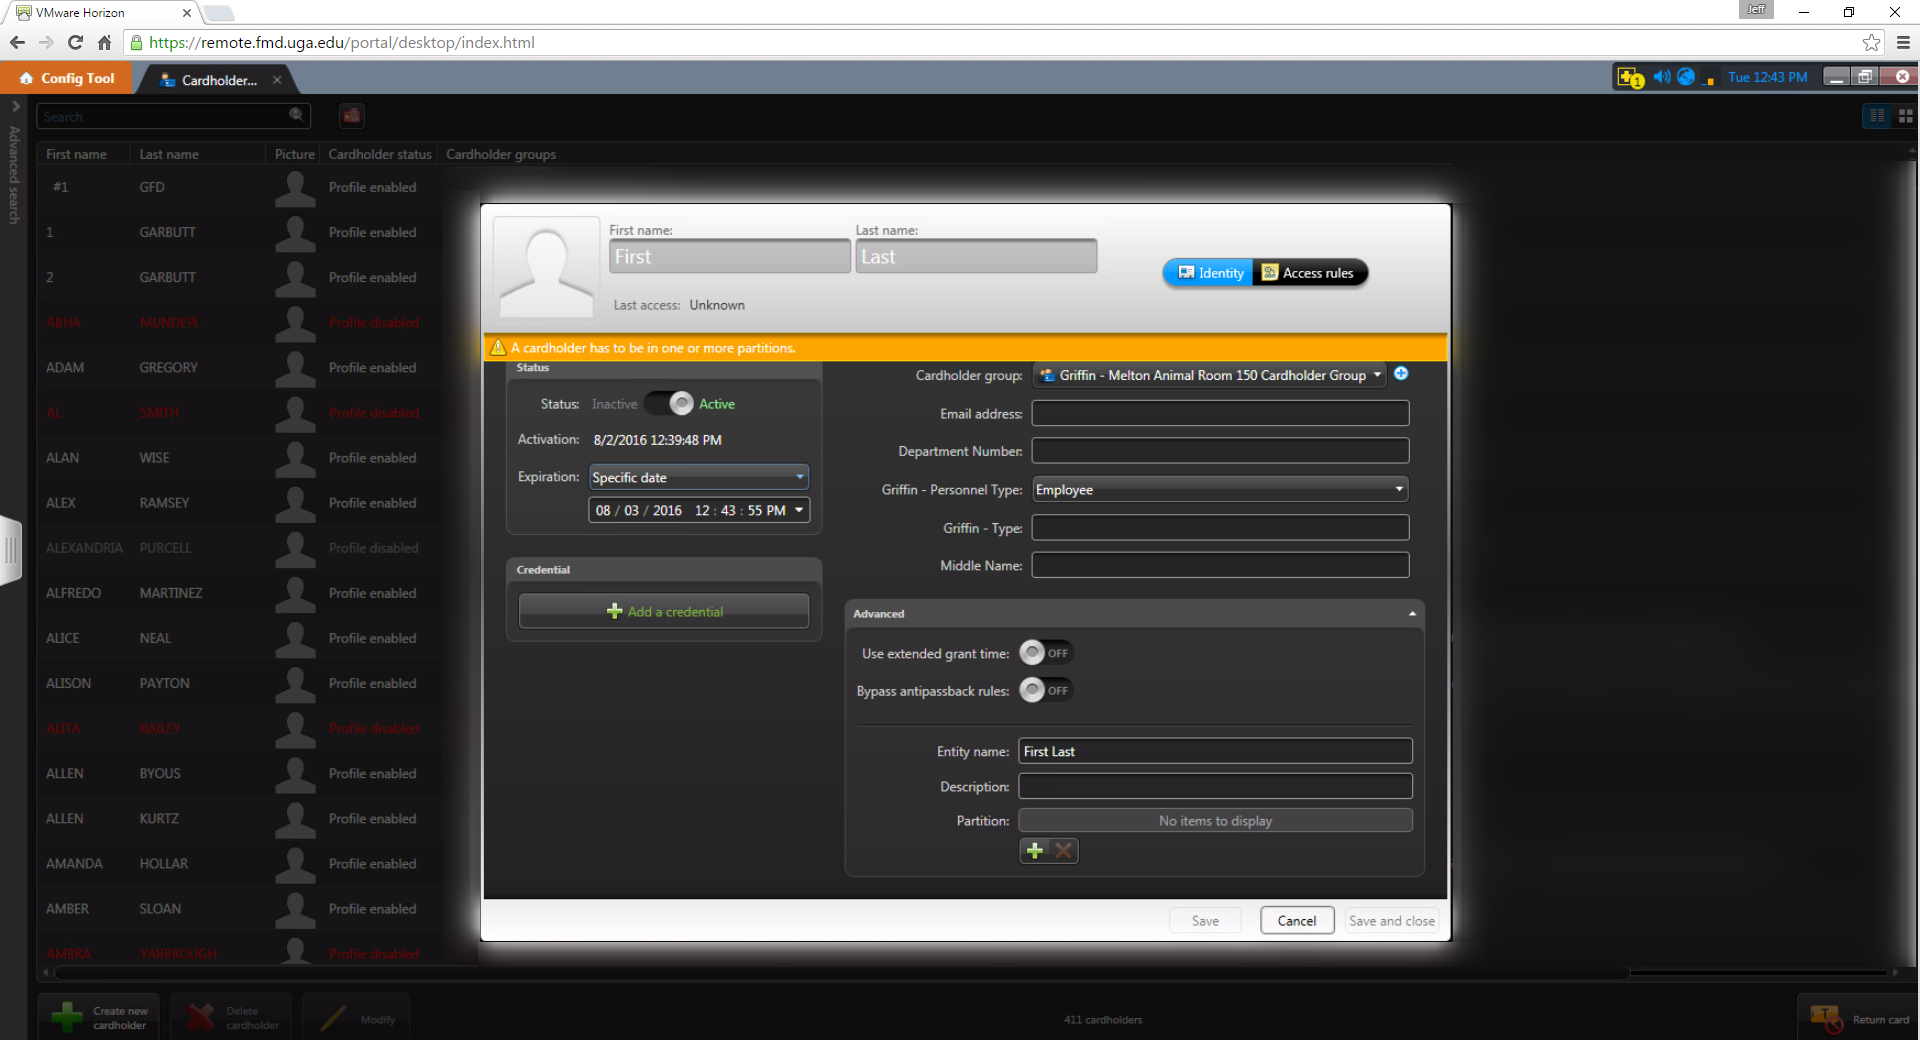
- Fill in the "First name" and "Last name" fields, located at the top of the popup:
-
- Set an expiration date if needed by choosing an expiration type and a date and time for expiration. Note: If you do not want the Cardholder or Credential to be immediately active, you should toggle the "Status" button to inactivate the record and then set an activation and/or expiration date.
-
- Set any informational fields such as e-mail, department, personnel type, etc.
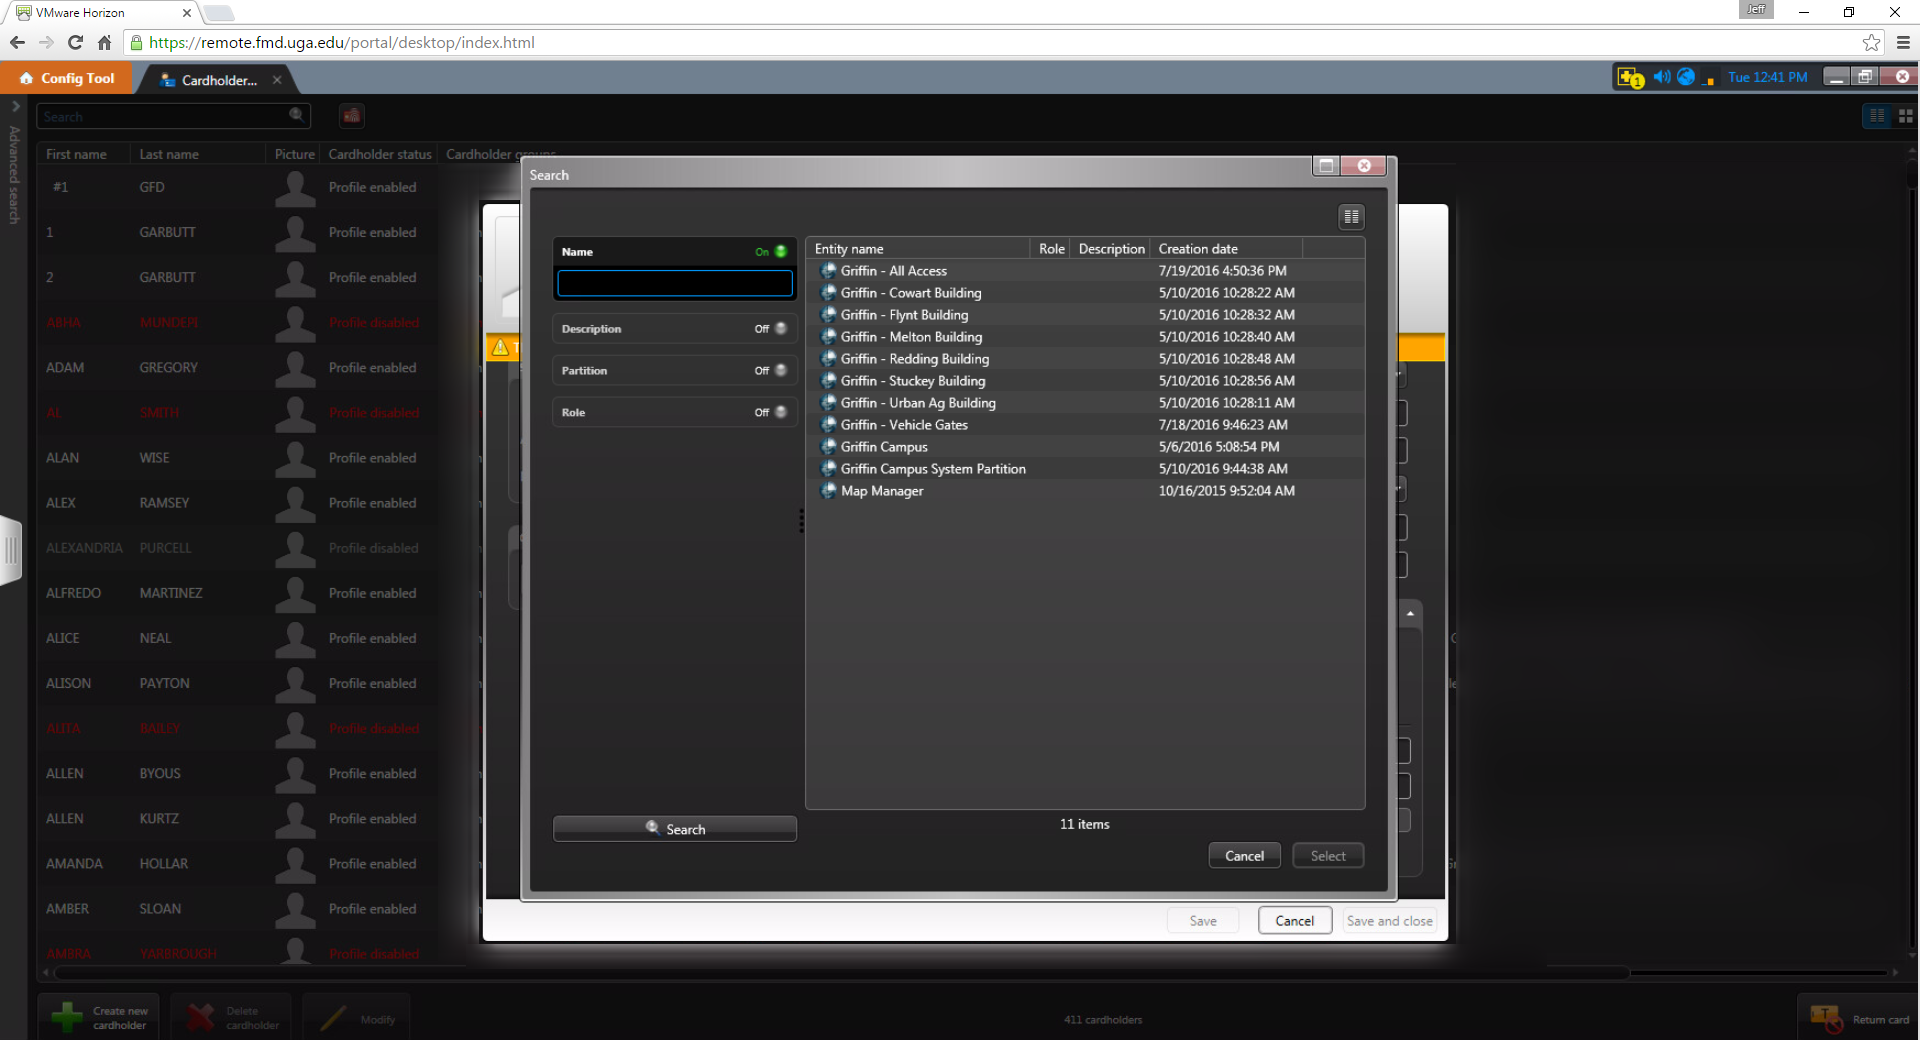
- Set the Partition under the Advanced group to 'Griffin Campus'. You can do this by clicking the green add button under the Partition field and selecting 'Griffin Campus' in the pop-up window. Sometimes this field may already be set. Just make sure that it is only set to 'Griffin Campus'.
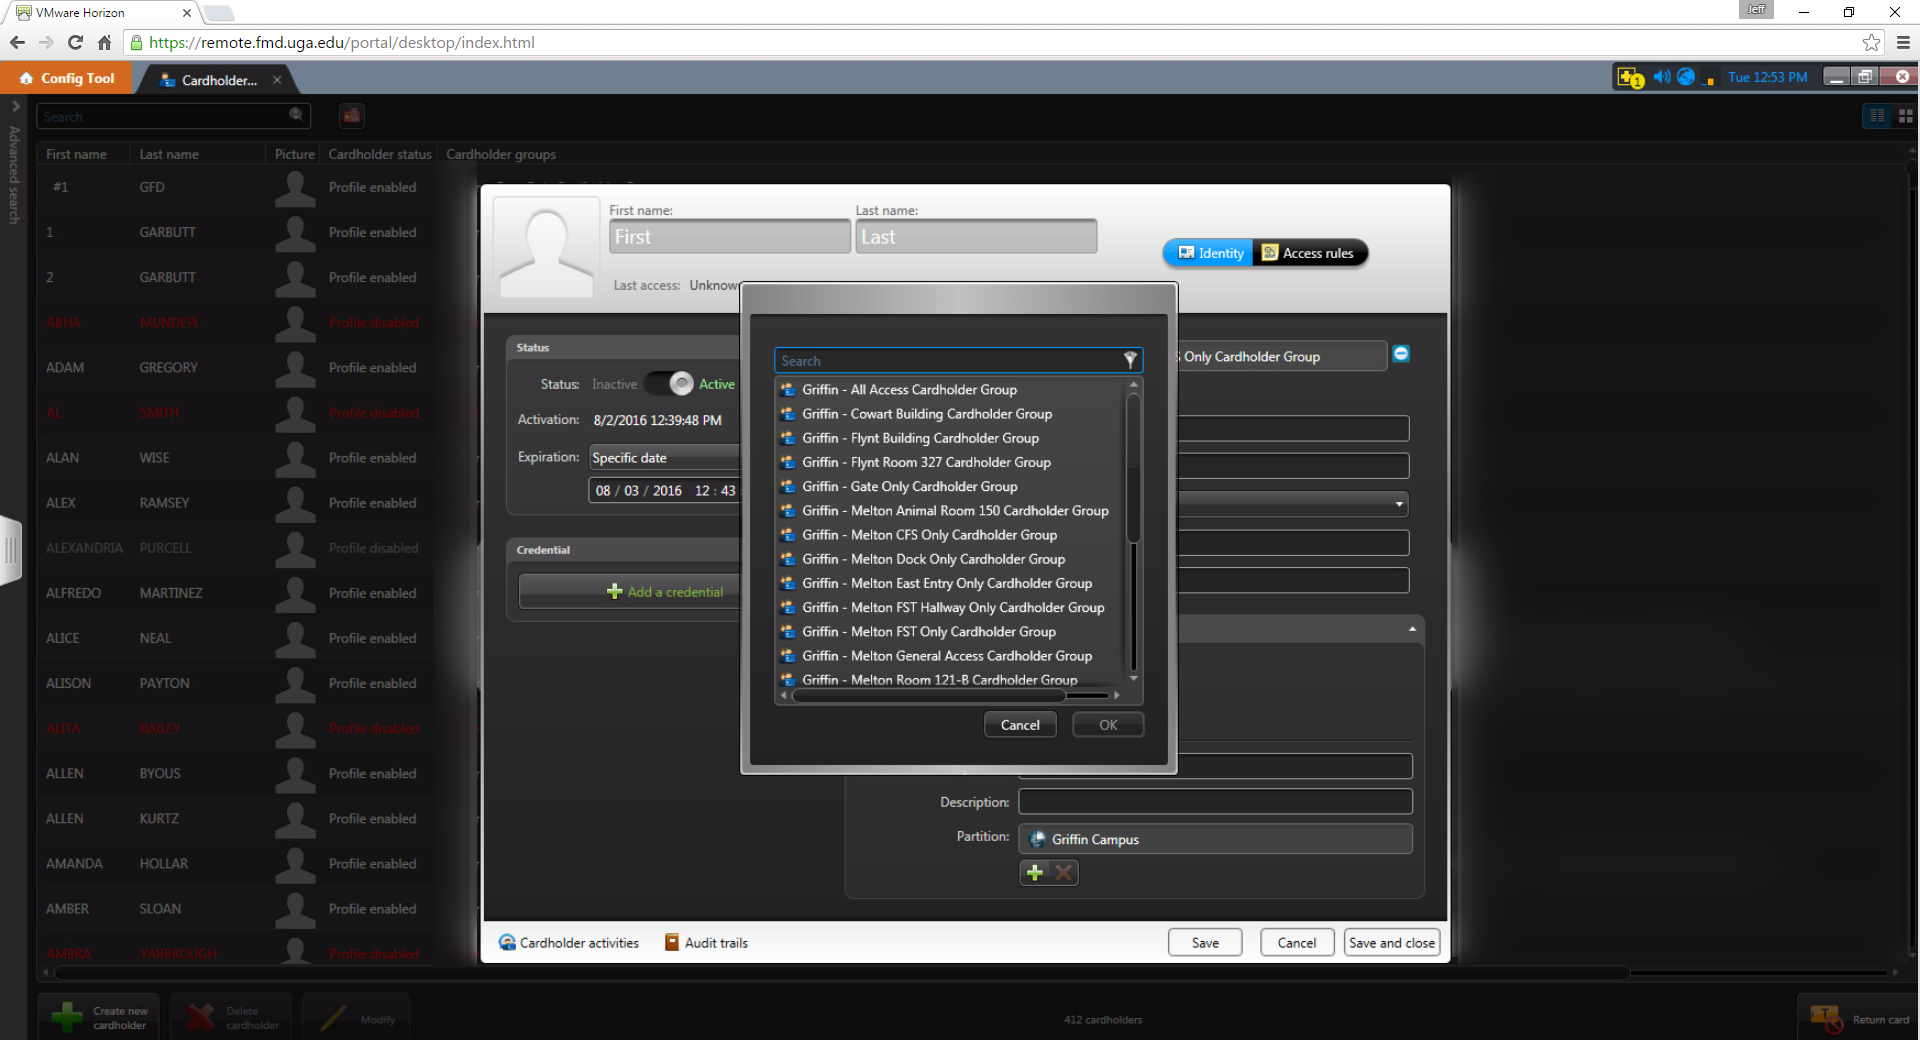
- Set the Cardholder Groups the Cardholder should be a member of. Cardholder Groups are how you add access for a Cardholder to your facility. Each Cardholder Group they are a member of contains pre-defined doors and personnel schedules. If you are unsure of what doors are contained in a Cardholder Group have your facility contact accesscontrol@uga.edu and we can provide that information to an on-file facility contact. Sometimes a default Cardholder Group may be automatically added from a previously added Cardholder. You can remove this by clicking on the dropdown and selecting 'Clear Selection' at the bottom. For the first group to add you can use the dropdown box and after that you'll need to use the plus buttons and select from the pop-up list.

- At this point you should Save the record using the 'Save' button at the bottom of the Cardholder record.
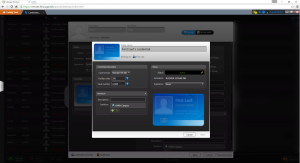
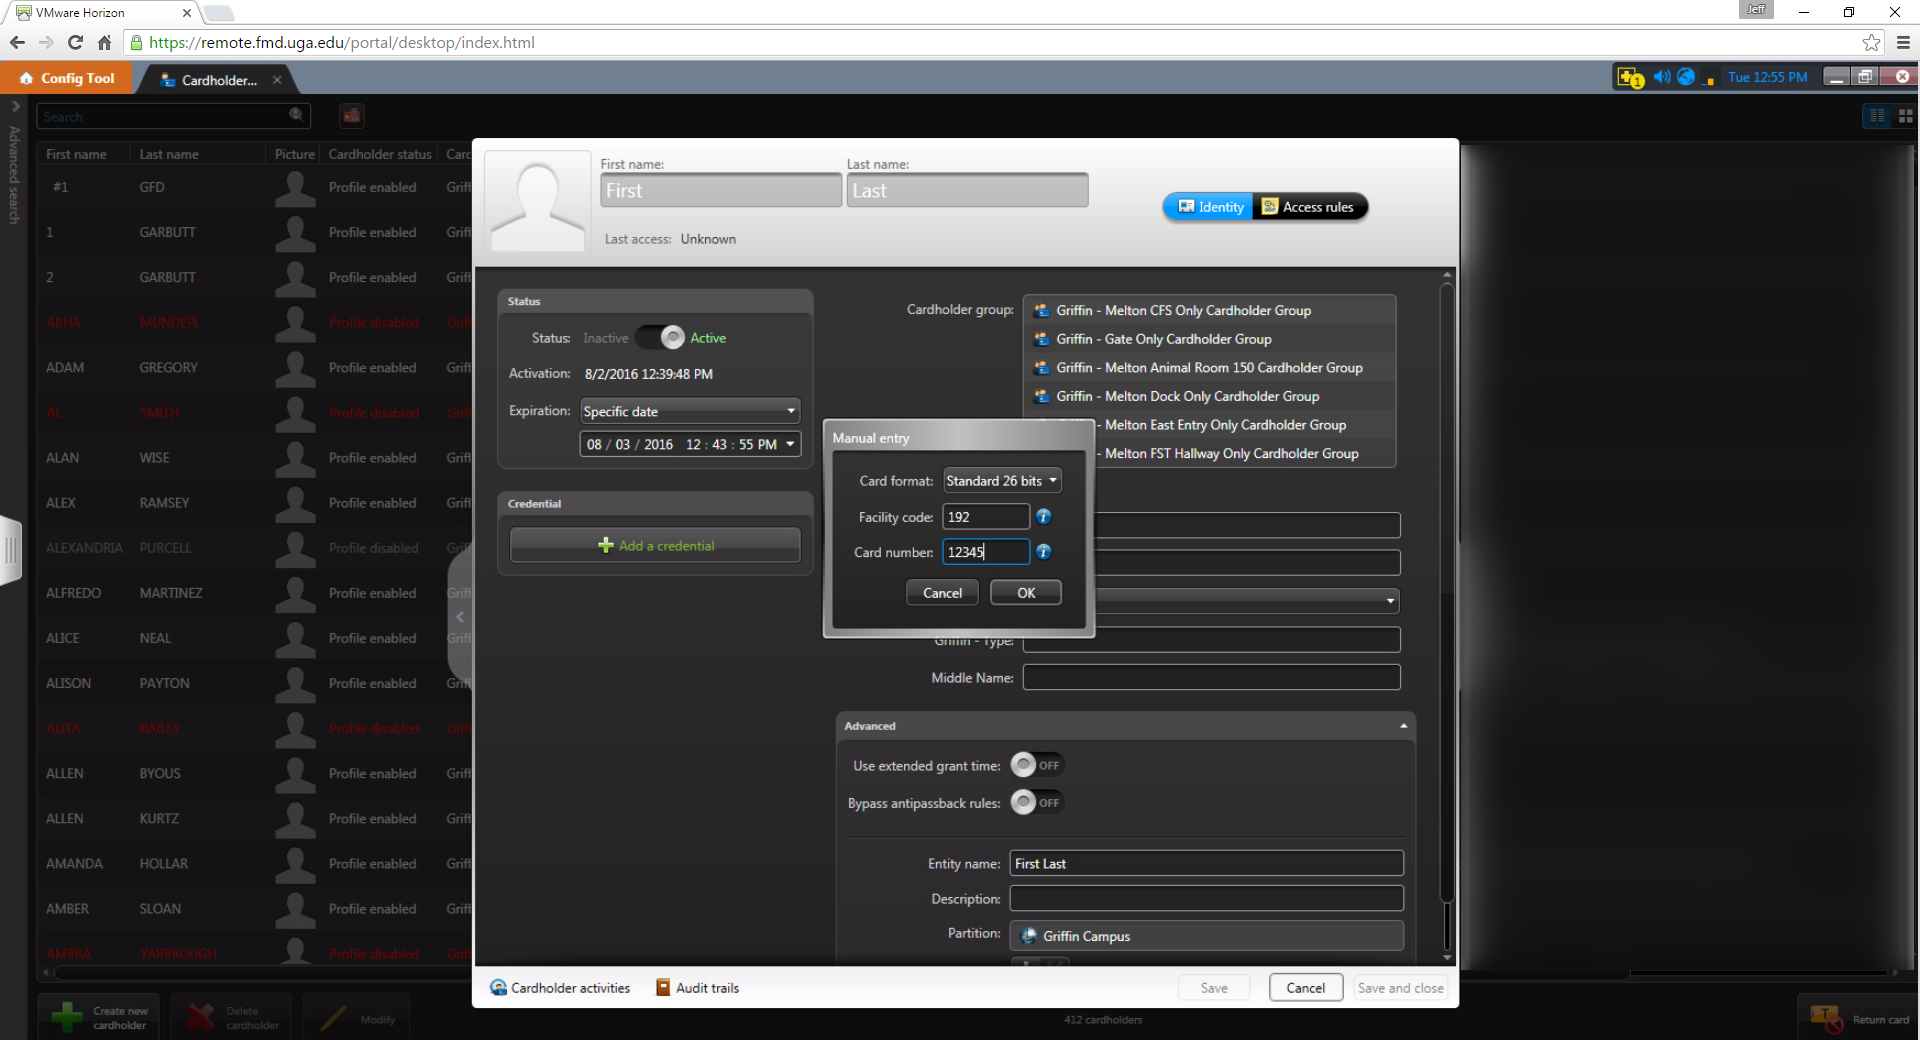
- Next you'll want to attach the Credential (card) to the Cardholder. Click on the 'Add a Credential' button and select your option from the dropdown box. Manual entry will allow you to manually enter credential information while automatic would allow you to swipe the card on a selected card reader for enrollment.
- Next you'll need to enter some Credential information. The 'Card Format' should always be 'Standard 26 bits', The 'Facility code' should be '192', and the 'Card number' should be the number printed on the card. This card number has to be between 1 and 65535. You cannot create a credential that exists and is attached to another Cardholder. You must first find the Cardholder or Credential and then remove it from the Cardholder'.

- Once you've created the Credential a new screen will pop-up if this is a new credential or the credential will be added to the Cardholder immediately if it already exists. In the case of a new Credential the name should always be changed to match the card number.
- You should also make sure the Partition under the Advanced section of the Credential is set to 'Griffin Campus'.
- If creating a new Credential select 'Save' on the Credential. You'll be taken back to the Cardholder record which should now have the Credential added. If you need to add multiple Credentials for this same Cardholder repeat steps 11-18 until complete.
- Once you're done select the 'Save' or 'Save and close' button on the bottom right of the Cardholder.


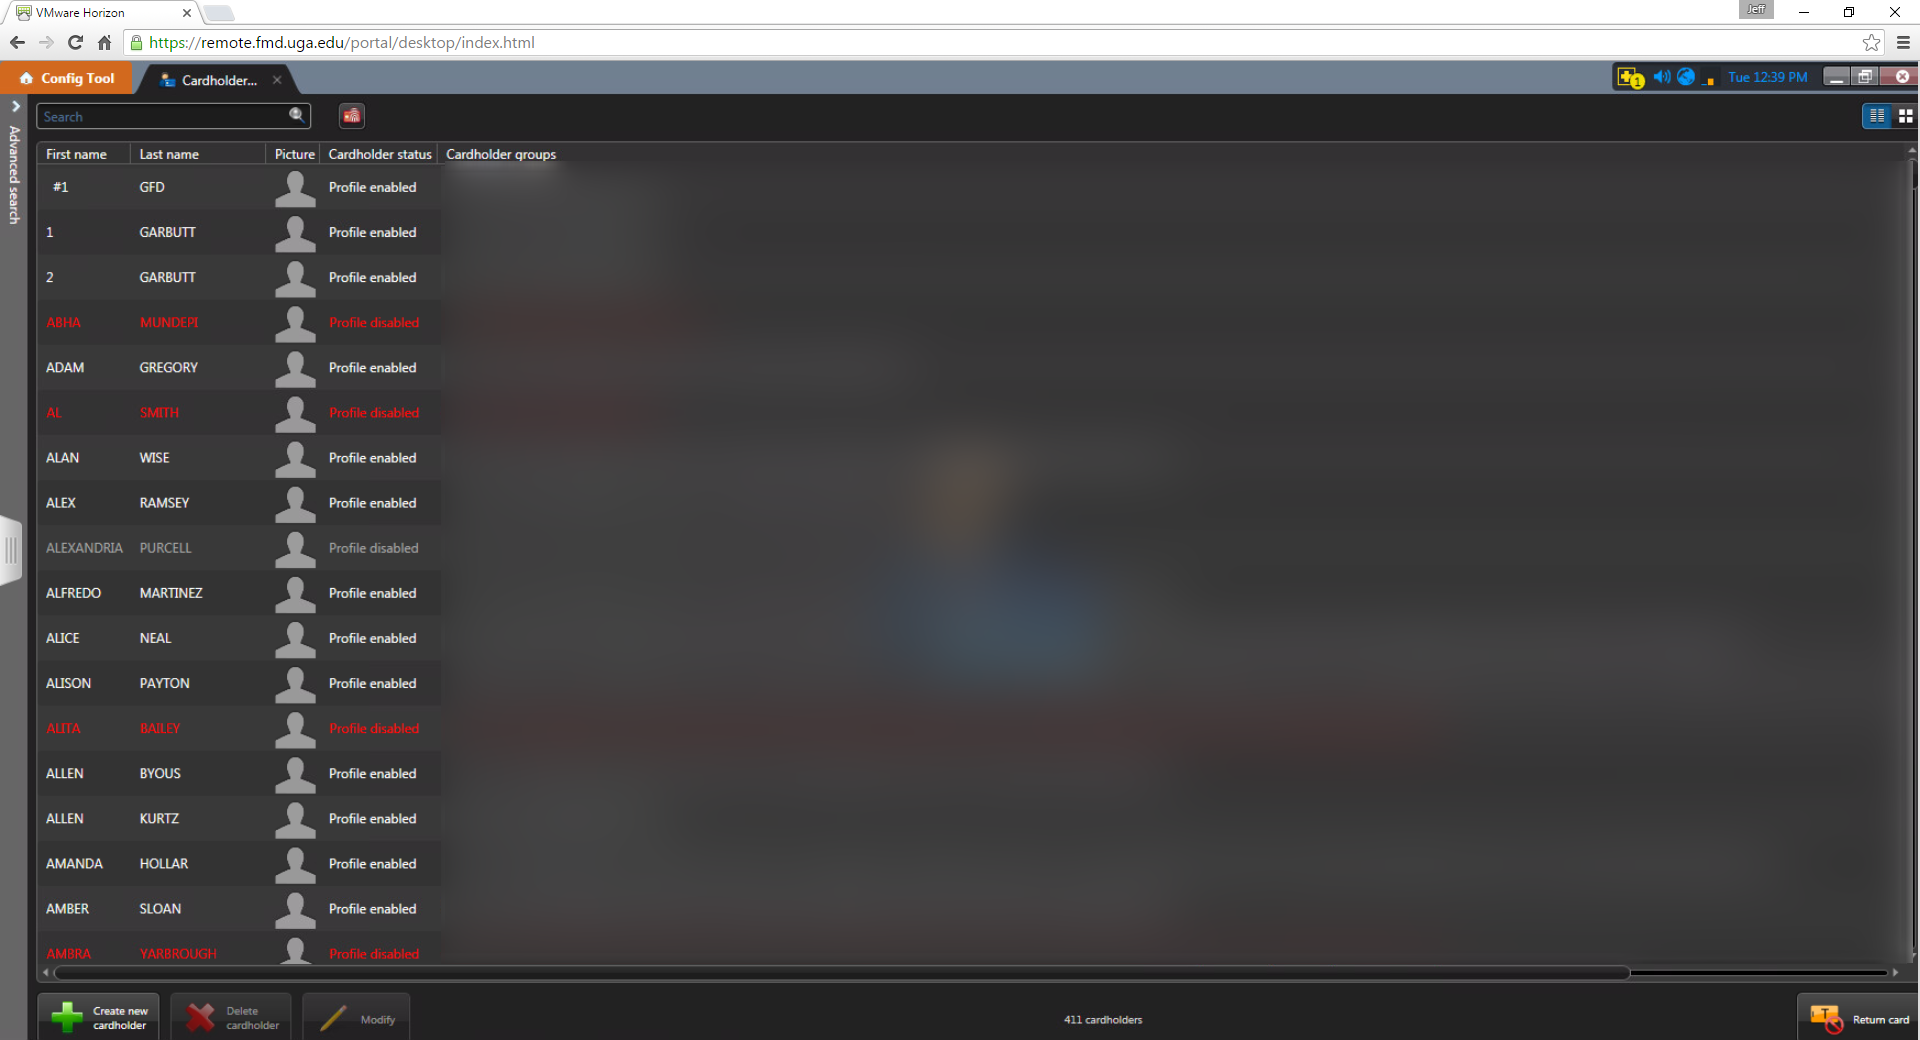
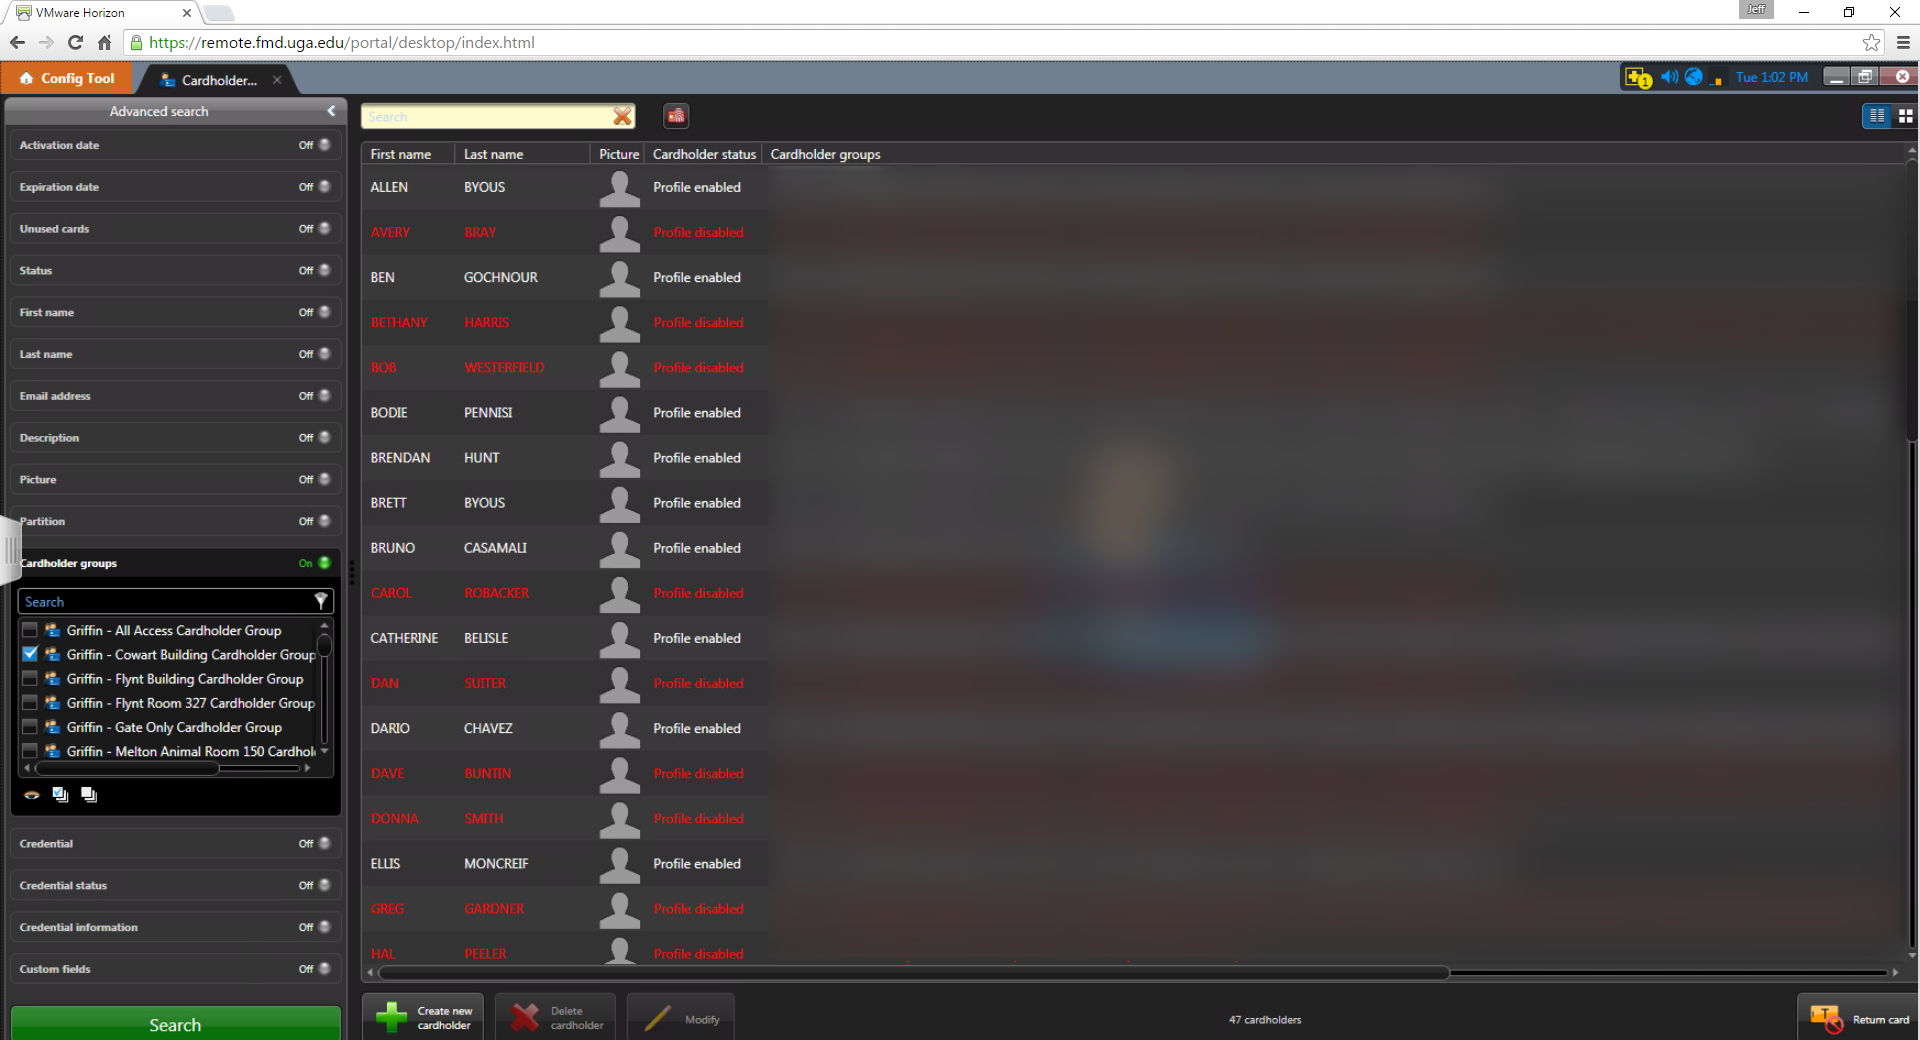
The first thing you can see in this task is a full list of Cardholders, their names, statuses, and the Cardholder Groups they belong to. The status can be determined by the color of the record. If the record is white it is active, grey is deactivation, and red is expired.
There are a couple of ways to search for individual Cardholders or Cardholder Groups. You can use the 'Quick Search' box found at the top of the task or the 'Advanced Search' options by clicking on the Advanced Search bar on the left. The quick search will only search first and last names while the advanced search gives you many more options. Cardholders that are currently inactive in the system are grayed out.

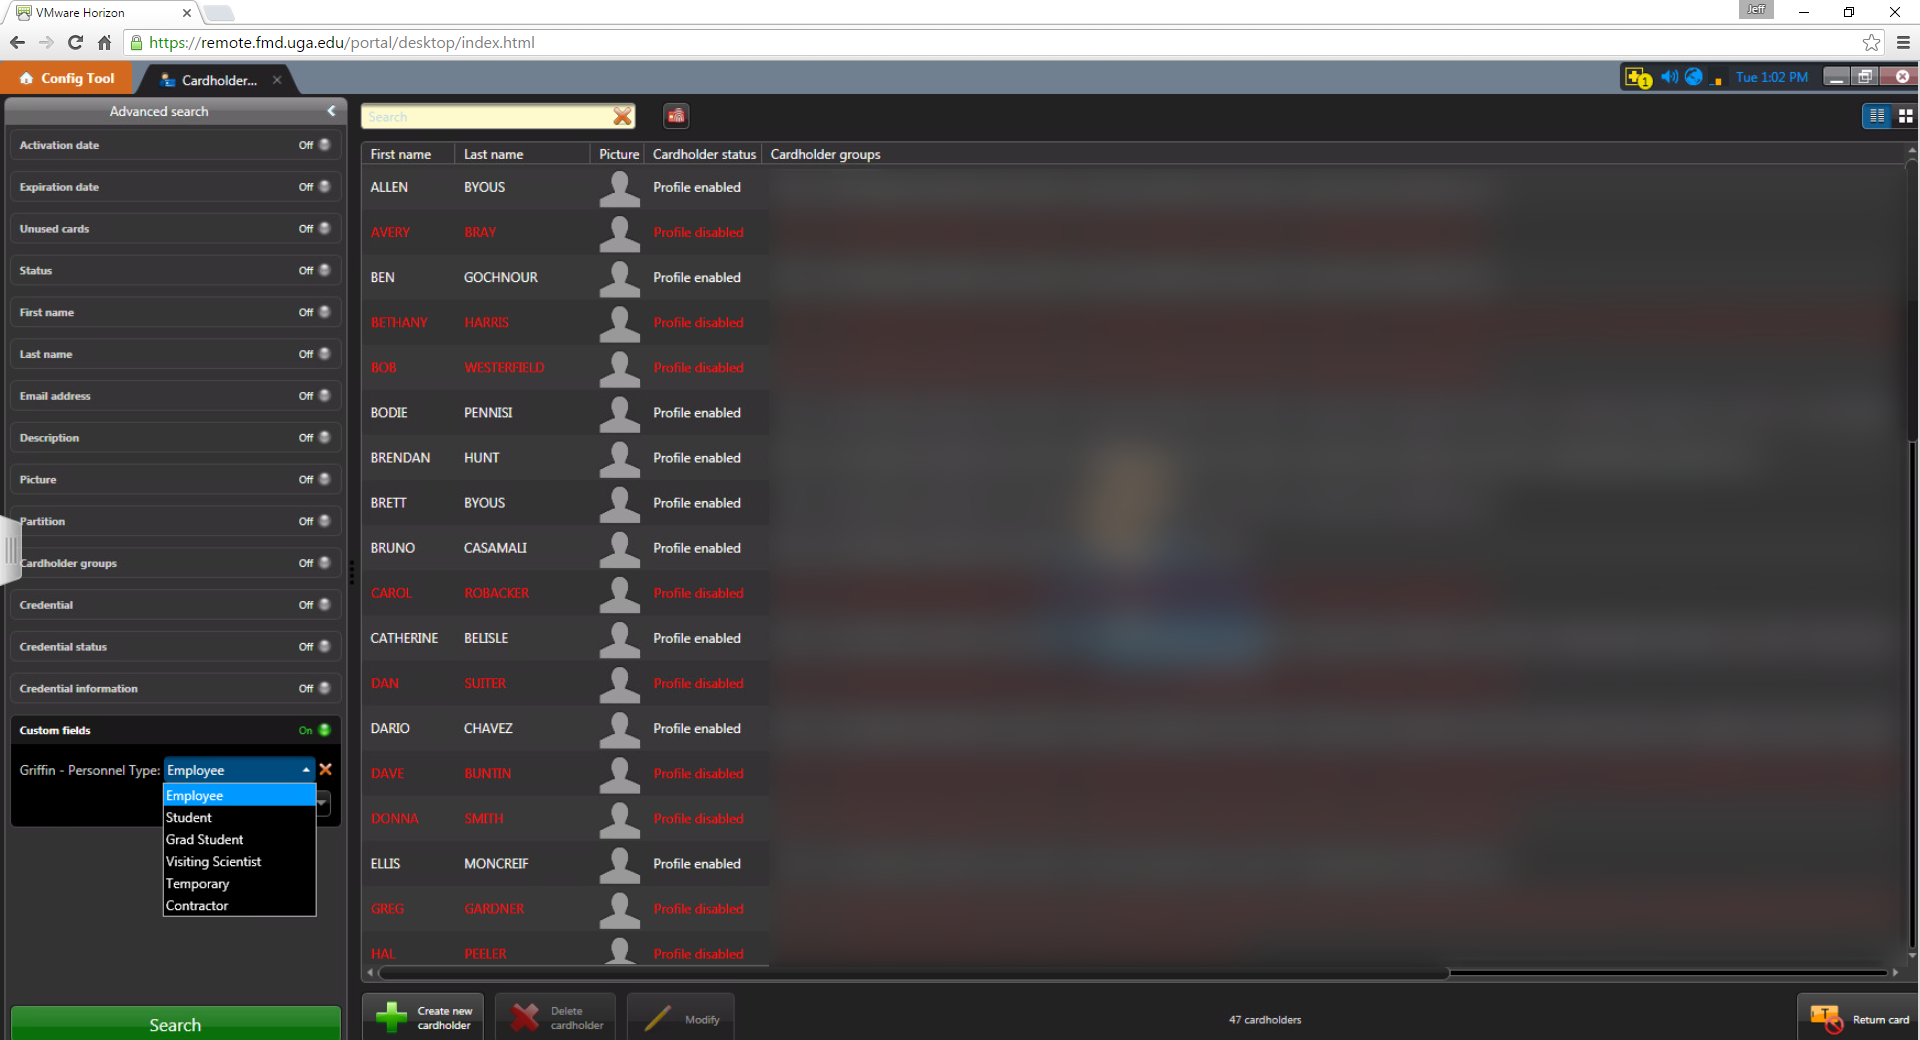
For the advanced search, some common search options would be 'Cardholder Groups' or the 'Griffin - Personnel Type' under the Custom Fields filter. Cardholder Groups are groups that determine who has access to a set of doors in a single or multiple facilities. You can use Cardholder Groups to, for example, search for everyone who has access to one of your particular facilities. Personnel Types are a field on Cardholder records that state the Cardholder's affiliation such as Employee, Student, Contractor, etc.
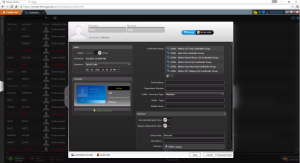
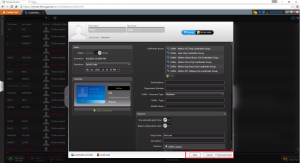
Once you've found the cardholder you are looking for you can double click on them to open the Cardholder options window. You'll see a number of things in this window.
- If the person has a picture on file it will display here (and also in the search results).
- If the cardholder's record is active or has been deactivated along with an activation and deactivation date if applicable.
- Any credentials that are associated with the cardholder. Each credential's name matches the card number of the card.
- Run a Cardholder Activity report. This will be discussed more in the Security Desk -> Reports section of this page.
- The Cardholder Groups that the Cardholder is a member of. Multiple groups can be added by using the plus signs next to and under the Cardholder Group field. Cardholder Groups are how you add access for a Cardholder to your facility. Each Cardholder Group they are a member of contains pre-defined doors and personnel schedules. If you are unsure of what doors are contained in a Cardholder Group have your facility contact accesscontrol@uga.edu and we can provide that information to an on-file facility contact.
- A number of informational fields including but not limited to e-mail, department number, middle name, and personnel type. If you're department would like additional fields to keep track of some information send an e-mail to accesscontrol@uga.edu and we can setup fields that only you or your department can see.
- A number of advanced settings and fields. One field of use here may be the 'Description' field. This field generally is a combination of first and last name. You'll also see the partition the Cardholder is a member of. This partition should always be 'Griffin Campus'.

Once all needed changes have been made or you need to look at another Cardholder record you can use the buttons at the bottom right of the record to save or close the record.

Schedules
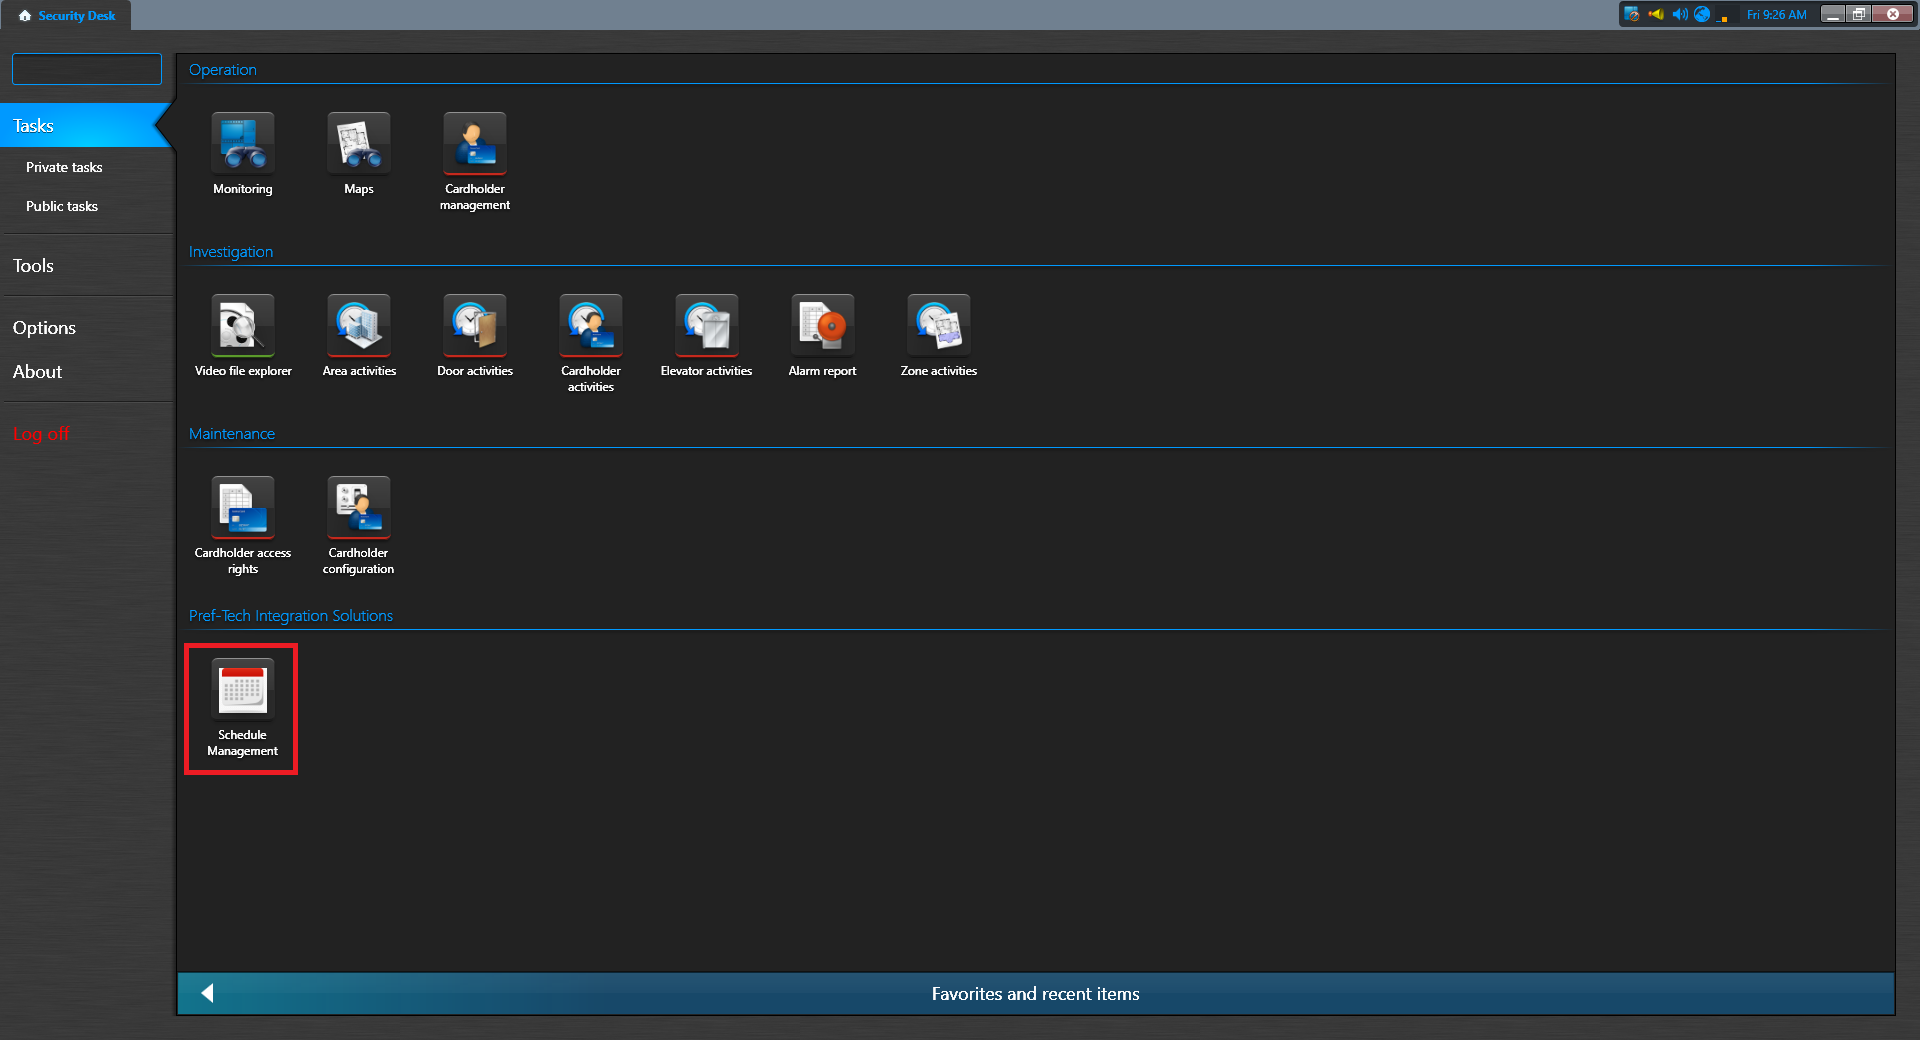
To find your schedules you'll need to launch the 'Schedule Management' task in Security Desk.
Once in the Schedule Management task you will see all of the schedules for your facilities. Normally, you'll see up to three types of schedules. Schedule types make include Unlock schedules, Alarm schedules, and Cardholder schedules among others. You may enter text in the "Search" field to narrow your list of schedules.
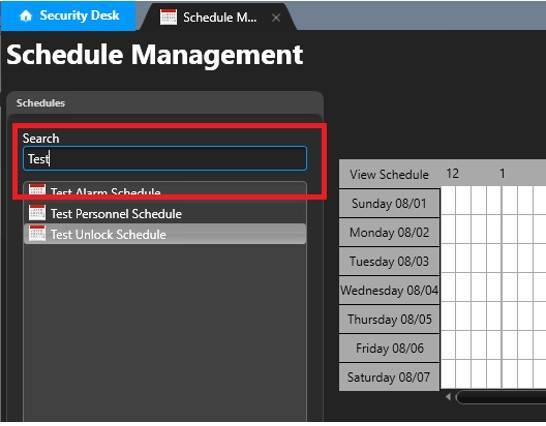
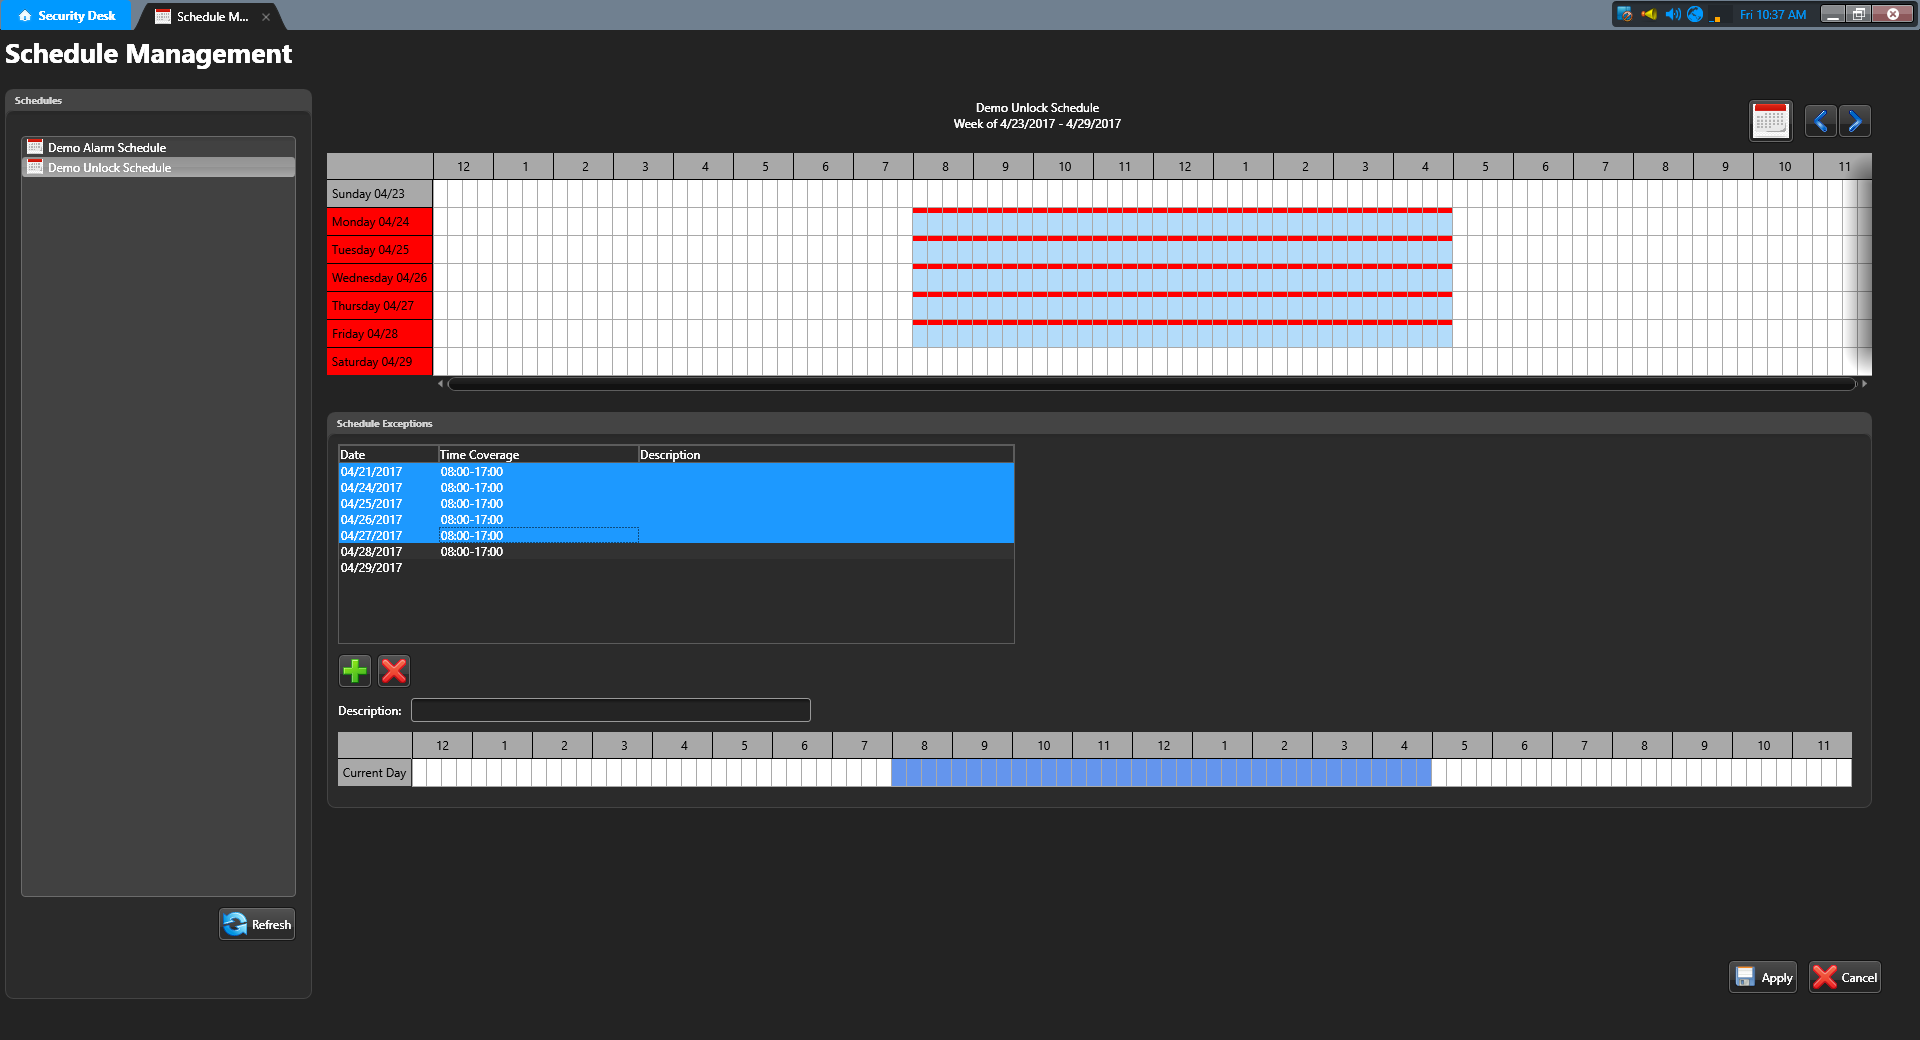
Once you select the schedule that you want to modify from the list on the left the properties of that schedule will display on the right.
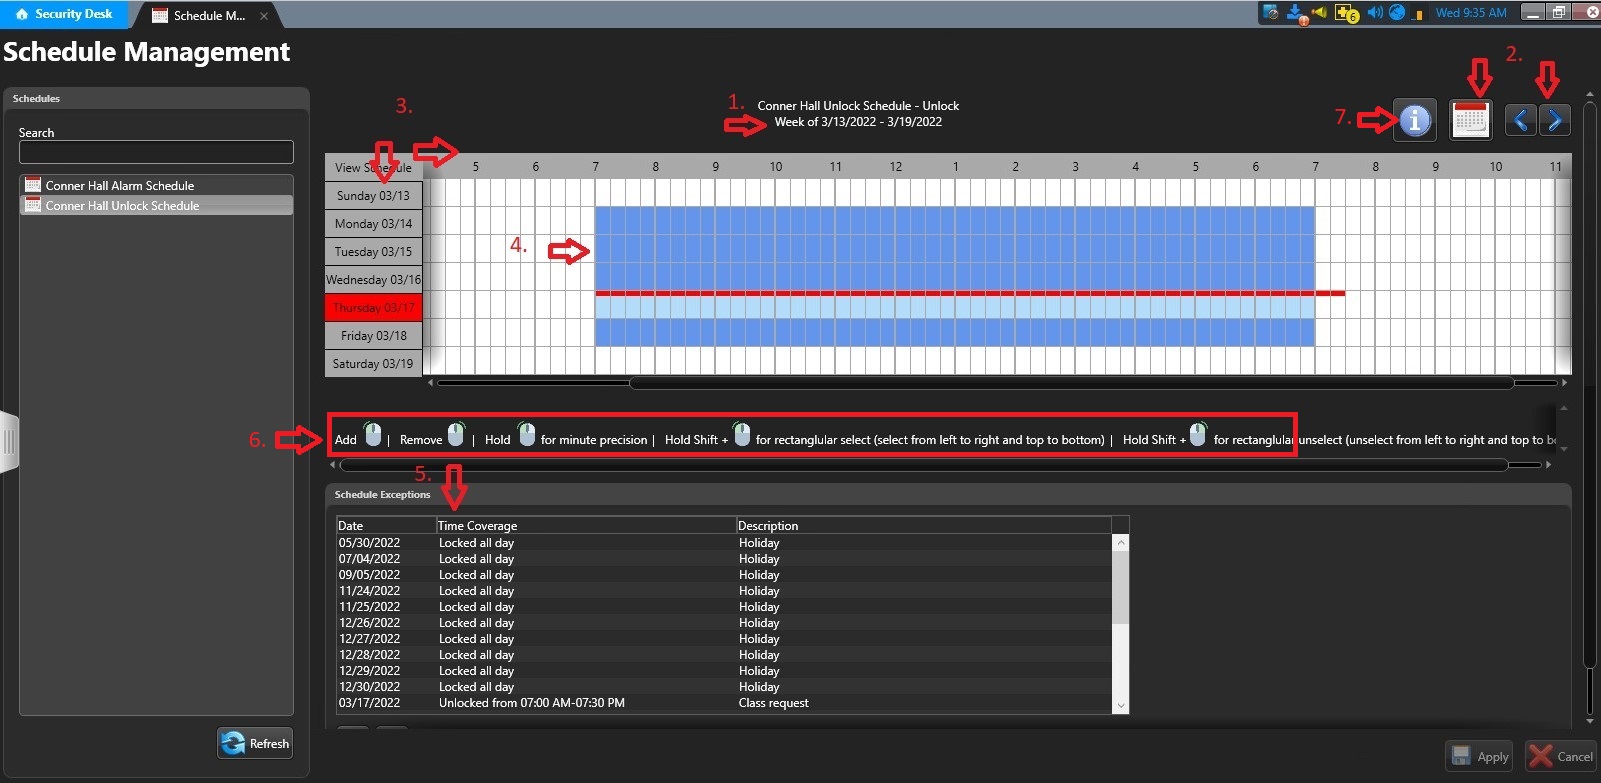
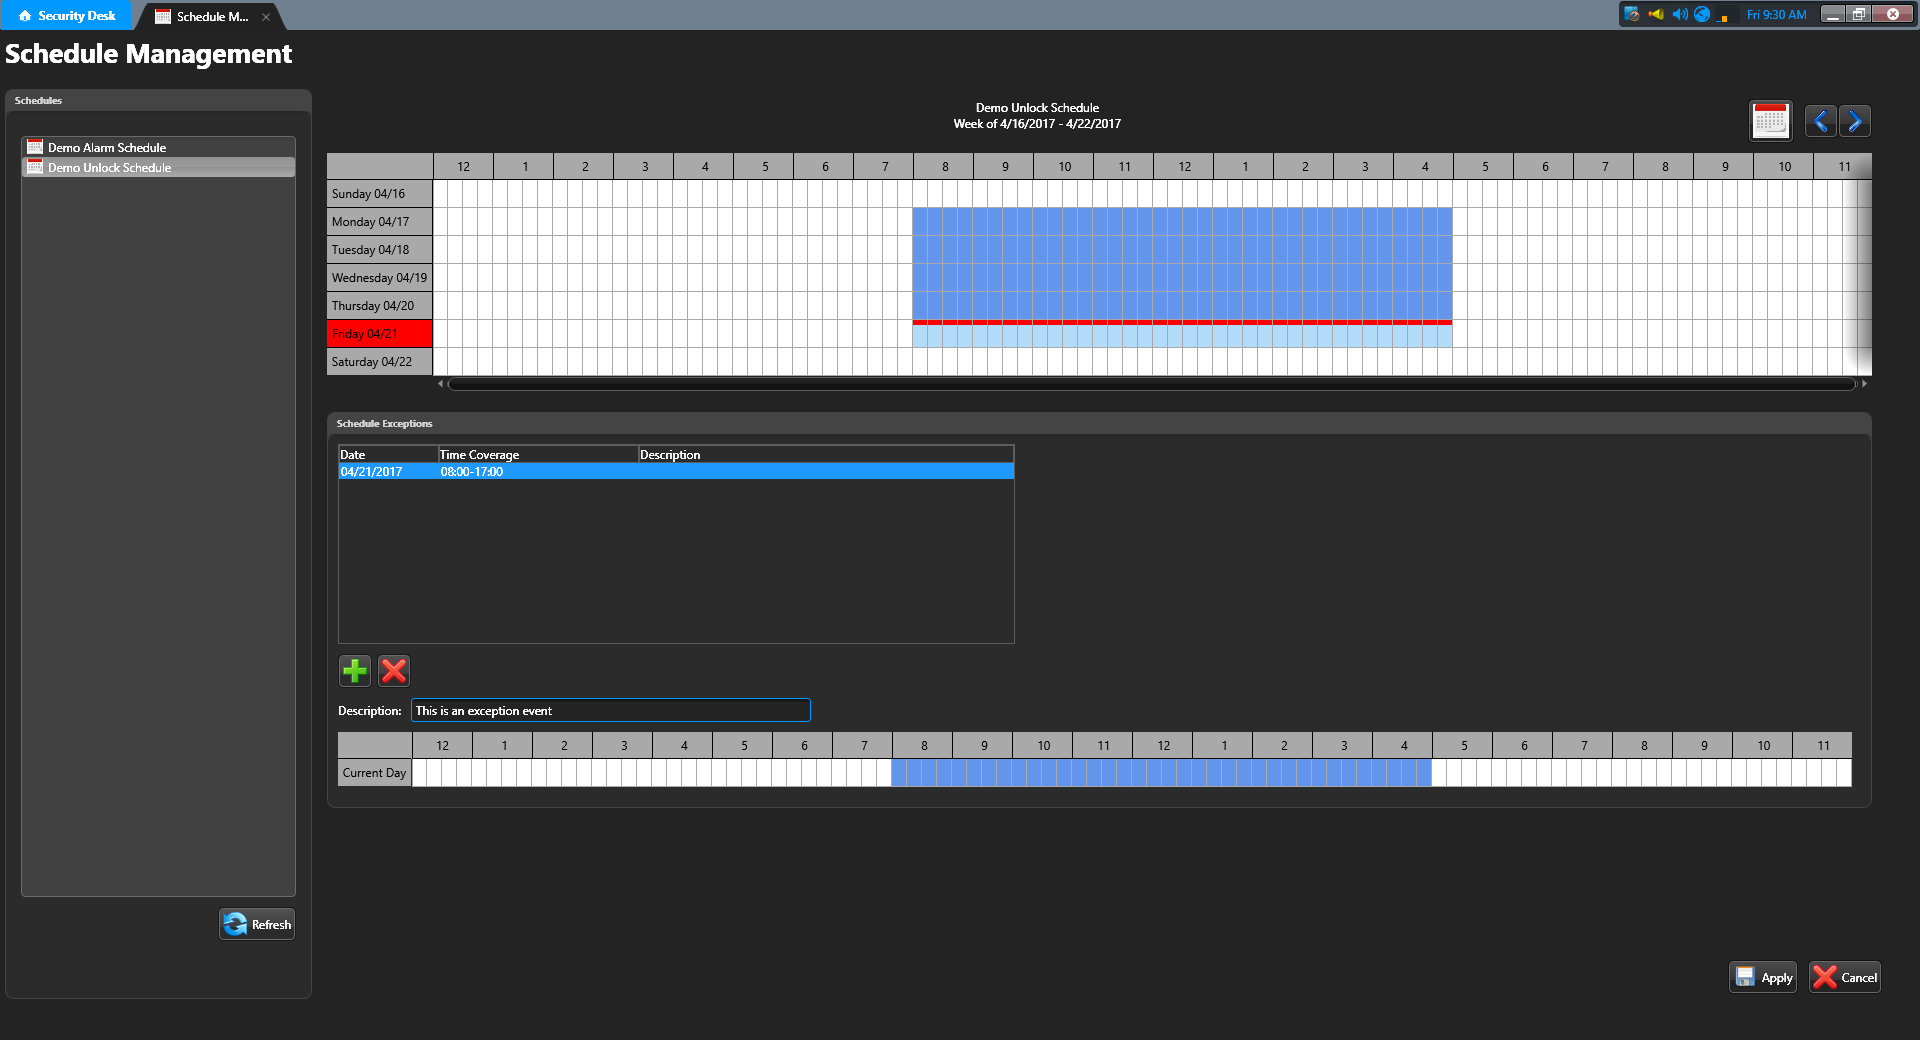
In the above example you'll note a few things:
- The name of the schedule is located at the top along with a listing of the current week you are looking at.
- There are navigation options on the top right that will allow you to move to specific weeks (the calendar icon) or to move between consecutive weeks (the arrows).
- On the schedule graphic you have a listing of the specific days on the left and hours in those days along the top.
- The blue coloration on the schedule represents a weekly schedule. In this example of an unlock schedule, the doors will be unlocked from 8AM-5PM Monday-Friday each week.
- Below the schedule graphic is a list of 'Schedule Exceptions'. These are deviations from a normal weekly schedule.
- Legend indicating key/mouse combinations to modify schedules.
- Pop-up legend describing what the different box colors on the schedule grid indicate.
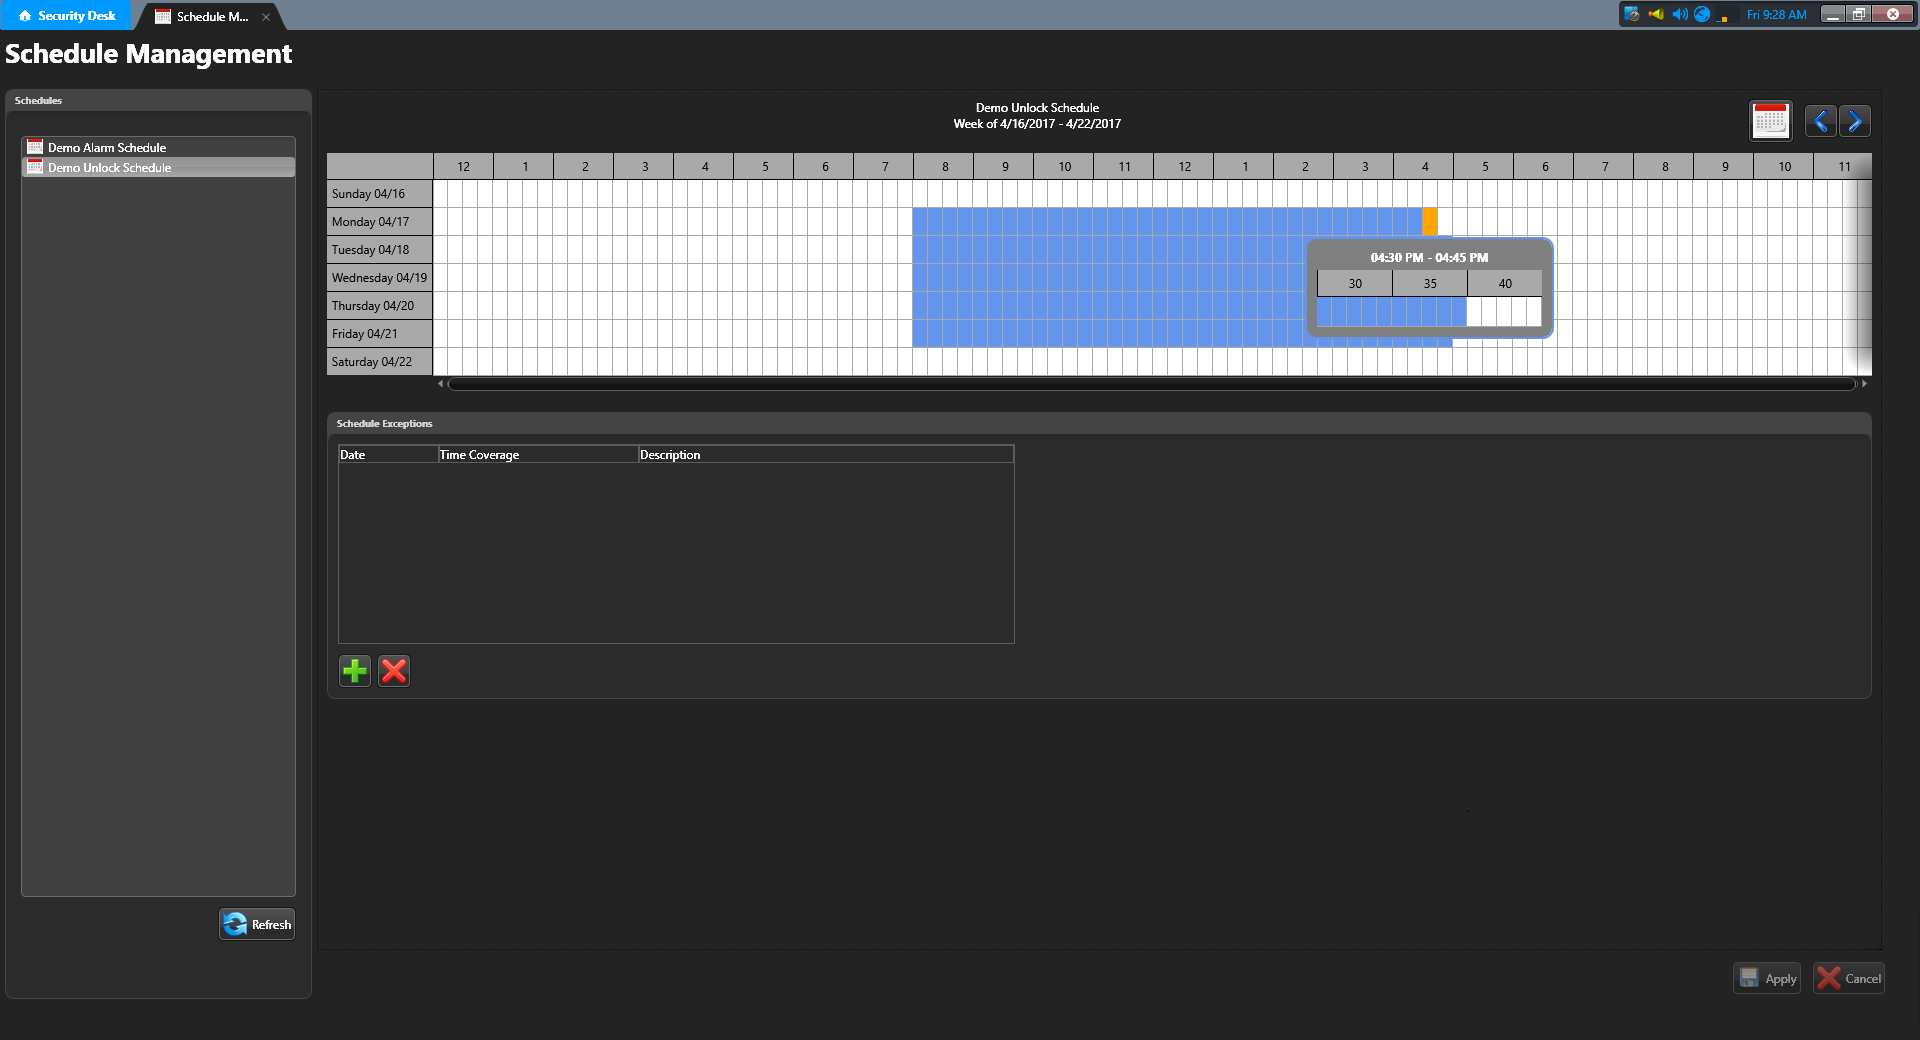
To modify the weekly schedule use your mouse. You can left click on white spaces to add times and right click on blue spaces to remove times. You can also use a long left click to bring up a menu with a shorter time interval. All time intervals on the default view of the schedule are 15 minutes but by holding down the left mouse button you can bring up a window with time intervals of 1 minute. These shorter intervals will show up as an orange color on the schedule.
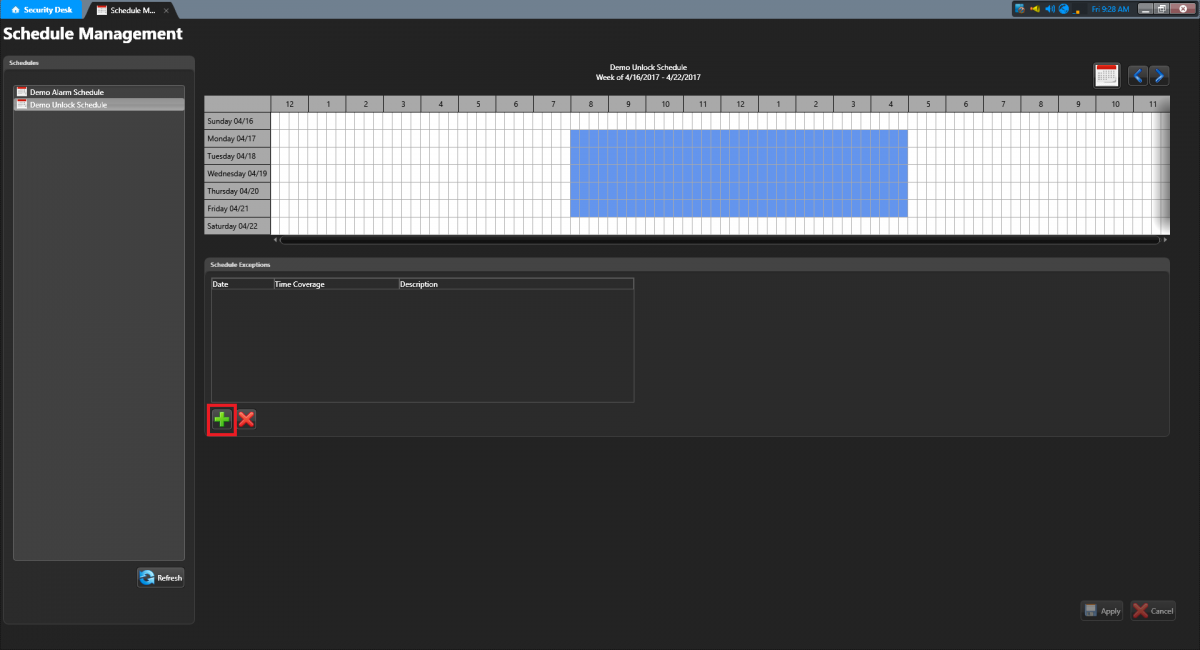
To create a new exception to the weekly schedule click on the green plus sign in the 'Schedule Exceptions' section of the schedule.
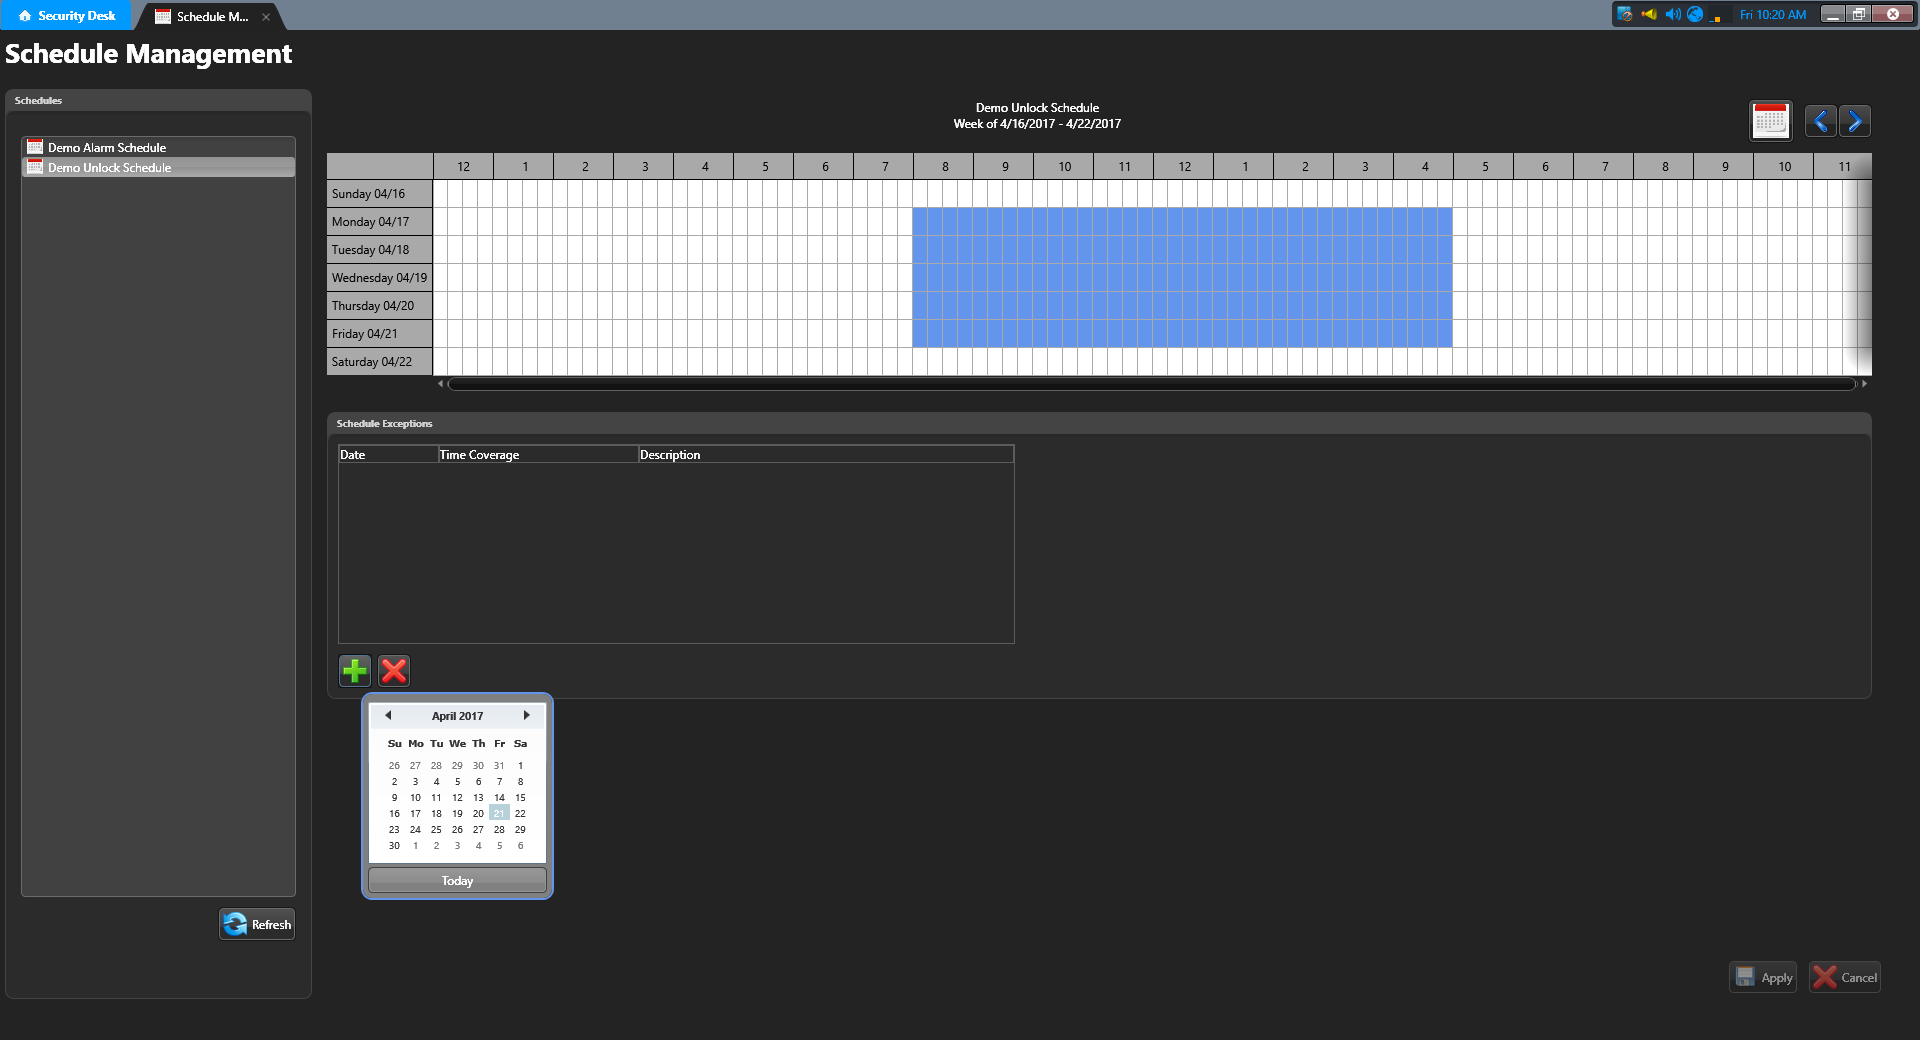
A window will pop up allowing you to select the day for the exception.
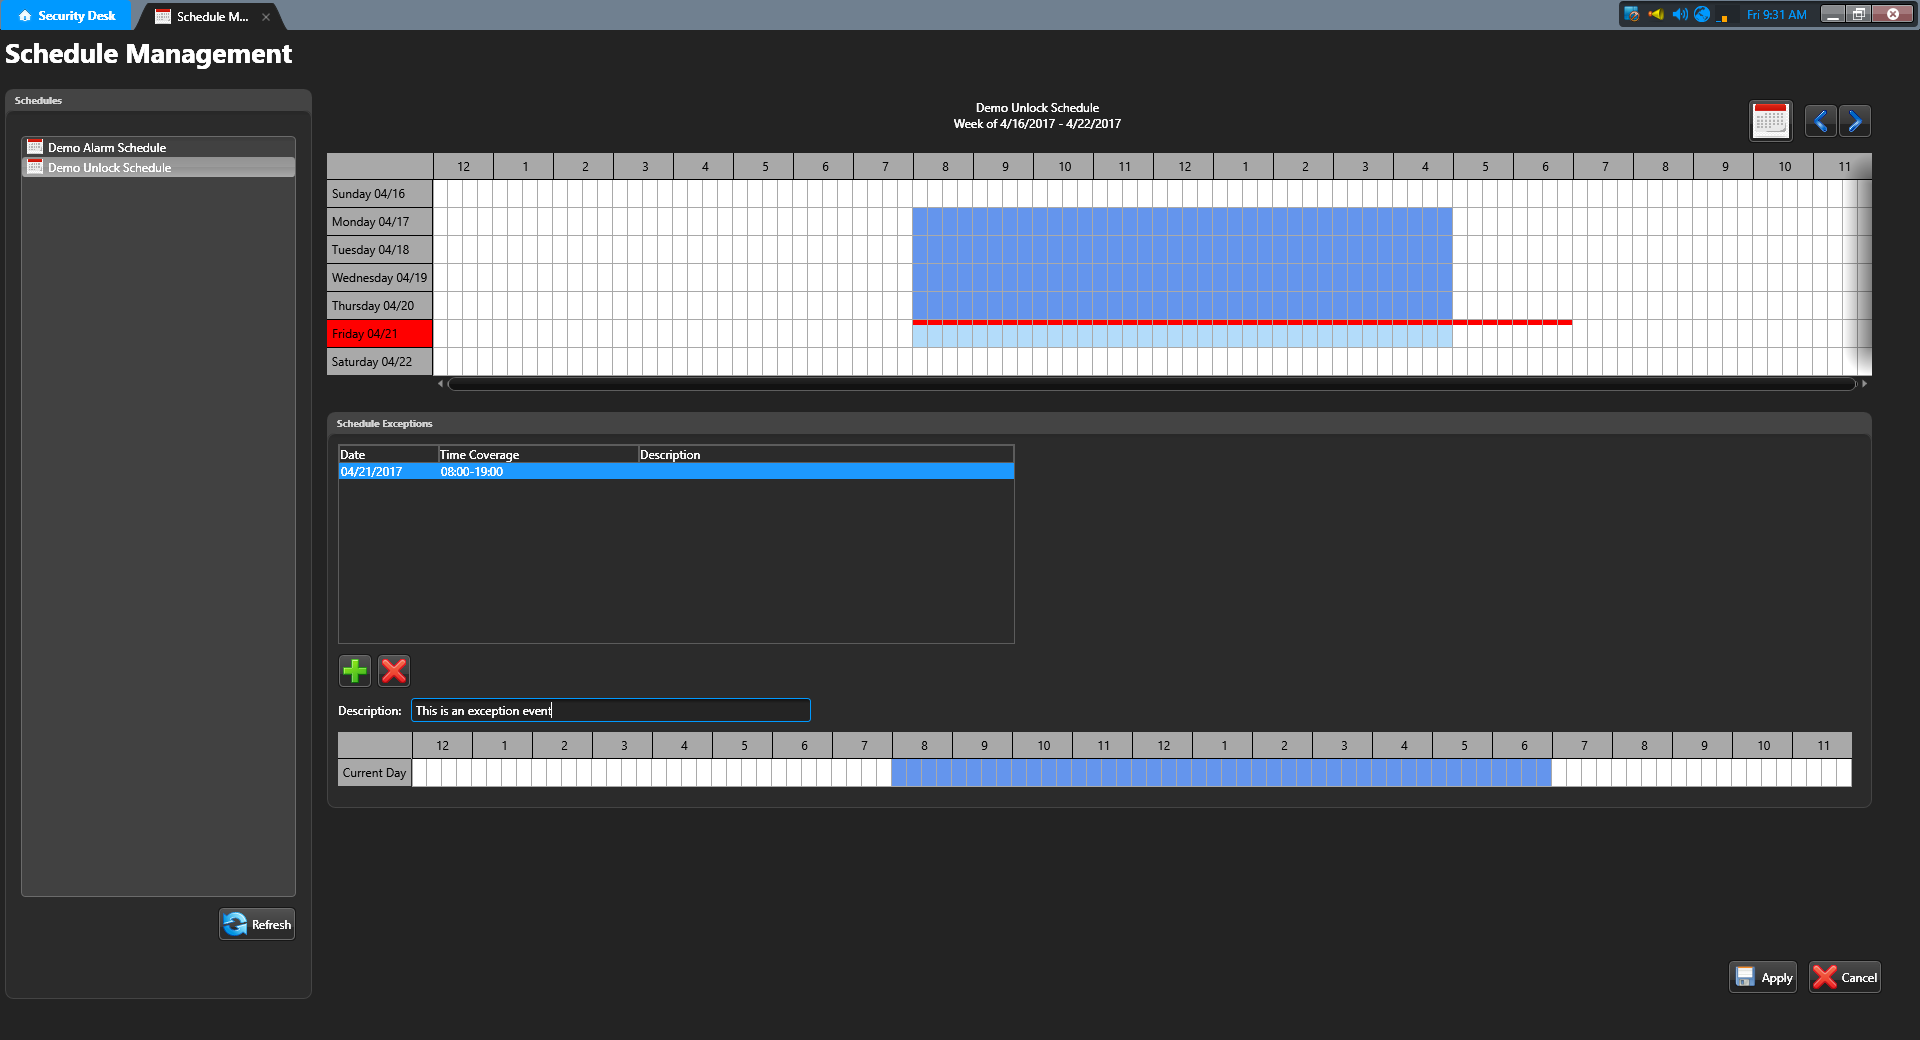
Once the day is selected a new exception will be created and new options will appear to customize the exception.
You have the ability to enter a description for the exception along with selecting the times for the exception. The scheduling interface for exceptions work the same as for the weekly schedule. You can left click on white spaces to add times and right click on blue spaces to remove times. You can also use a long left click to bring up a menu with a shorter time interval. All time intervals on the default view of the schedule are 15 minutes but by holding down the left mouse button you can bring up a window with time intervals of 1 minute. These shorter intervals will show up as an orange color on the schedule.
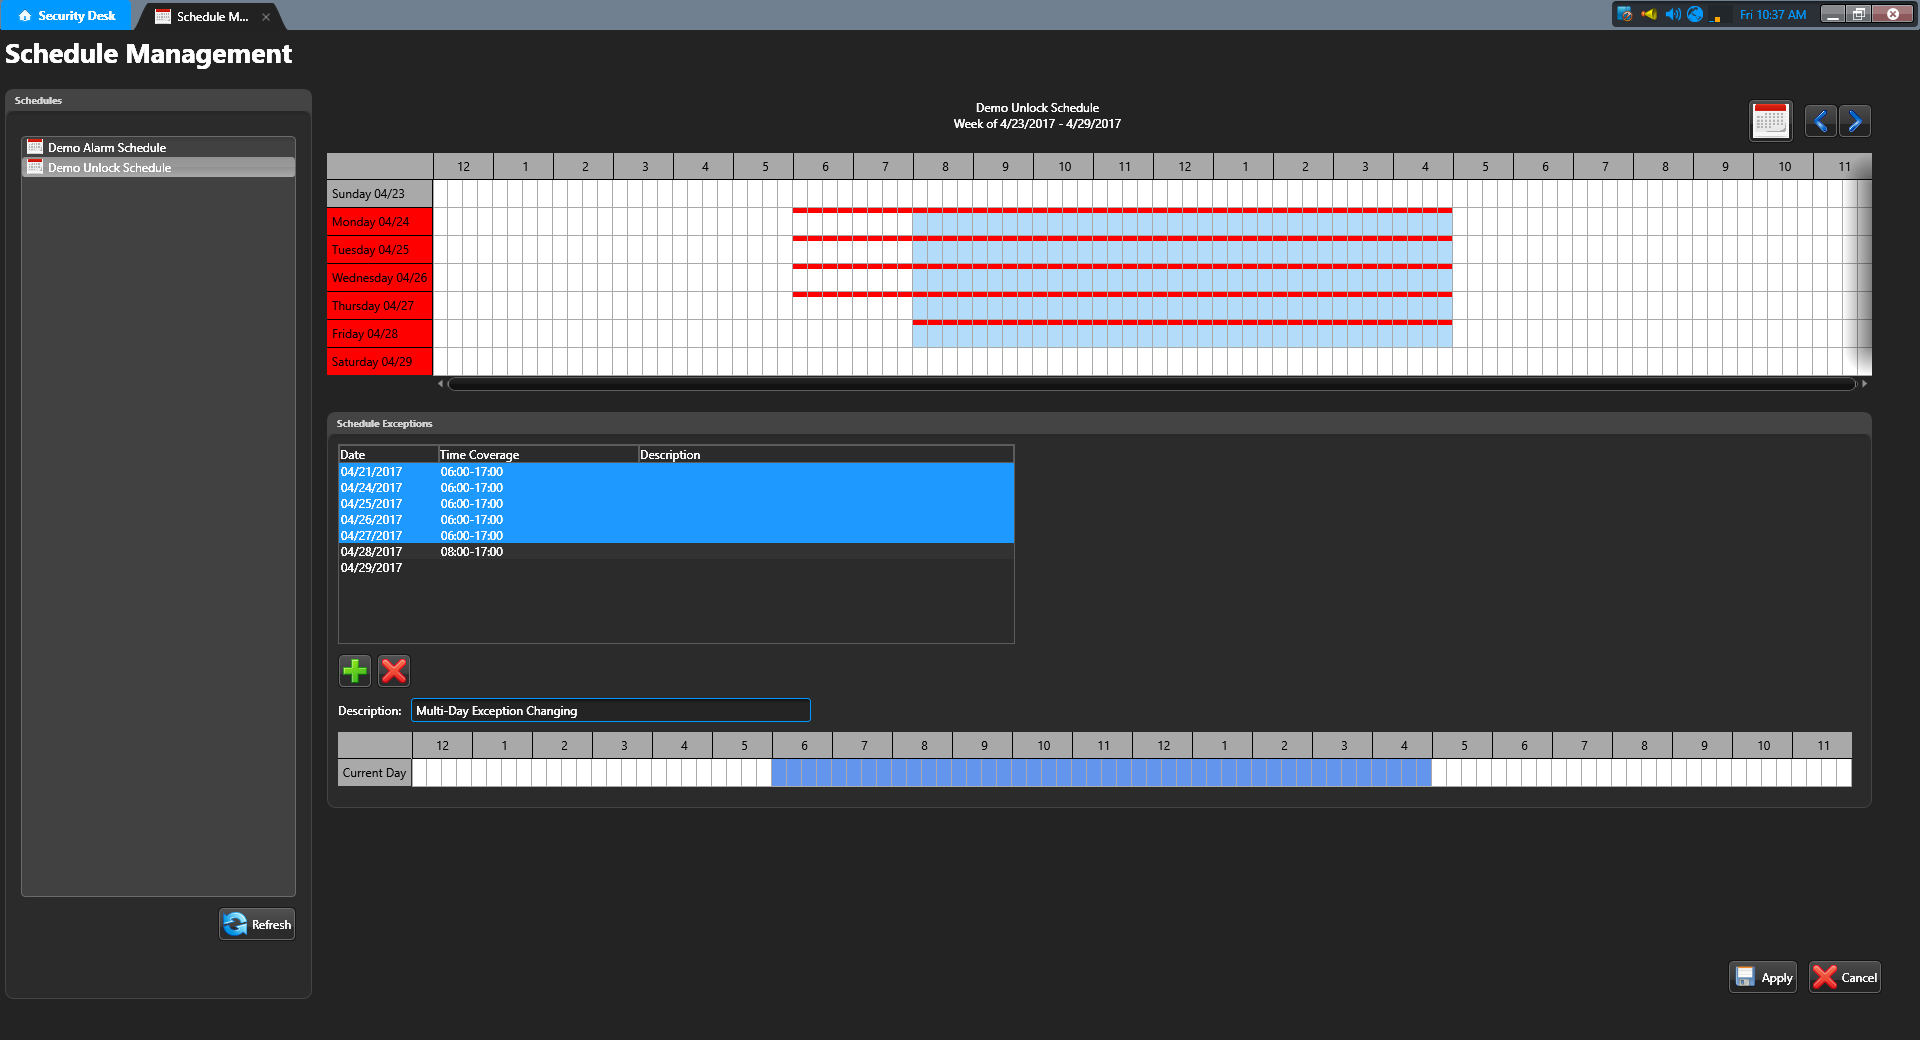
By default the exception will be created to match the weekly schedule for the day selected. If you look at the weekly schedule above the exceptions you will now see changes that reflect the exception. Any day that has an exception on it will have its name highlighted in red. Since an exception overwrites whatever weekly schedule is on the day the weekly schedule for that day shows as a light blue. This is to reflect that there is still a weekly schedule for that day of the week but it does not apply to this specific day. There is also a red line on the weekly schedule shown at the top of the row of the day with the exception. This red line shows the active times of the exception. In this case, since the exception was just created and since new exceptions default to the same schedule as the weekly schedule red is shown from 8AM-5PM in this example. Changes made to the exception will then be reflected on the weekly schedule. In the following image the exception was extended from 8AM-5PM to 8AM-7PM.
Once you have made any needed changes to your weekly schedule or any exceptions there is an 'Apply' button in the bottom right of the screen. Hit this 'Apply' button to save your changes or the 'Cancel' button to revert any changes made. Once you hit 'Apply' a notification will appear on the screen once the changes have been saved. Once the changes have been saved or no changes have been made to the schedule the 'Apply' and 'Cancel' buttons will remain grayed out until a change is made.

Once you hit 'Apply' a notification will appear on the screen once the changes have been saved.
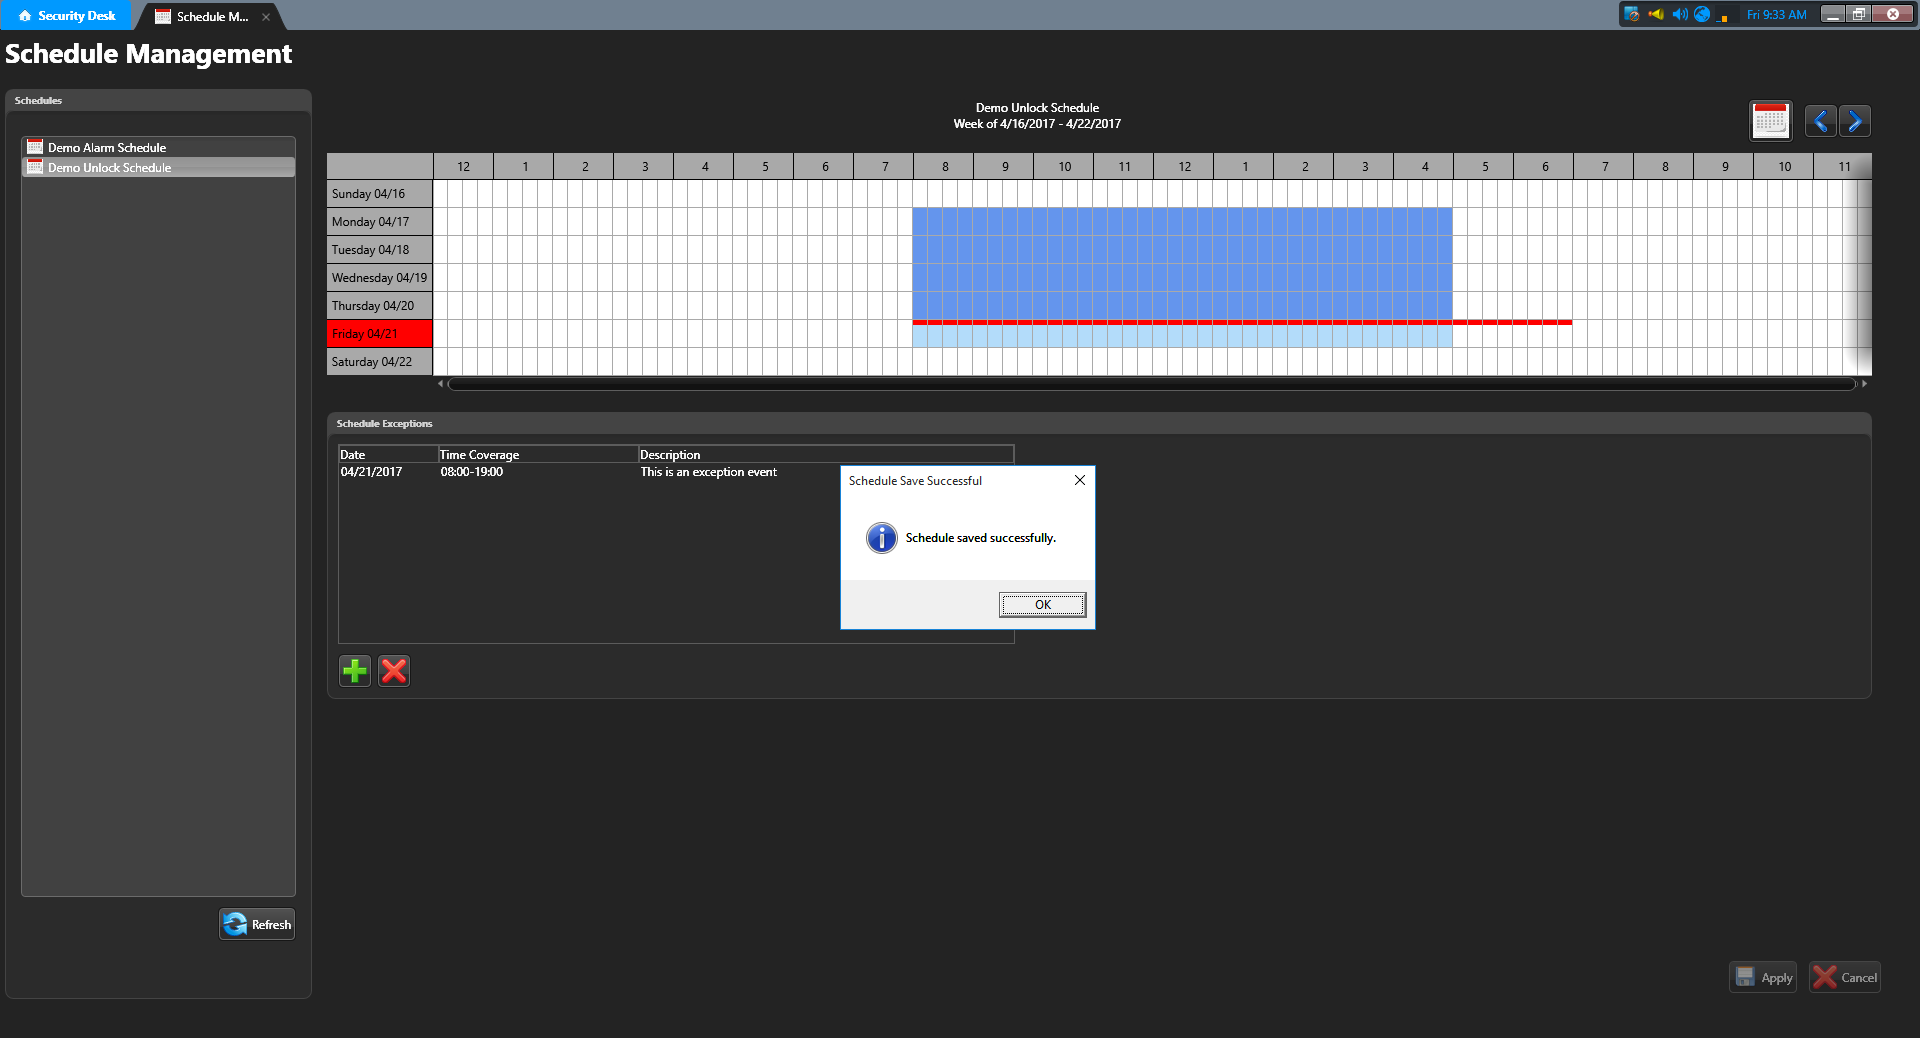
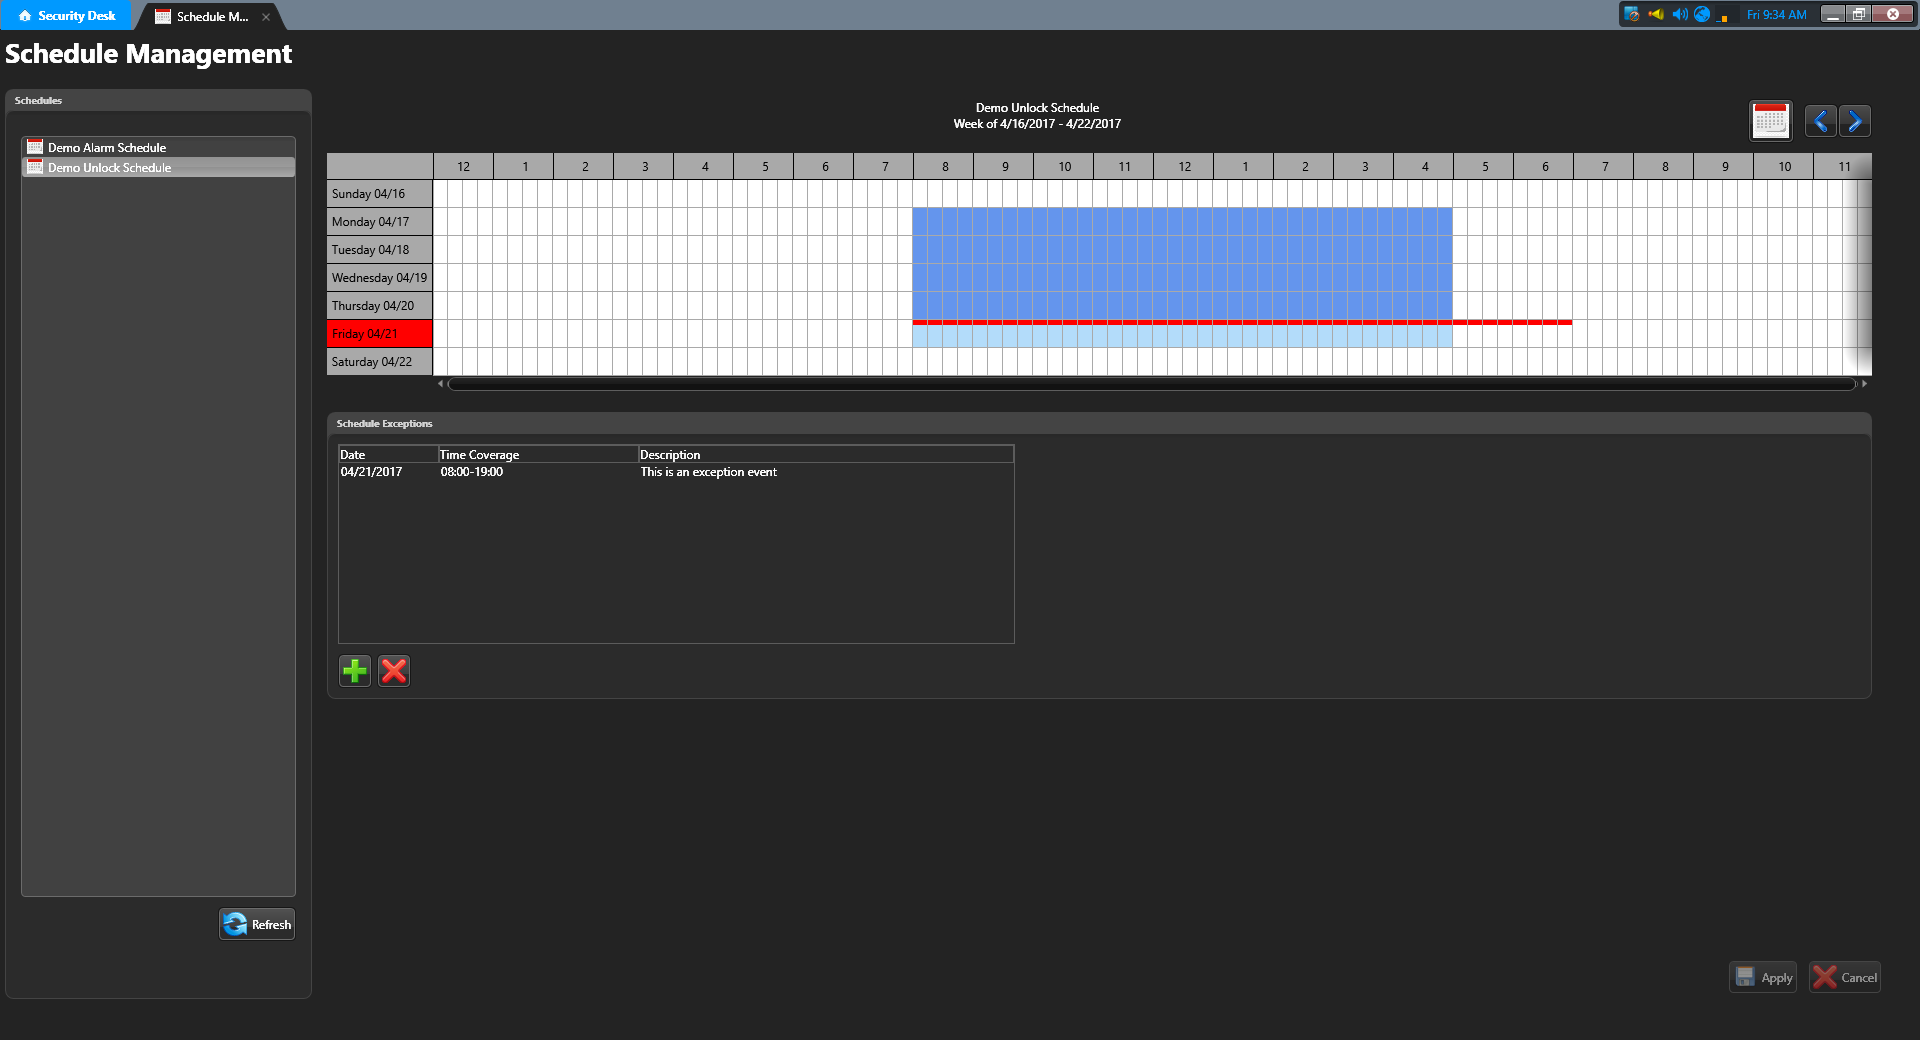
Once the changes have been saved or no changes have been made to the schedule the 'Apply' and 'Cancel' buttons will remain grayed out until a change is made.
You also have the ability to modify multiple exceptions at the same time. To do this add all of the days to the exception list with the green add button, use ctrl or shift click to select multiple days, make description and schedule changes as needed, and then save the schedule.

In addition to the unlock schedule example another common schedule type is alarm schedules. For those of you familiar with Andover this will be a change. Alarms schedules in Genetec need to be active when an alarm should occur whereas in Andover alarm schedules were active when an alarm should not occur. Below is an example of an alarm schedule in Genetec. This would be an appropriate alarm schedule for the 8AM-5PM unlock schedule used in the previous example. In this alarm schedule example the system will send alarms between 5:15PM-7:45AM Monday-Friday and all day Saturday and Sunday.
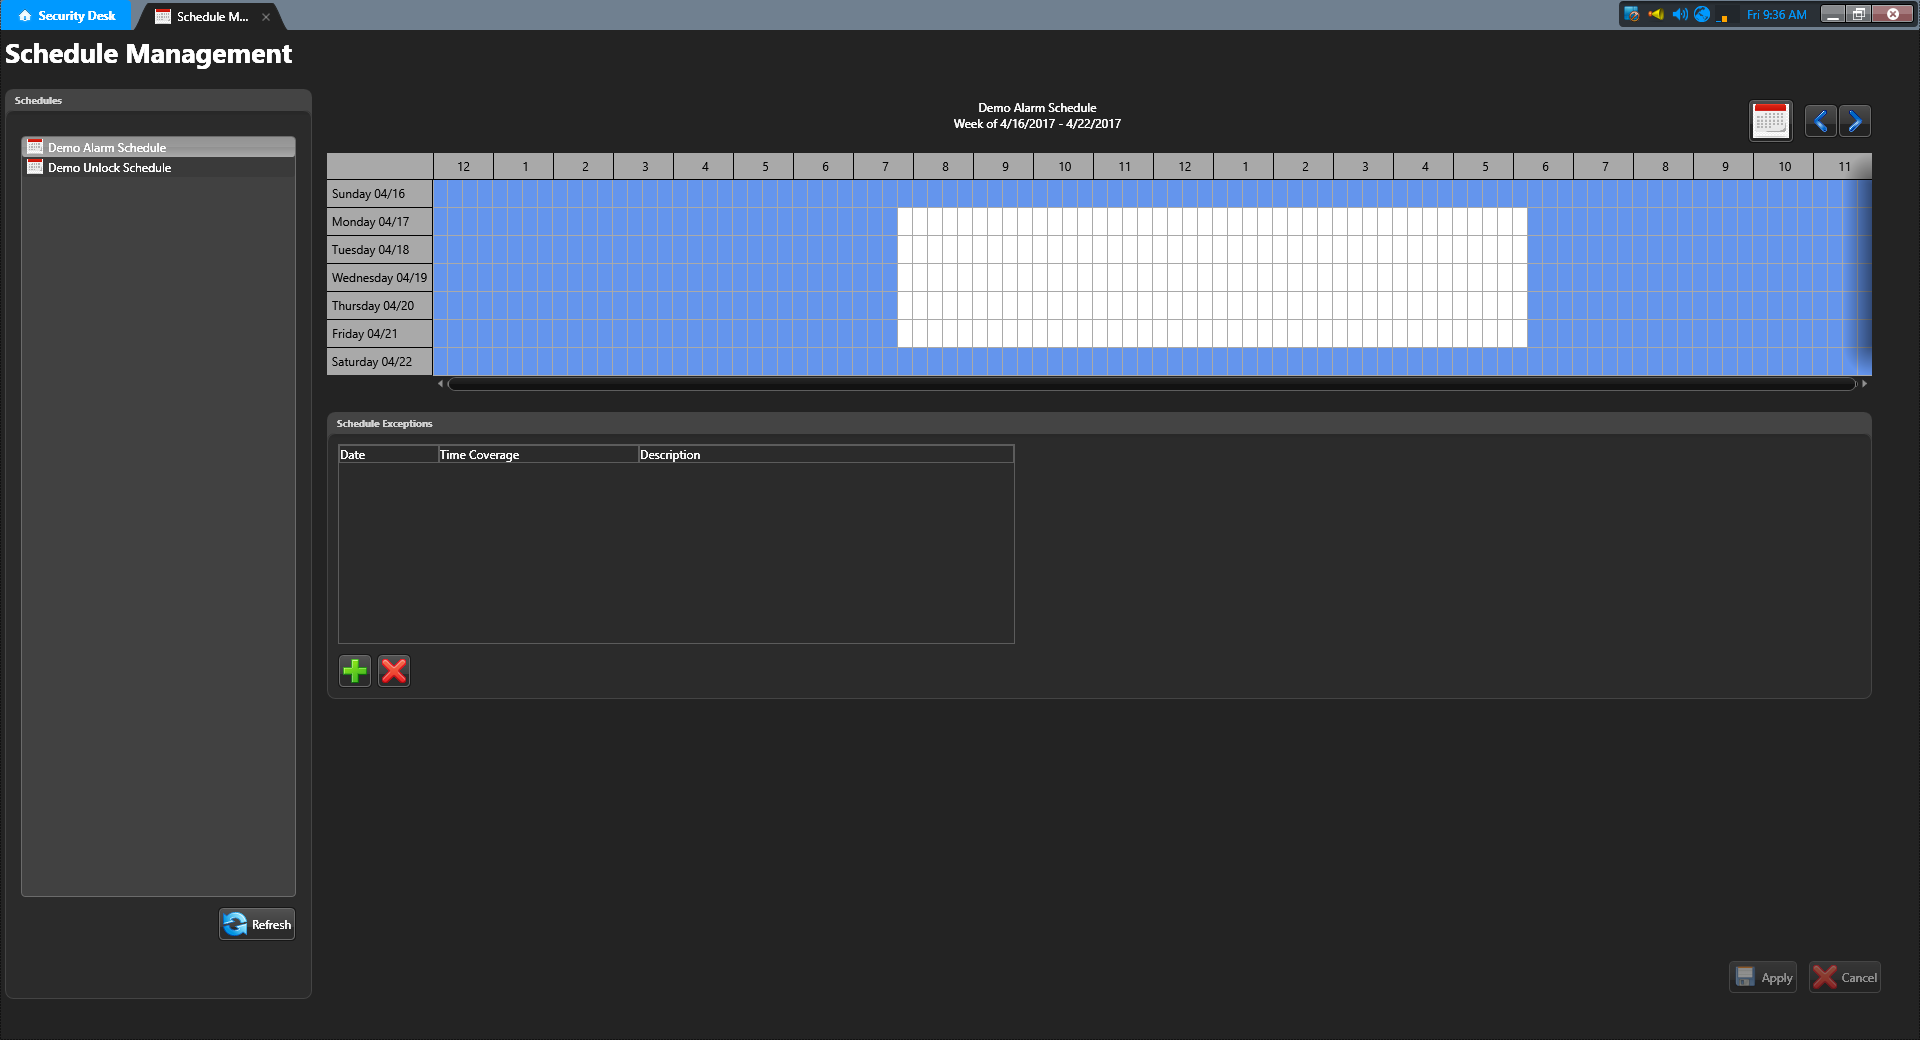
The alarm schedule's weekly schedule and exceptions can be changed in the same manner as the unlock schedule previously shown.
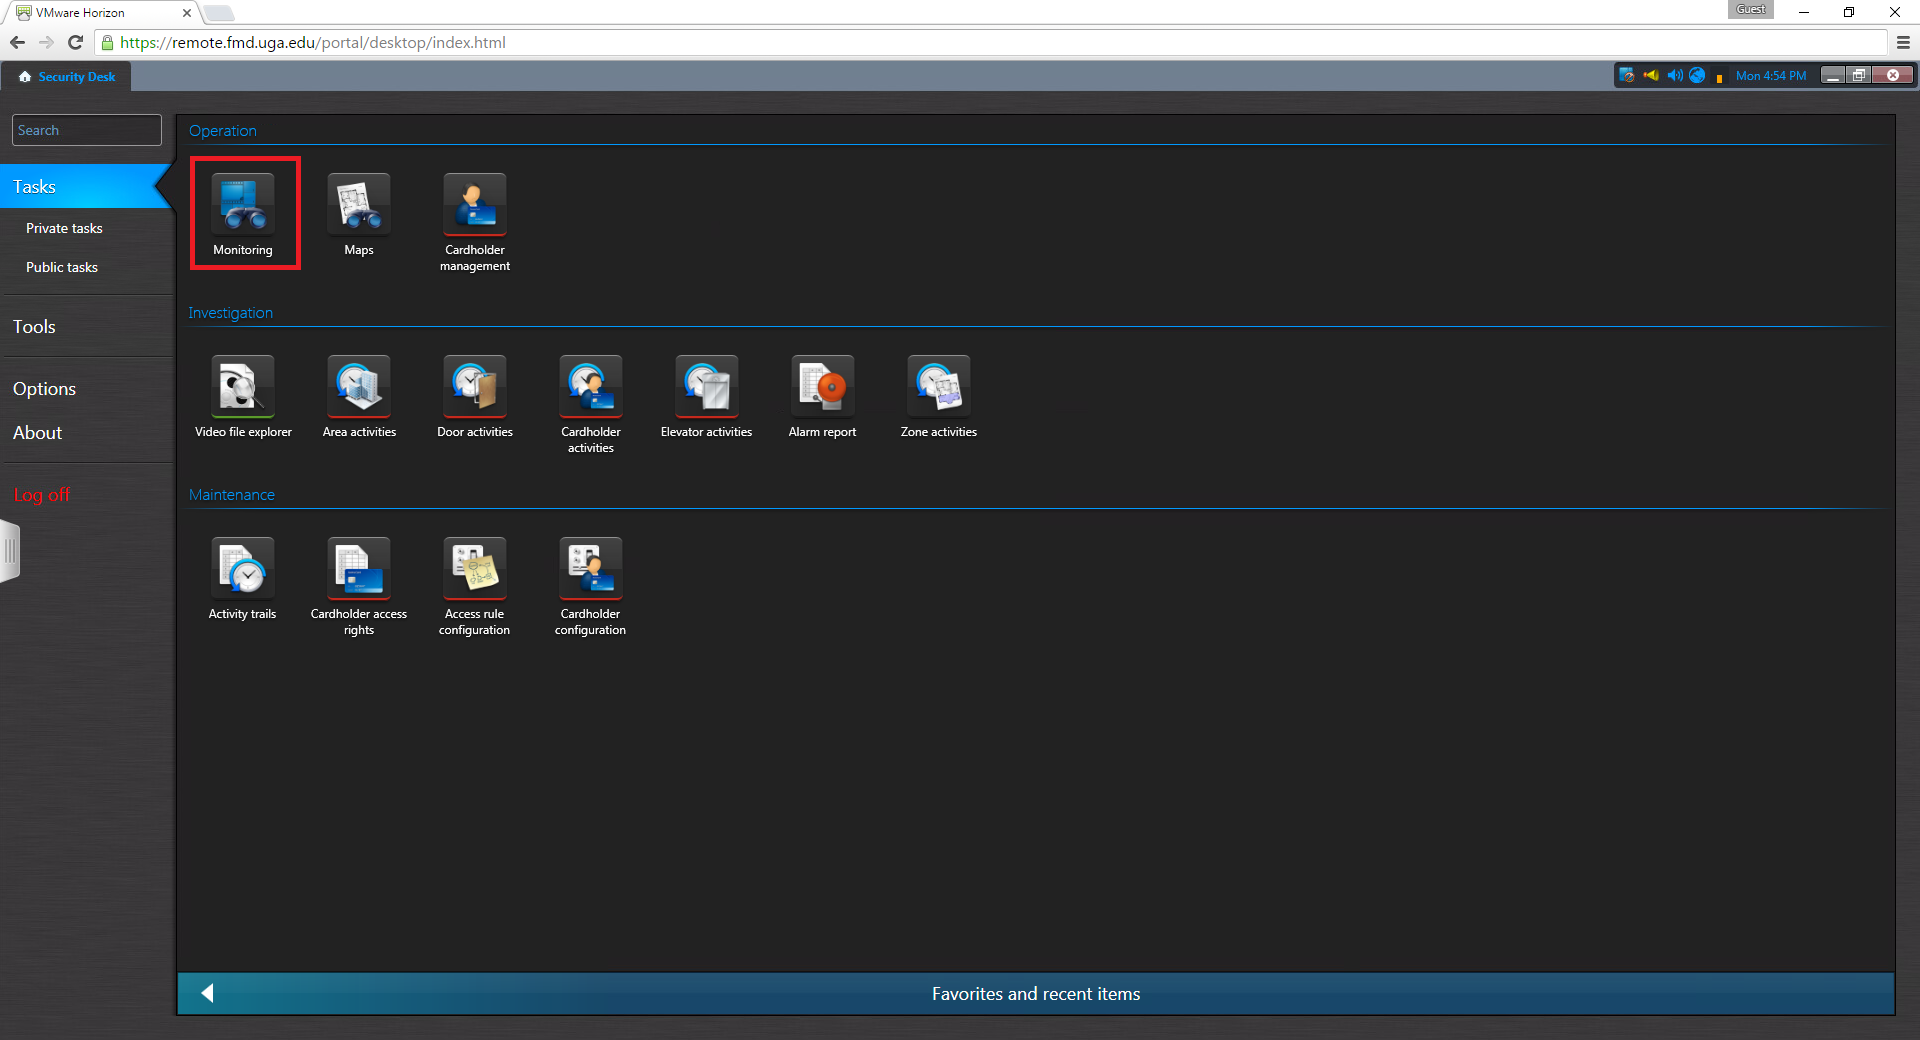
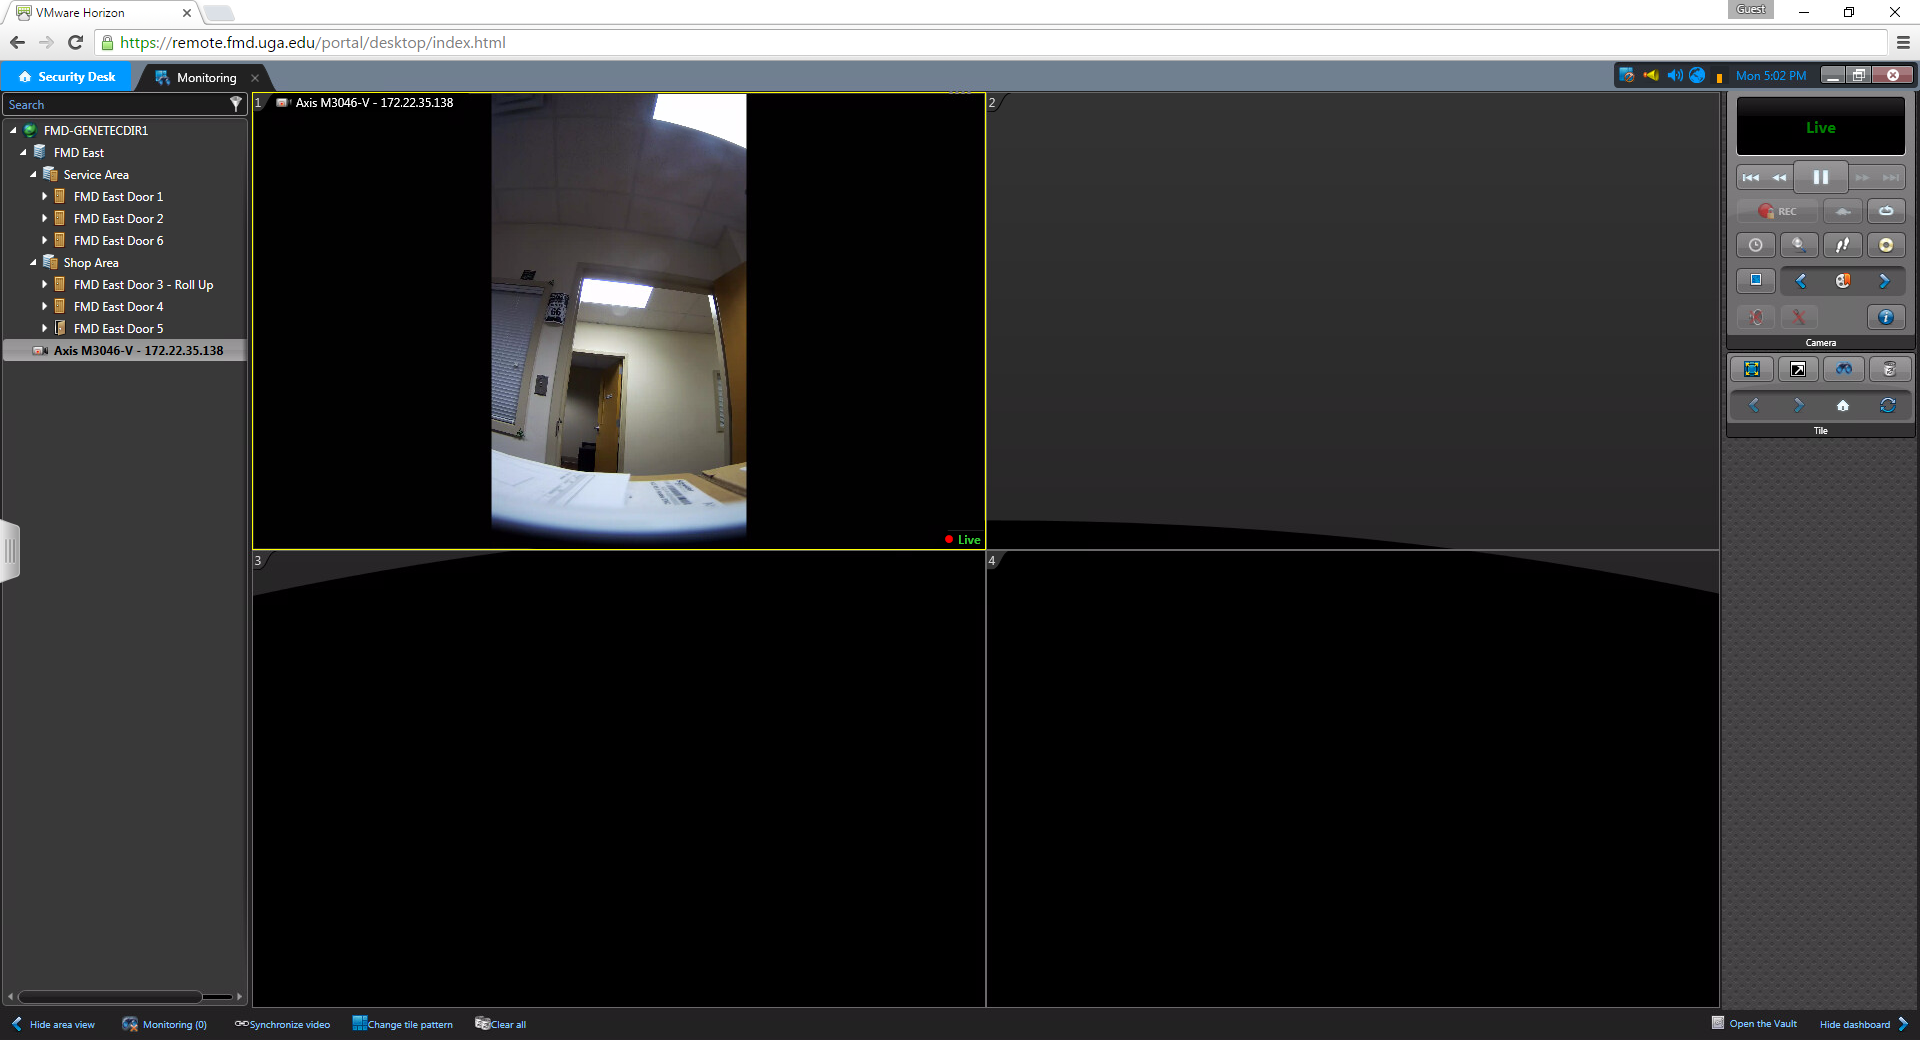
Monitoring:
To access the 'Monitoring' task click on the Monitoring icon on the main page.
The Monitoring task will allow you to see the current state of your facilities. It will show you if doors are open or closed, locked or unlocked. If you have cameras in your system you can also view them here. Simply drag them from the list on the left into one of the tiles into the middle. Information about the device and controls will populate on the right hand side of the screen depending on what you've selected. For example with doors you have the ability to momentarily unlock them or directly override an unlock schedule and with cameras you can record, take snapshots, or any other features allowed by the camera.


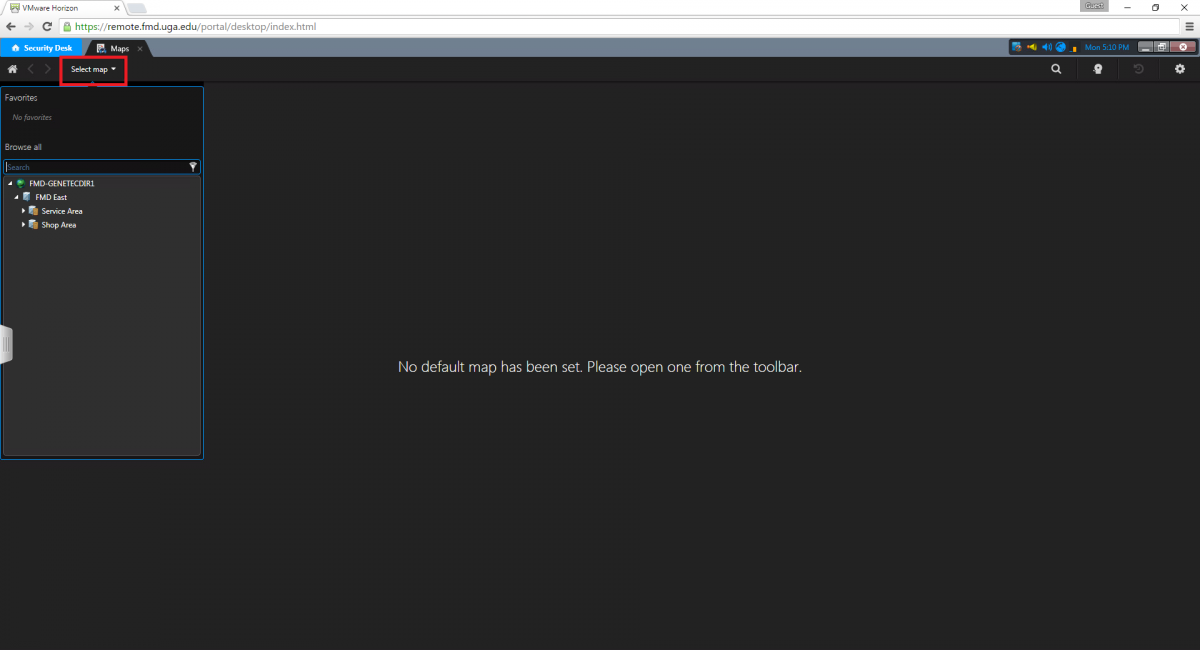
Maps:
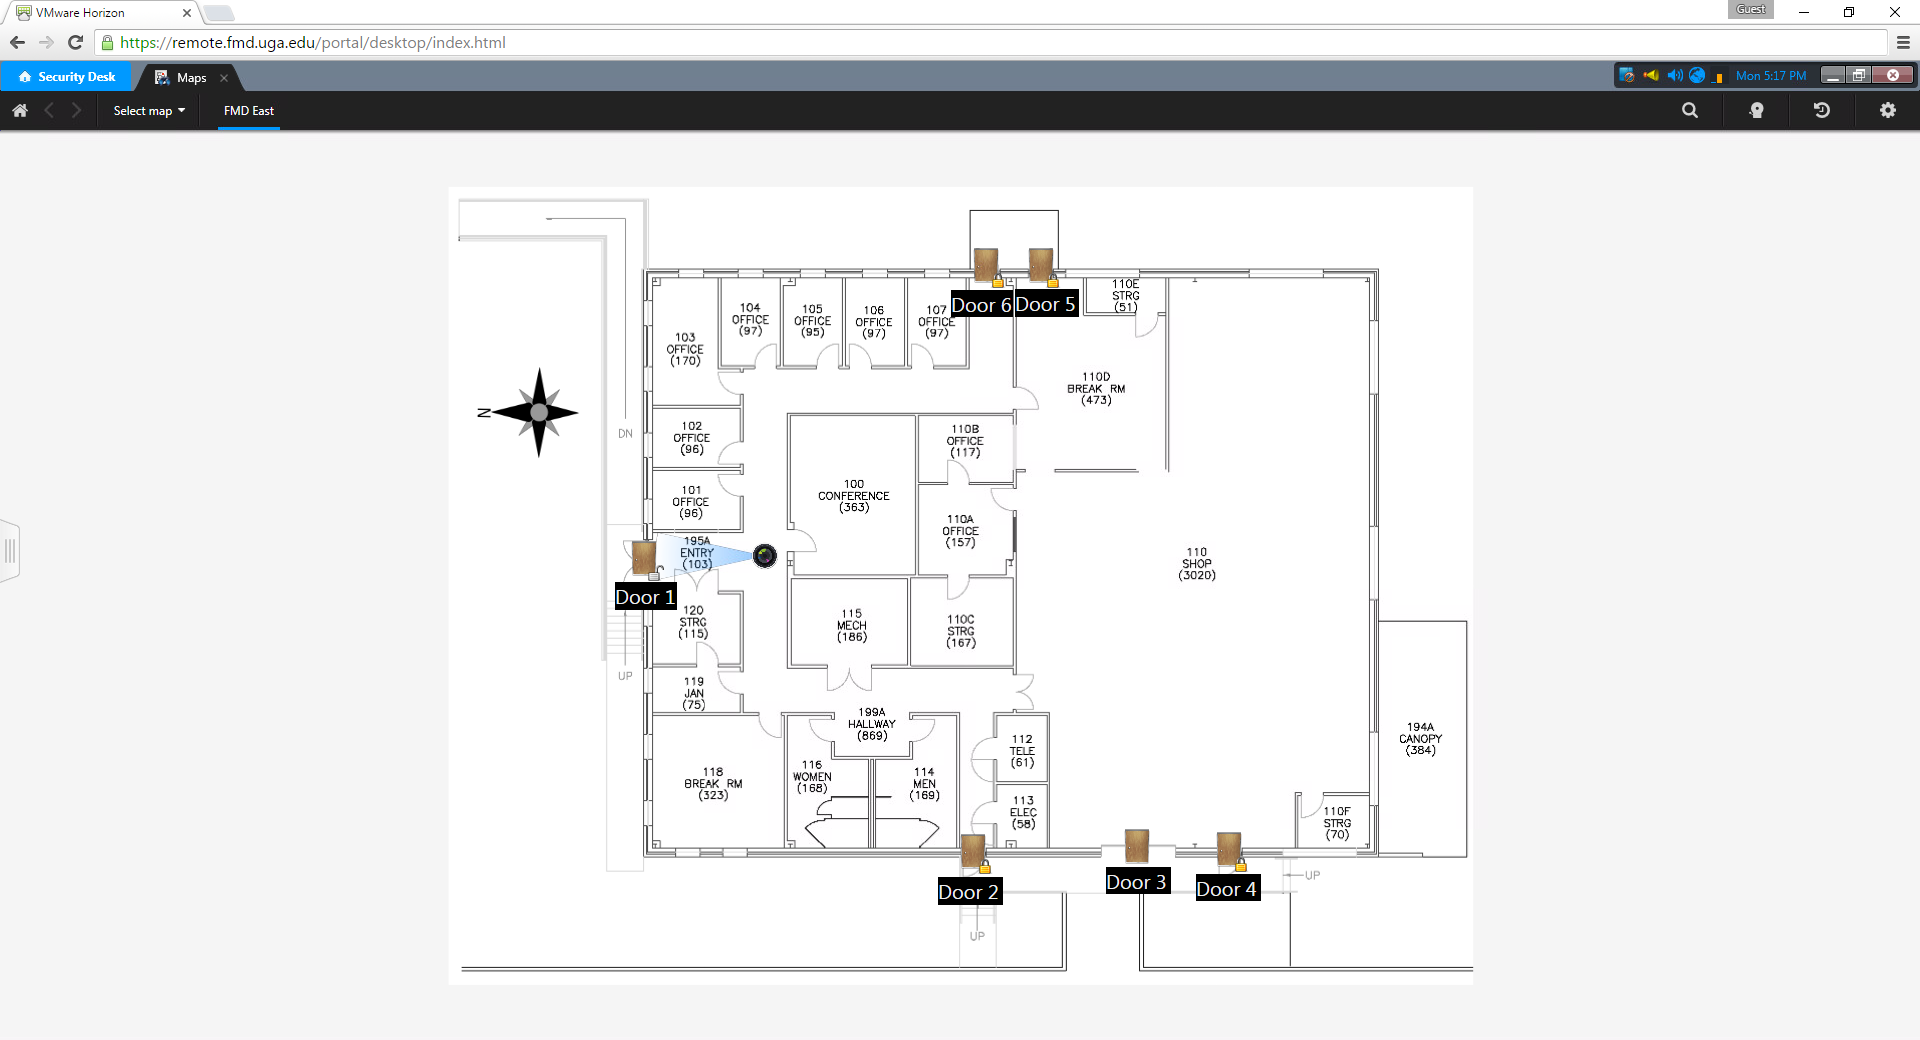
To access the 'Maps' task click on the Maps icon on the main page.
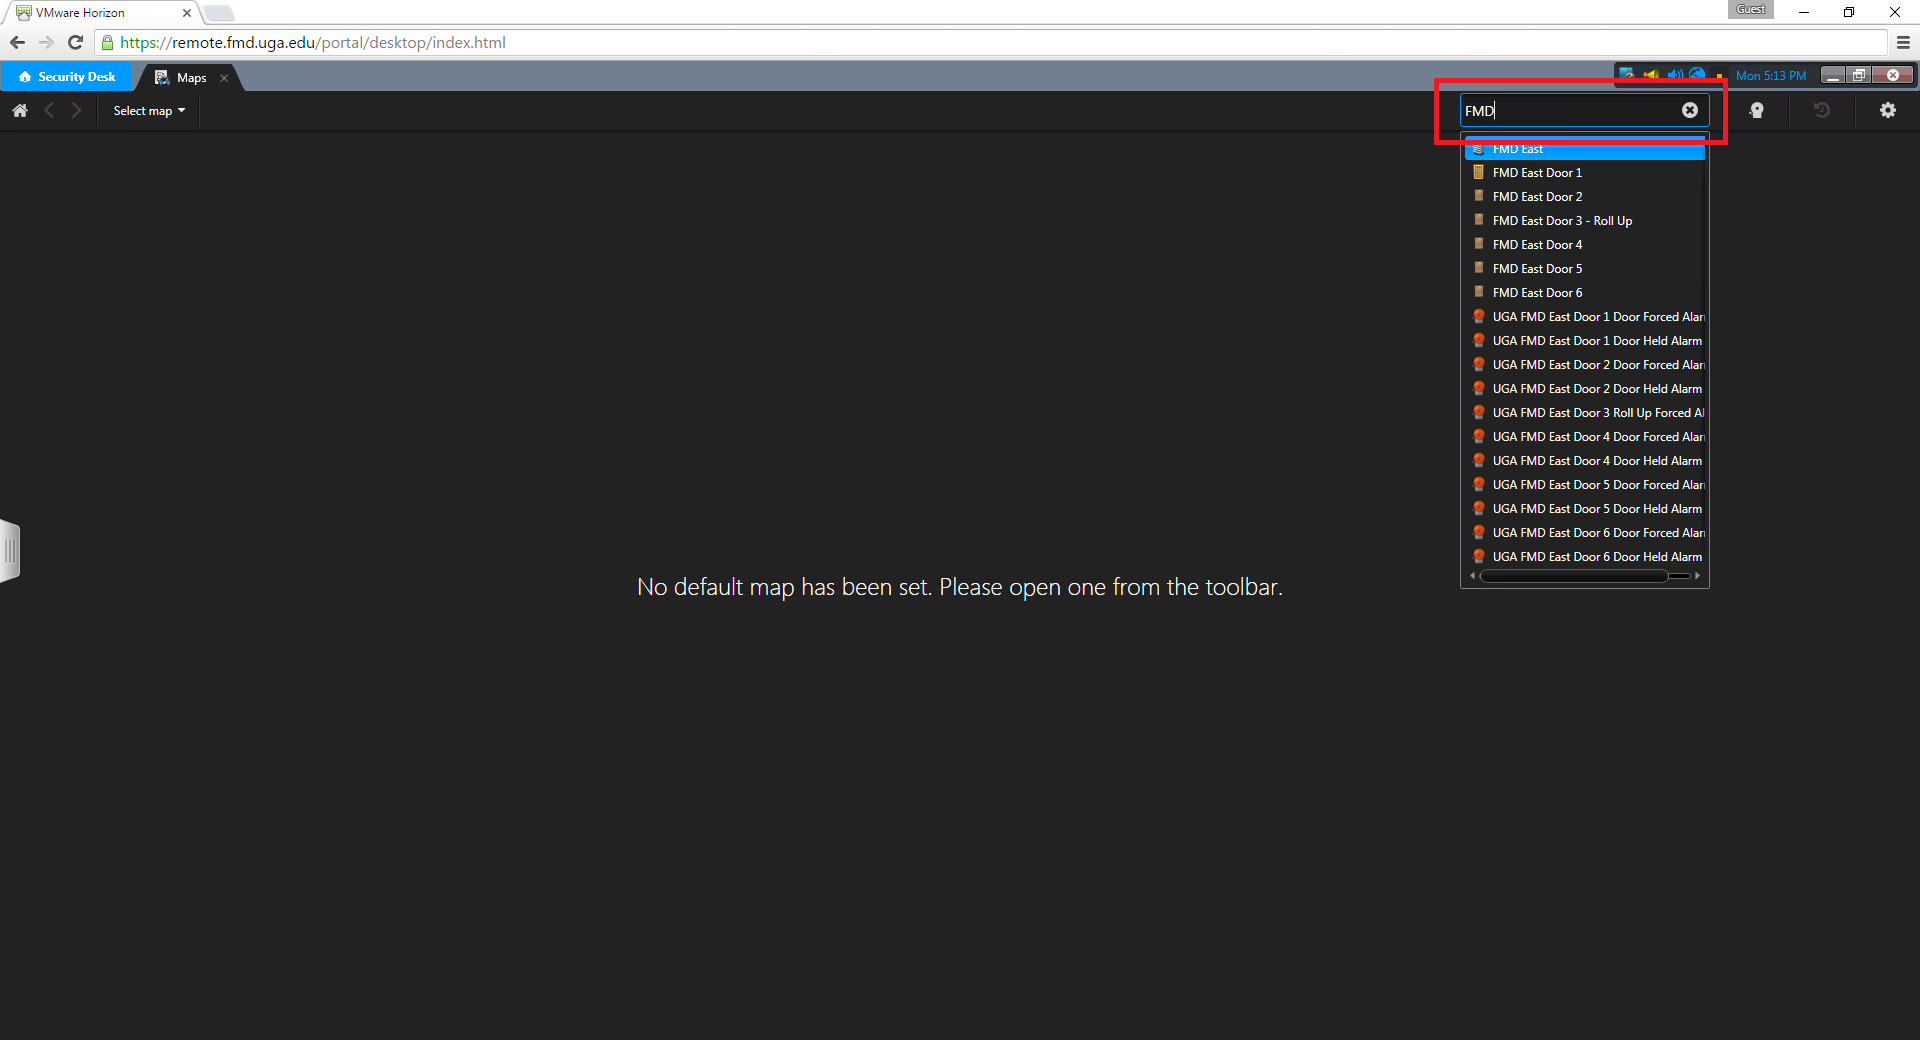
Once the task is open you can select the map you'd like to view by selecting the respective area or building from the 'Select Map' dropdown. Also, if you know the name of the object (door, camera, etc) that you are looking for, you can use the search box.
After you've selected your map it will display on the screen. A number of items can exist on a map such as doors and cameras. The maps will show information about the state of these objects. For example, if a door is open the icon will show an open door and if the door is unlocked it will show an open lock (a closed lock while locked). Cameras can show their field of view and make visual changes if they sense motion or are recording.
To be able to perform actions you'll need to enable the dashboard through the settings by selecting the gear icon in the top right.
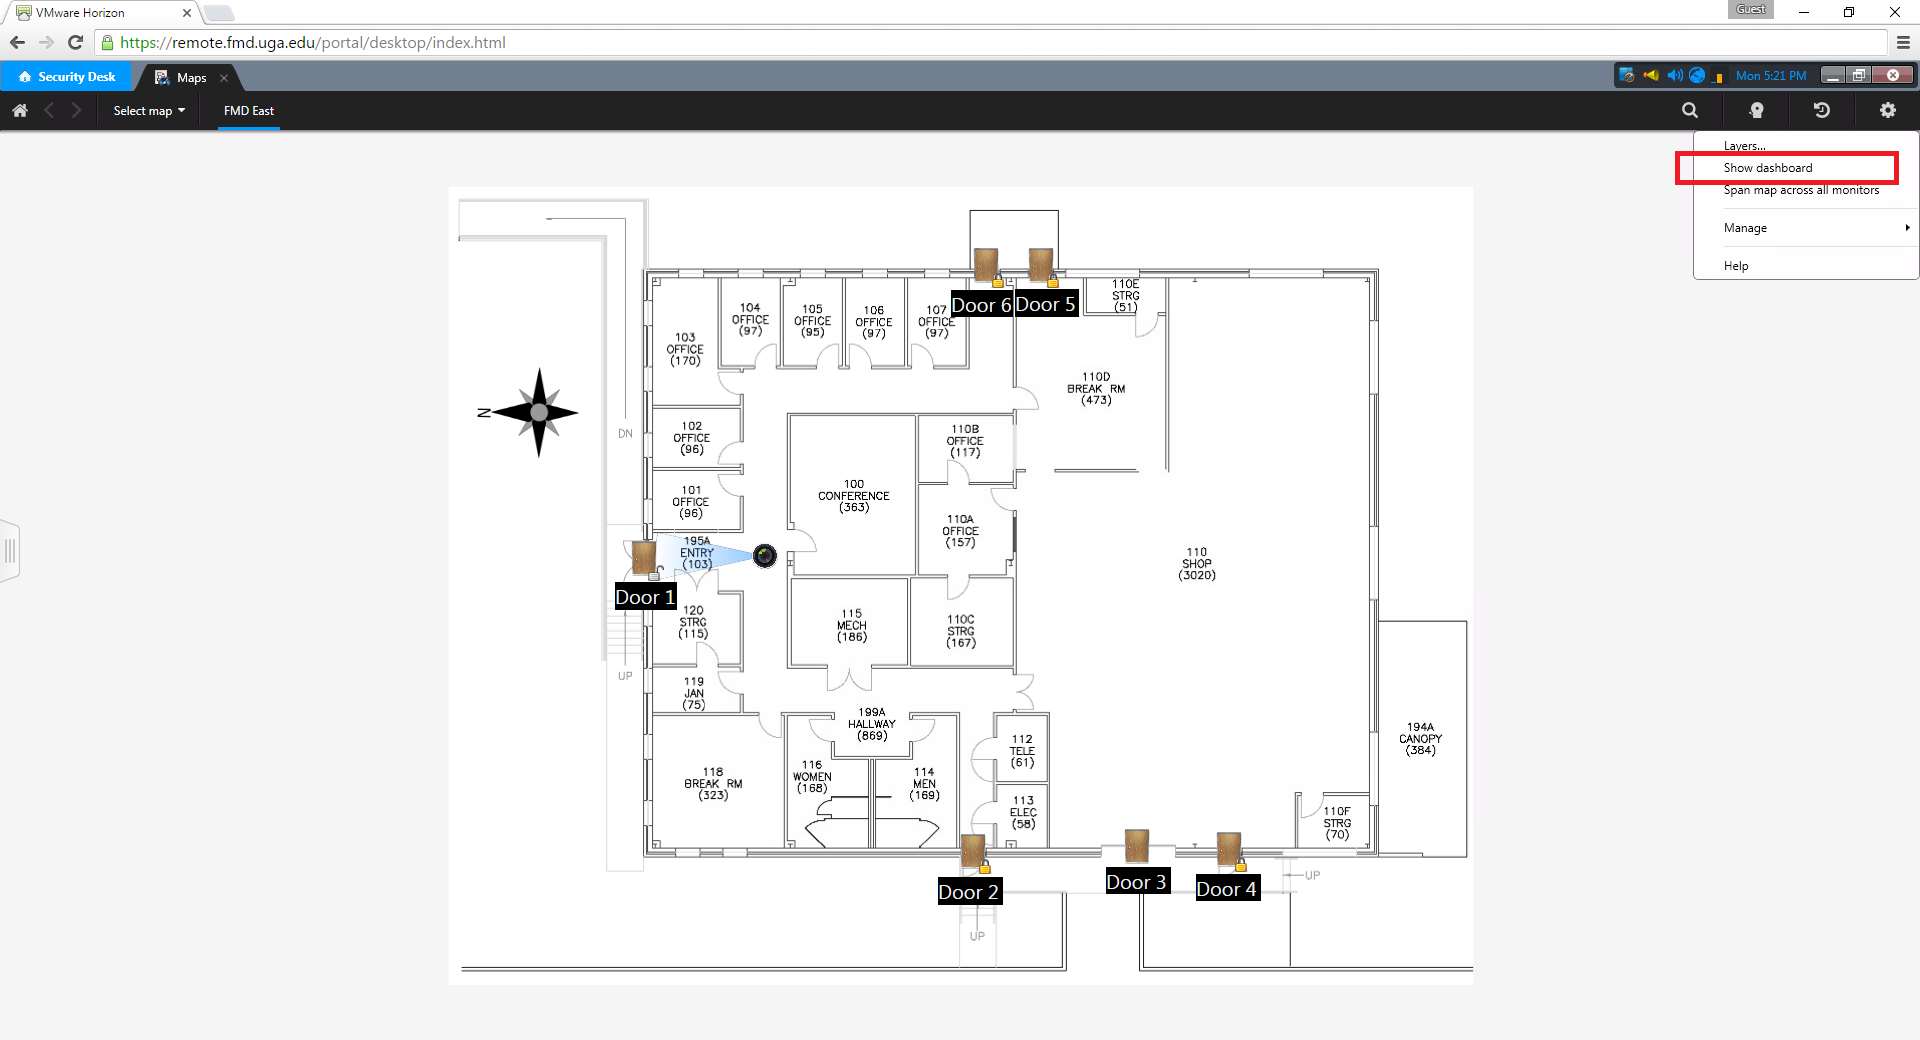
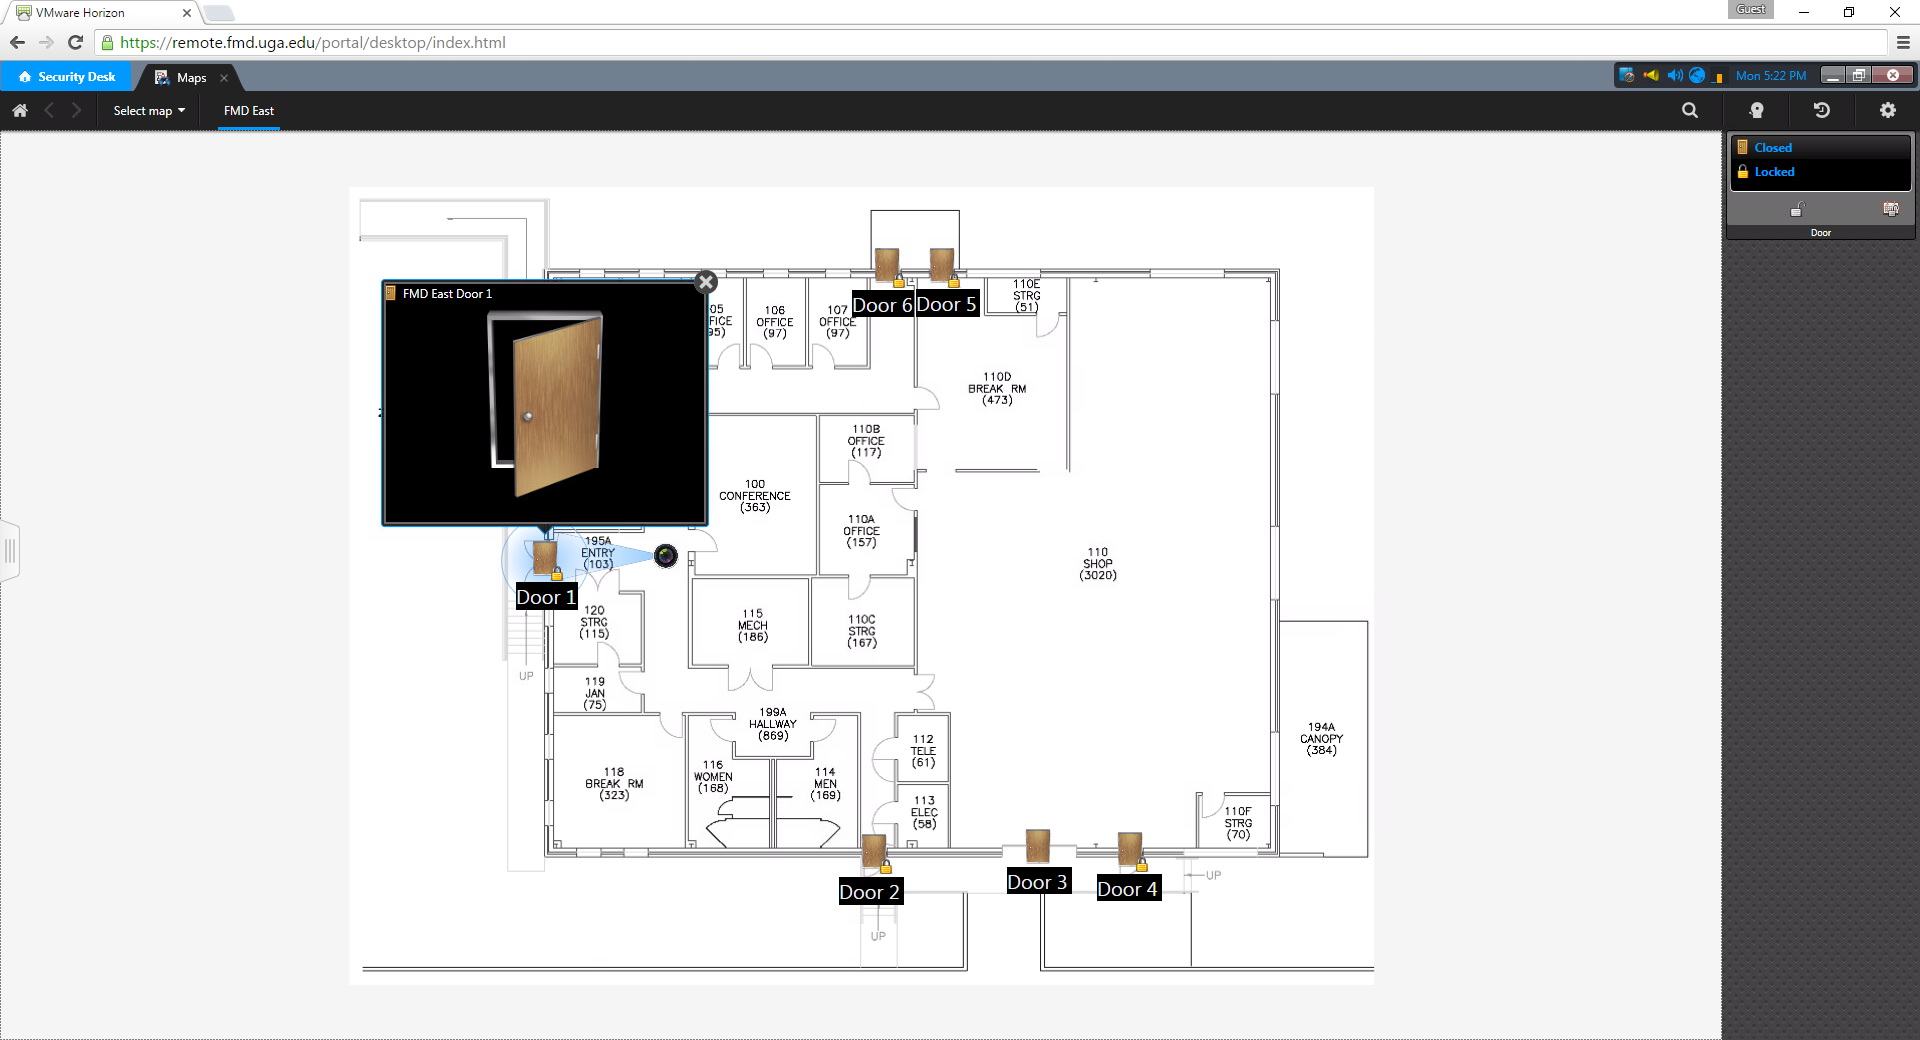
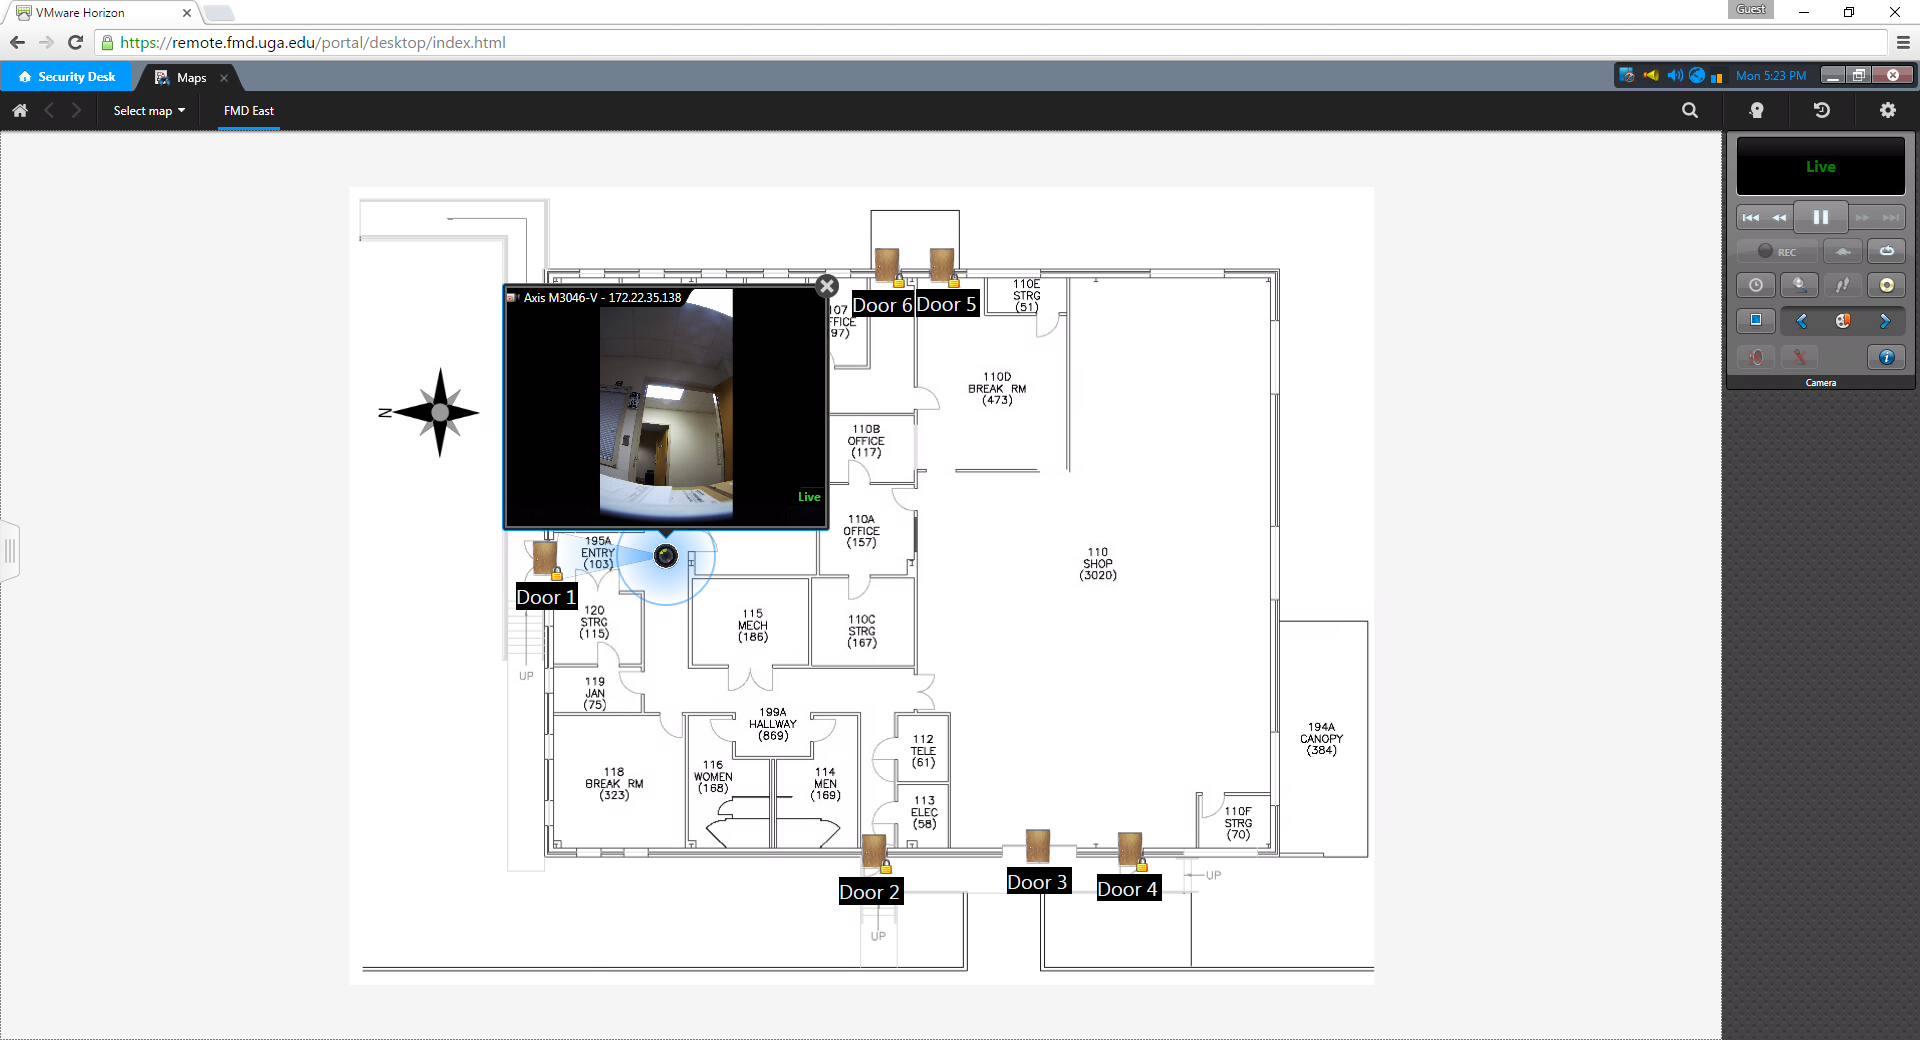
You can then select an object such a door or camera on the map to view and perform actions on them much like in the monitoring task.
Reports:
There are a number of Reporting tasks in the Genetec system. Below is a list of the available reports and a brief description of what they contain.
- Area Activities
- A report that contains Area events based on selected Areas and time frames. Areas can contain multiple doors or elevators.
- Door Activities
- A report that contains Door events based on selected Doors and time frames.
- Cardholder Activities
- A report that contains Cardholder access events based on selected Cardholders and time frames.
- Elevator Activities
- A report that contains Elevator events based on selected Elevators and time frames.
- Alarm Report
- A report that contains alarm events based on selected Alarms and time frames.
- Zone Activities
- A report that contains Zone events based on selected Zones and time frames. A zone is a grouping of one or more inputs such as a glass break device or a duress button.
- Cardholder Access Rights
- A report that contains a list of Cardholders that have access to a facility based on selected Areas or Doors.
- Cardholder Configuration
- A report that contains Cardholder information based on a number of criteria such as first or last name, Cardholder Groups, and Custom Fields such as Department Number or UGAID number.
Each report is unique in the filters that you can apply but function in generally the same way. Below is an example of how to use reports with steps that can apply to each report.
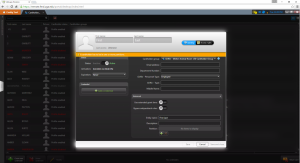
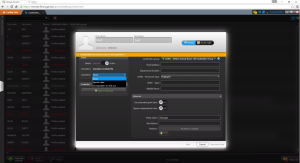
When you open the report you'll see a screen similar to the following. Some reports may have an additional frame on the right side of the screen as seen in the second picture. This can be viewed or hidden by dragging the highlighted control bar up or all the way down.
![]()
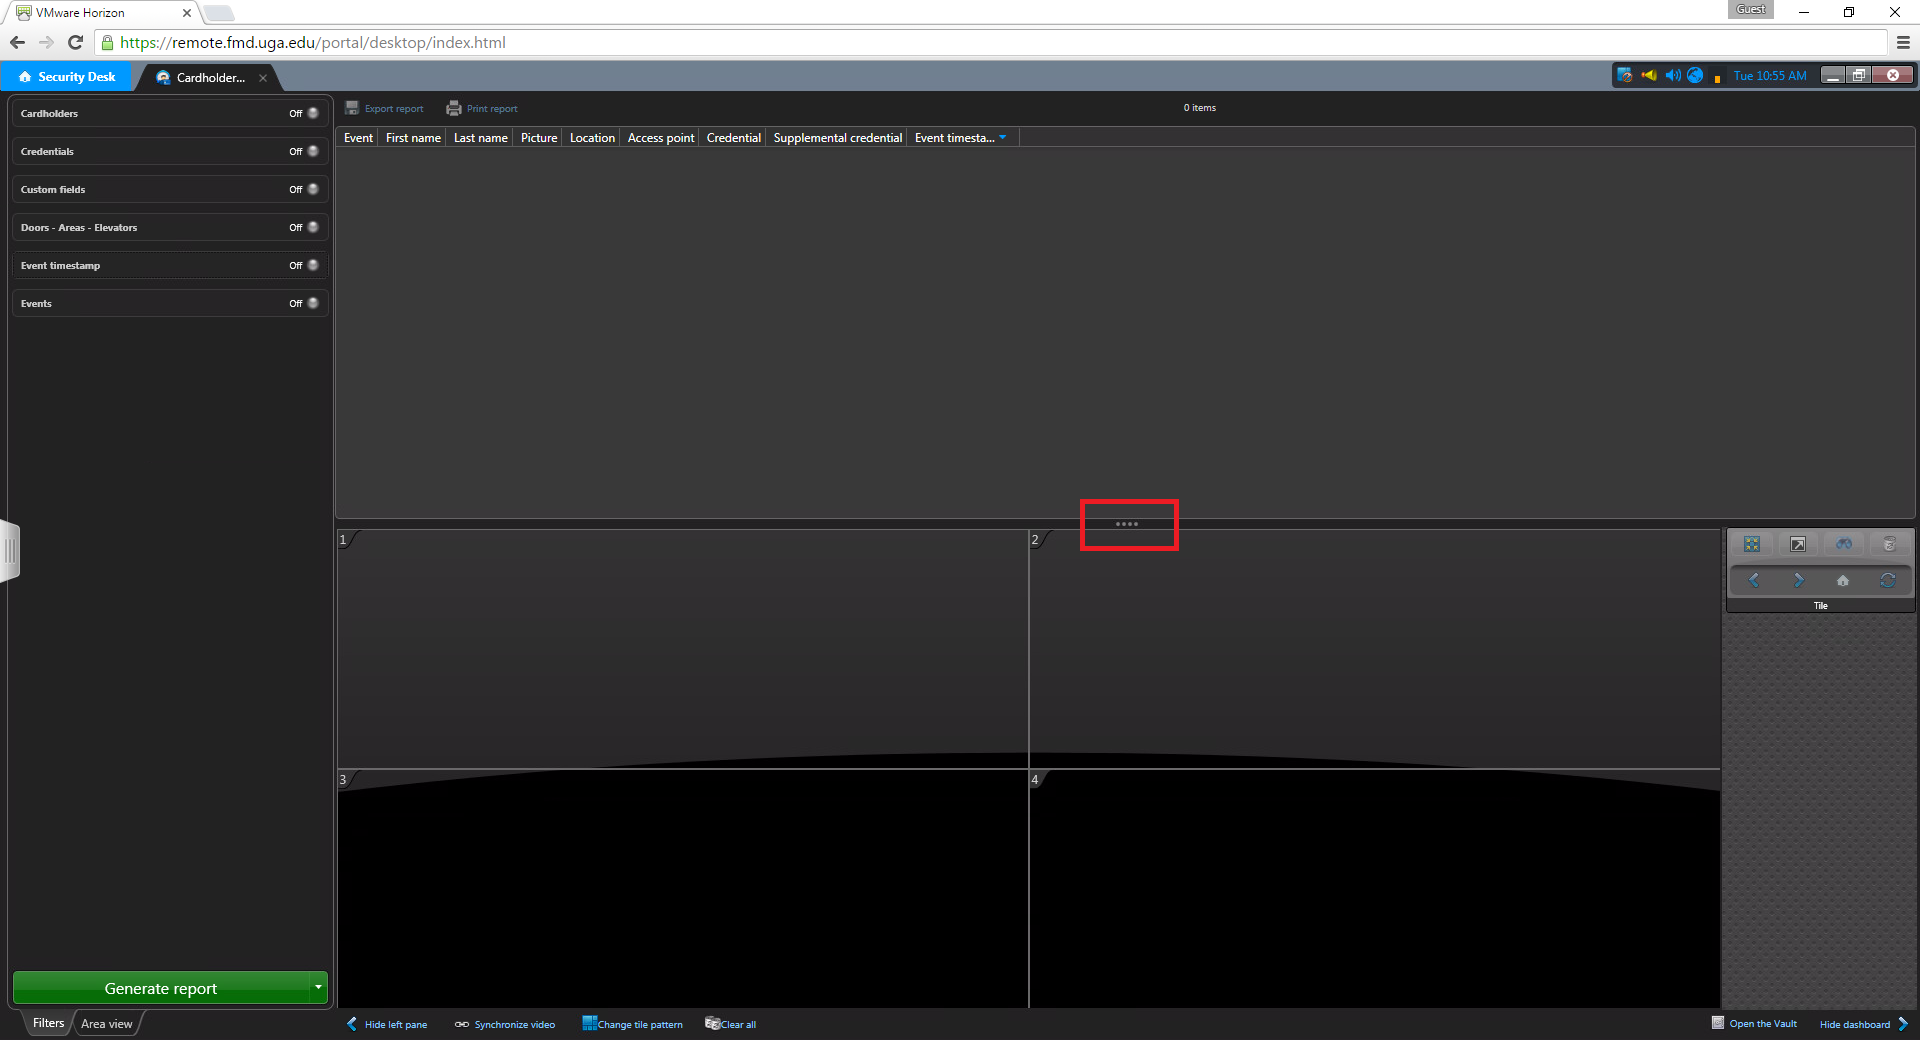
There are three main areas you'll see here: the filters on the left, the results pane on the top right, and the results tiles on the bottom right.
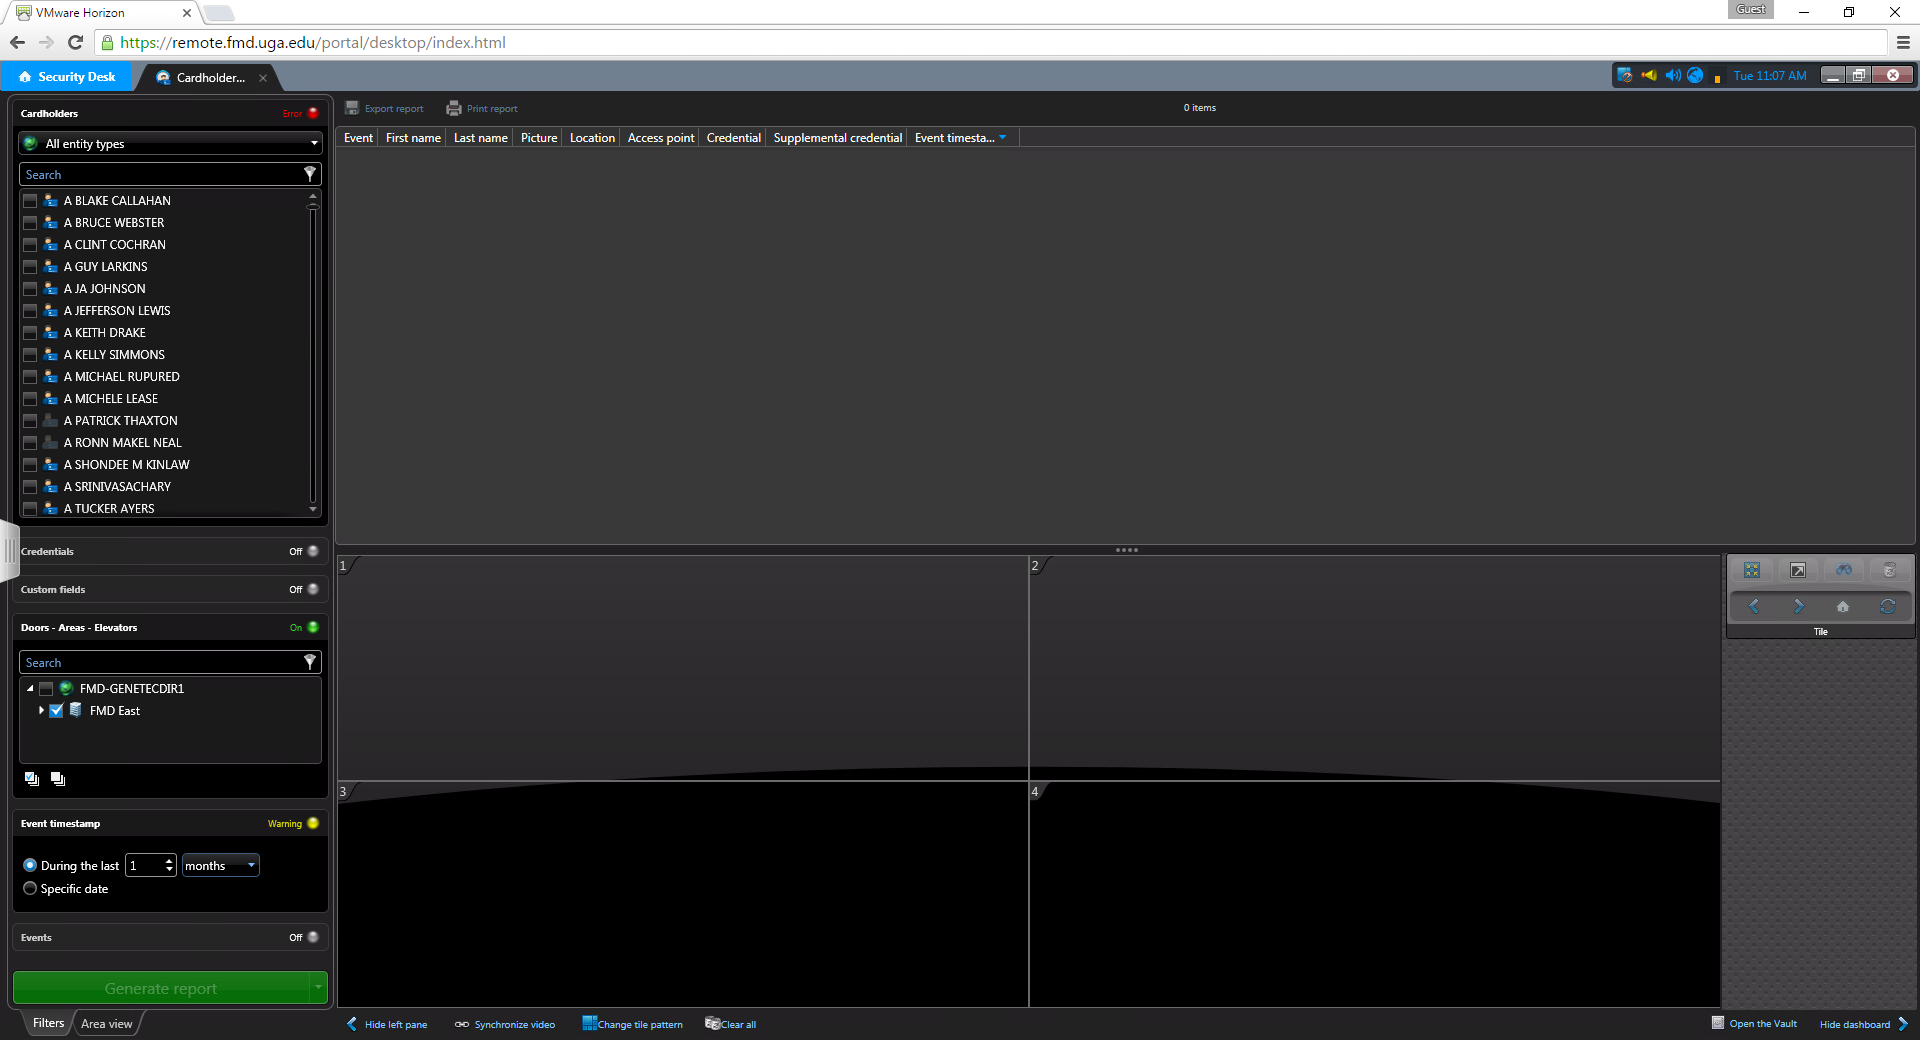
The filters are how you can search for the information you need. You can activate a filter by clicking on its name. There are four states a filter can be in: on, off, warning, and error. 'On' means that the filter is being used and you have selected something to filter by. 'Off' means that filter is not being used. 'Warning' means that the filter is being used but that the report may contain a large amount of data. In the following example picture a warning is shown on the 'Event Timestamp' filter because the selected time range is more than 1 day long and may generate a very large report. 'Error' means that a filter is being used but that you have not selected something to filter by. In the following example picture an error is shown on the Cardholder filter because it has been activated but no Cardholders have been selected.
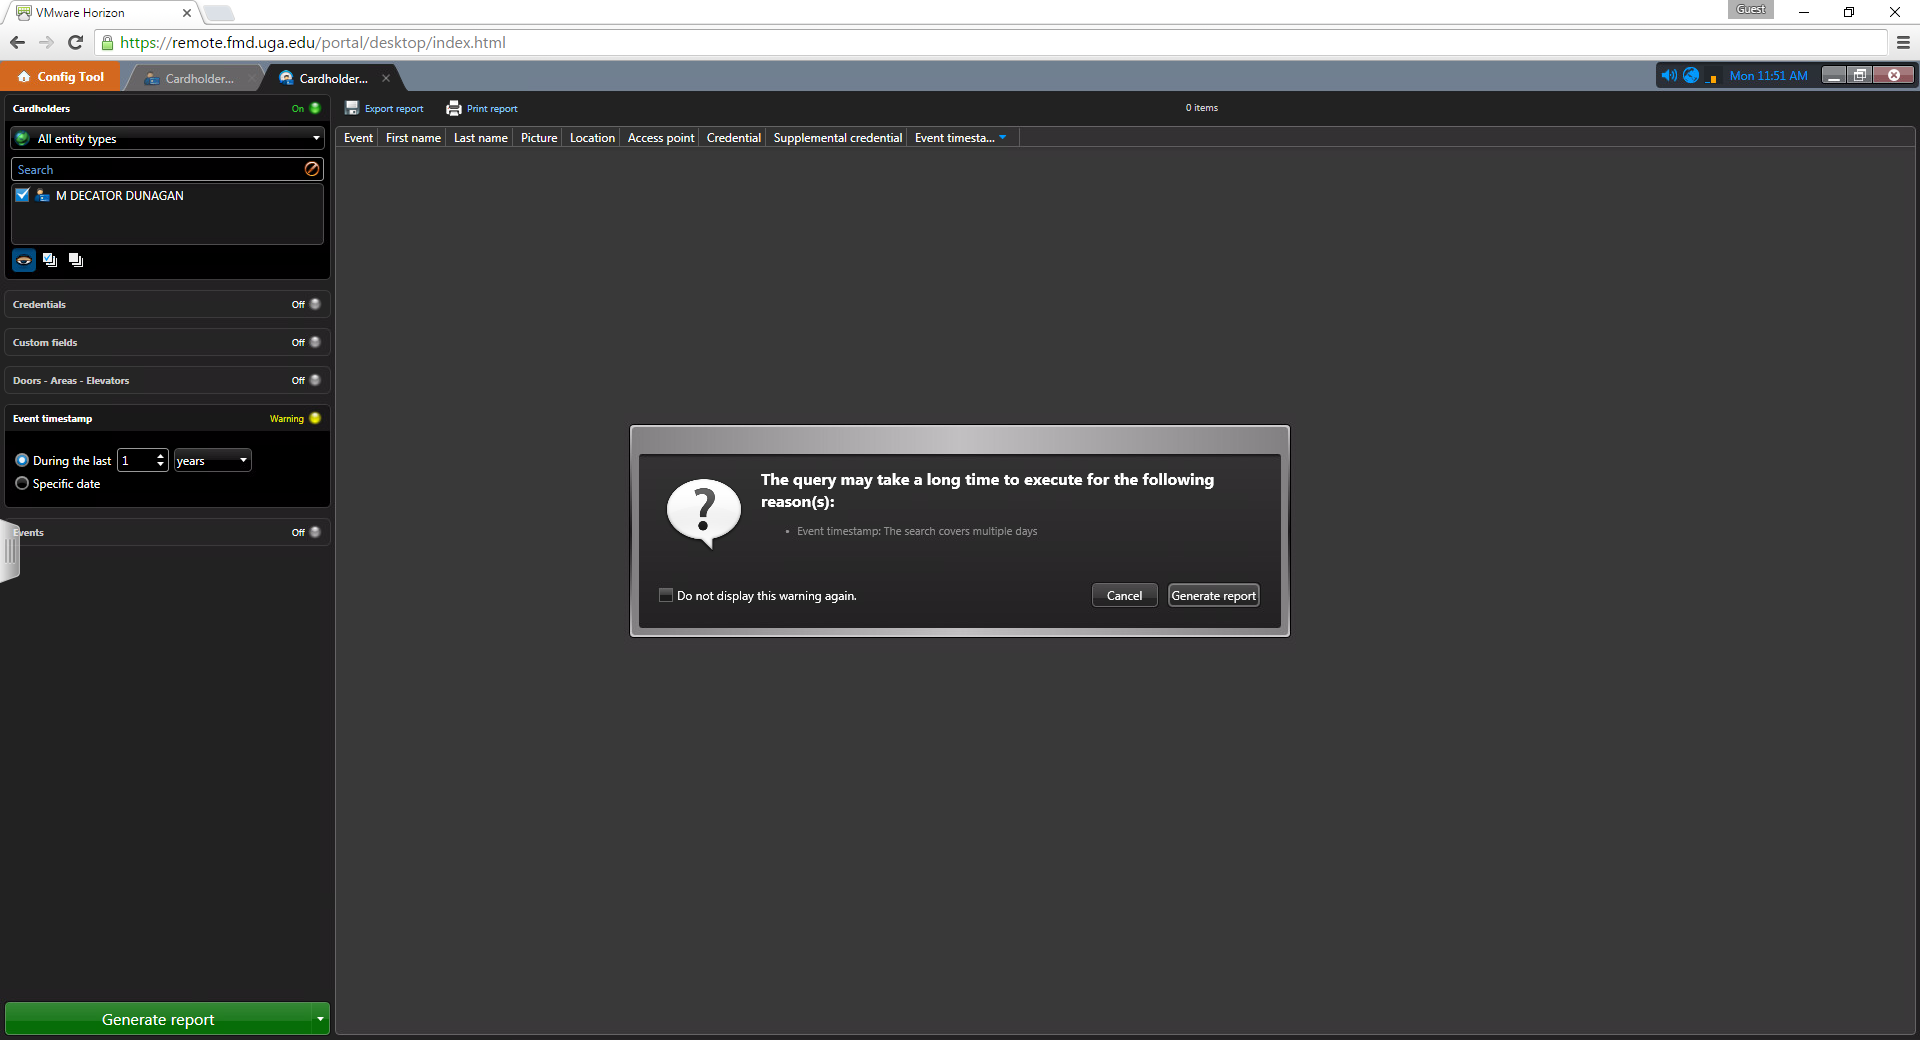
Once you've selected your filters hit the 'Generate Report' button at the bottom of the filters list. If you've selected a filter that is in a warning state you'll get an warning message that the report may take a long time to run. If needed hit the 'Generate Report' button in the pop-up box to continue running the report or hit 'Cancel' and use a more narrow set of filters
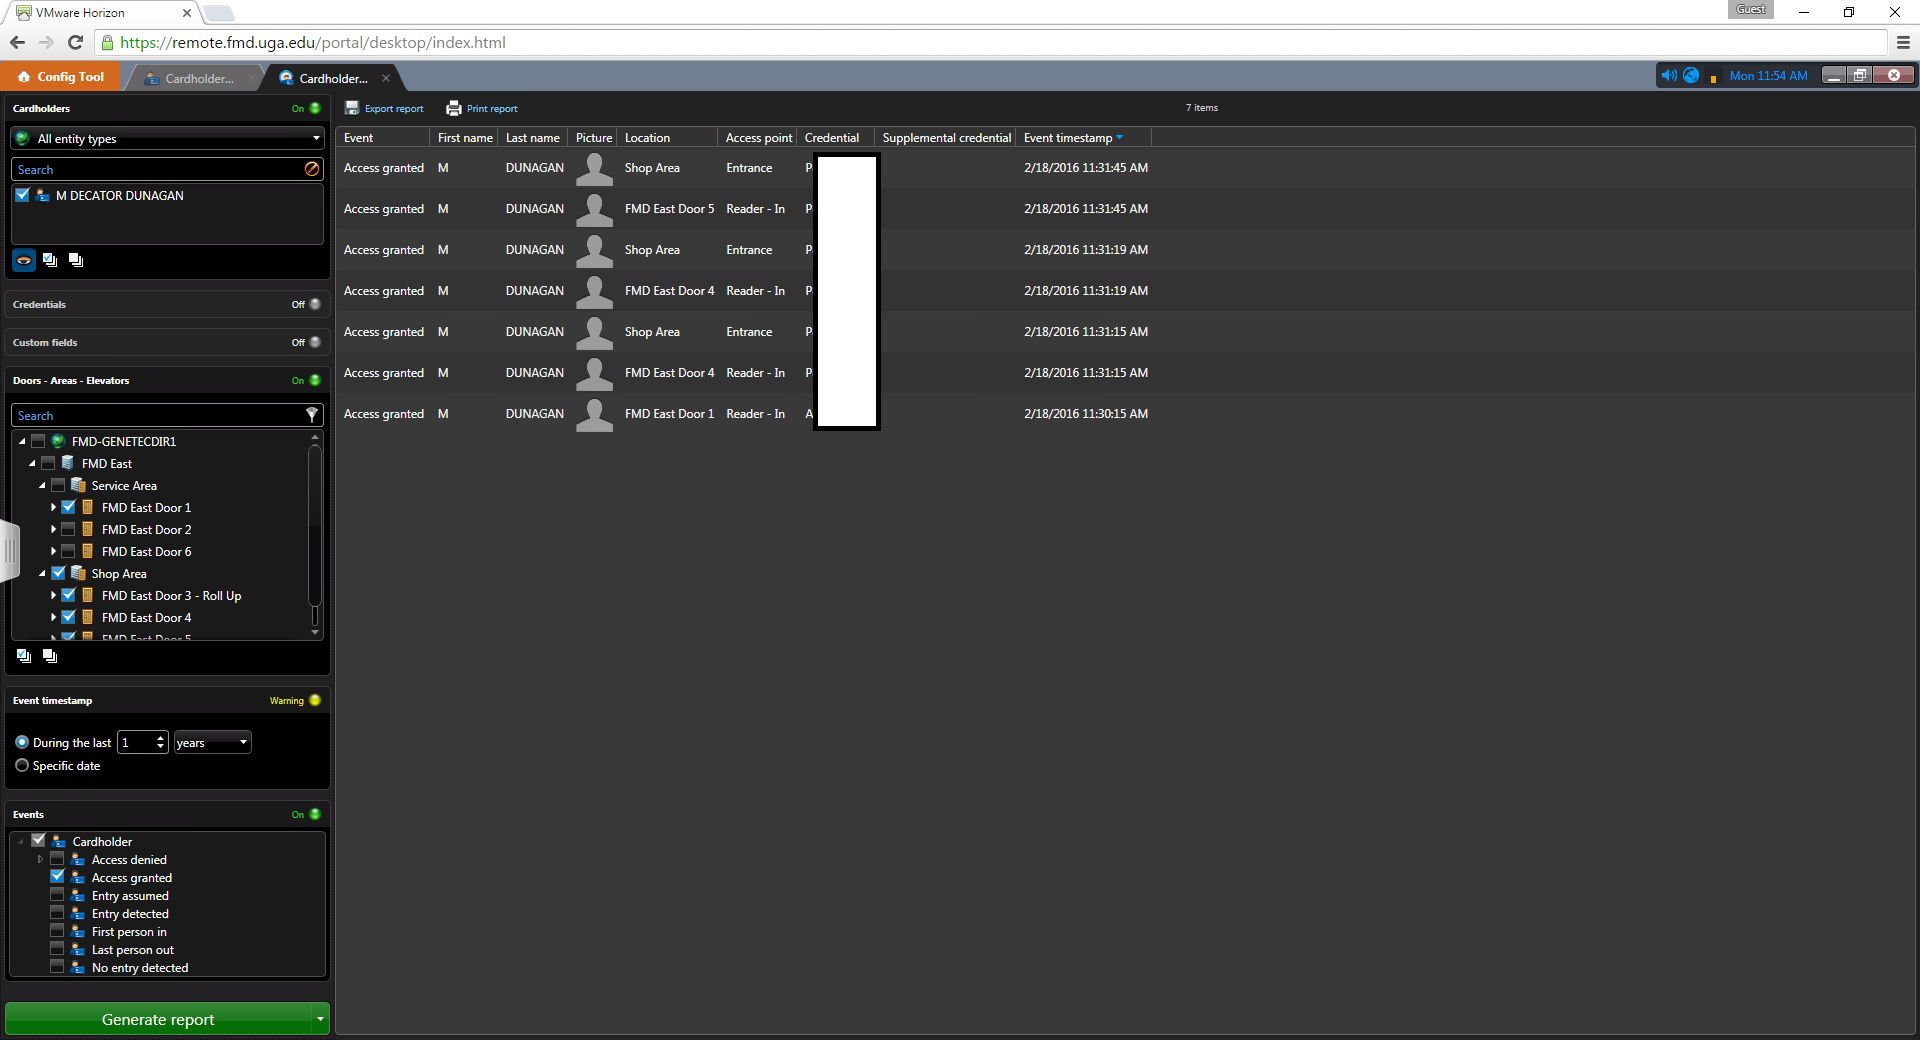
The results pane contains the set of results based on your chosen filters. The results pane will include a number of pre-defined columns but you can also click on a column name, click 'Select Columns', and add/remove/reorder the columns displayed by the report. In the two example pictures following one important thing to note is the different events that are displayed for Cardholders. In the first picture you'll see a number of entries that contain very similar information such as 'Access Granted' and 'Entry Assumed'. You can use the 'Events' filter in conjunction with the other filters to remove these similar events and produce a much more concise report as seen in the second picture.

The results tiles potentially contain and can display more information related to an entry from the result set. To view an entry in the results pane drag it from the set of results into one of the tiles.

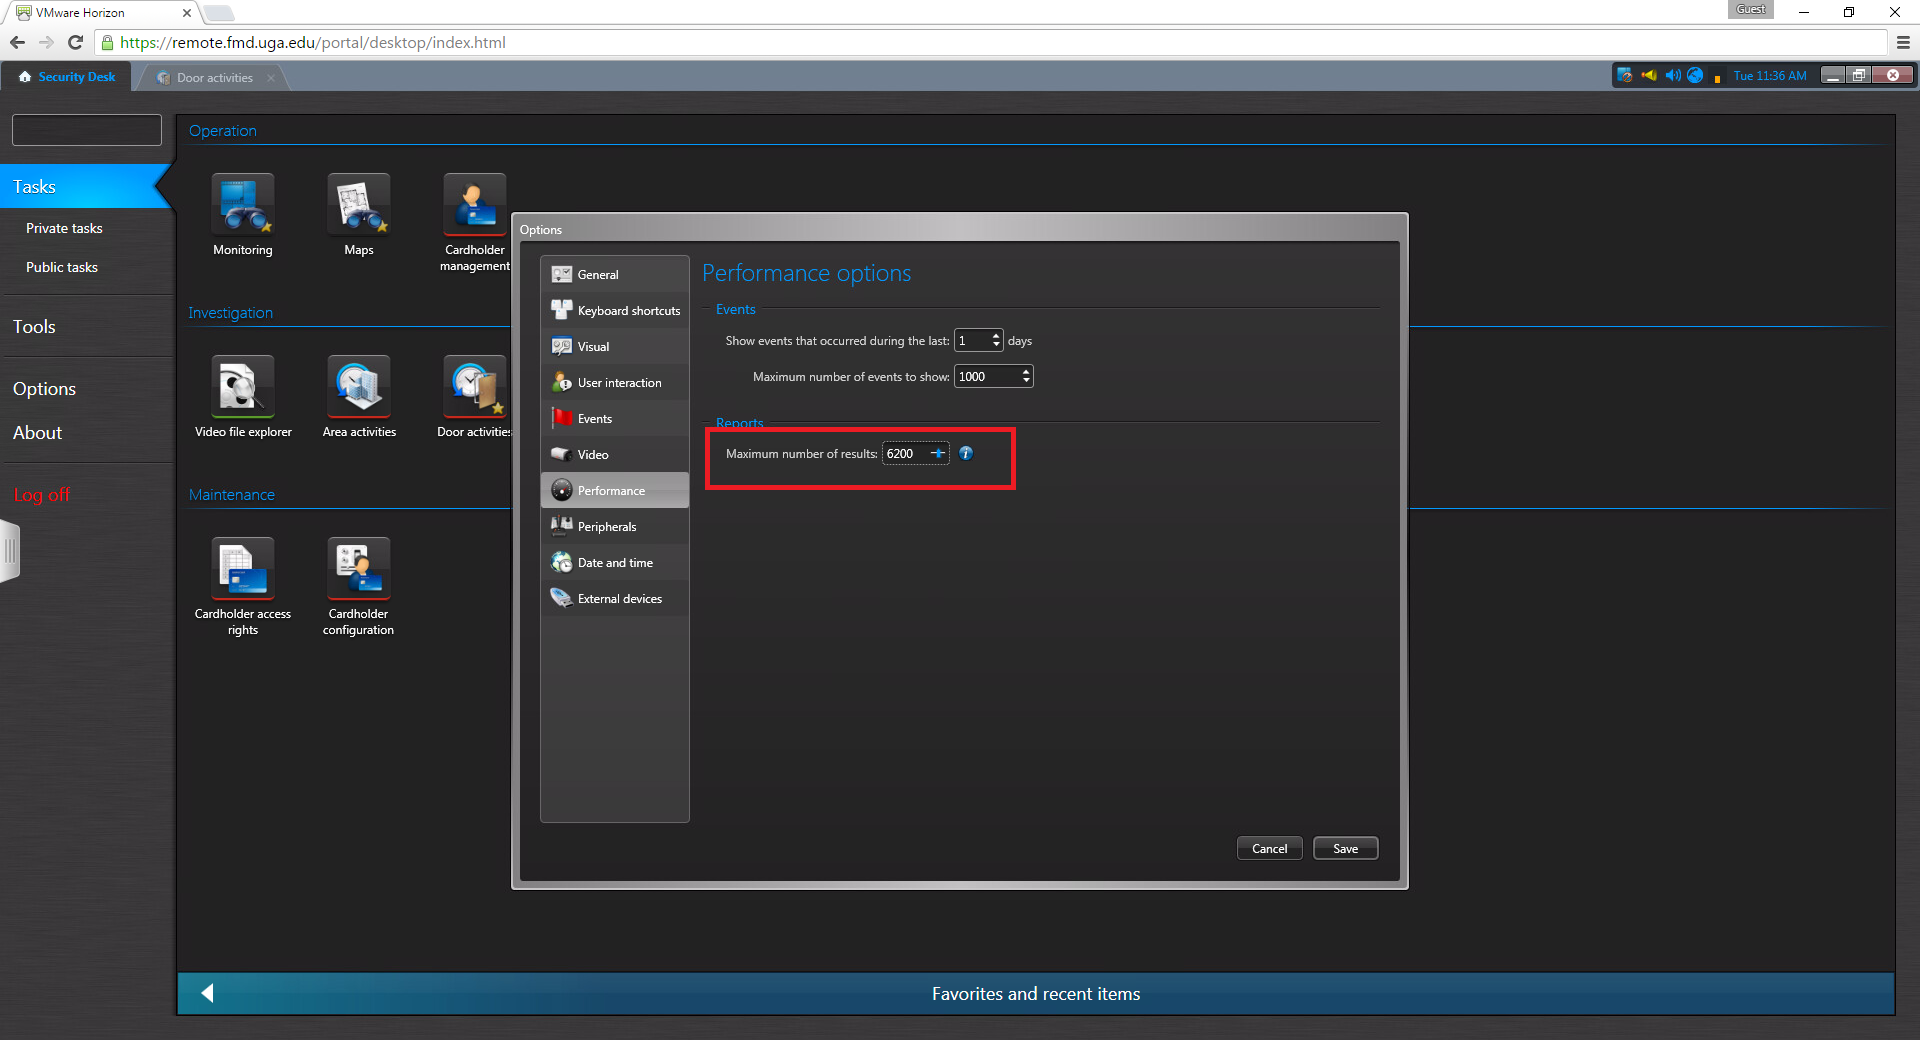
By default, Genetec limits the number of results from a report to 500. This can be increased by going to the 'Options' menu found on the main page and increasing the 'Maximum number of results' under the 'Performance' section. Once the 'Maximum number of results' option is increased the report will generate with more results up to that max number.
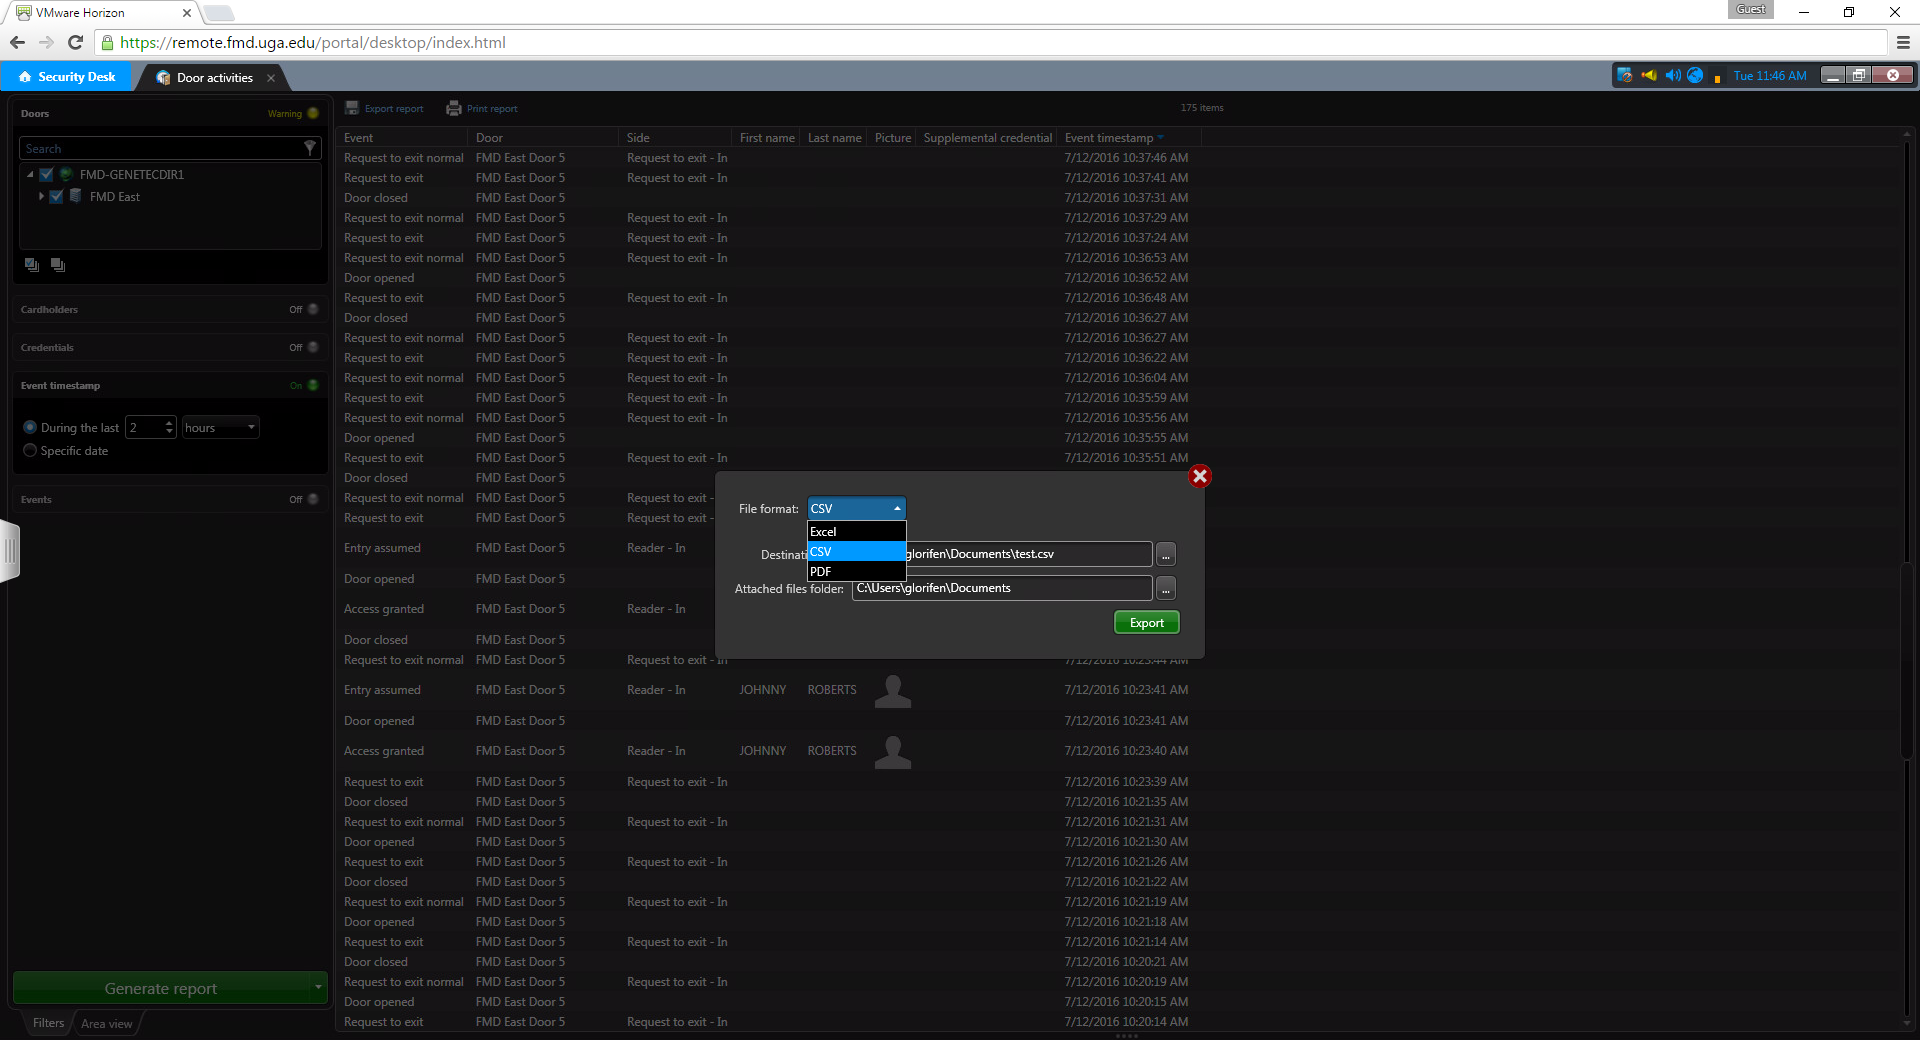
The easiest way to export a report and get a copy of it is to run the 'Export Report' command, select the file type including Excel, CSV (Comma Separate Values), or PDF, and then selecting where to save and name the file. Once it has been exported you can login to your e-mail on the Genetec computer and send it out as needed. Reminder: Any reports containing 810/811 numbers must never be sent to non-UGA e-mail addresses and any reports containing the full 16 digit card number must be sent using https://sendfiles.uga.edu. Both cases must in accordance with the UGA Data Classification and Protection Standard, here.

Genetec also has the ability to e-mail pre-configured reports on a schedule. If you would like to have this setup e-mail accesscontrol@uga.edu and we will work with you to configure the automated report.
Miscellaneous
Private and Public Tasks
Private and Public Tasks can be used to save commonly run reports. After their creation they will keep any configured filters for the next time they run.
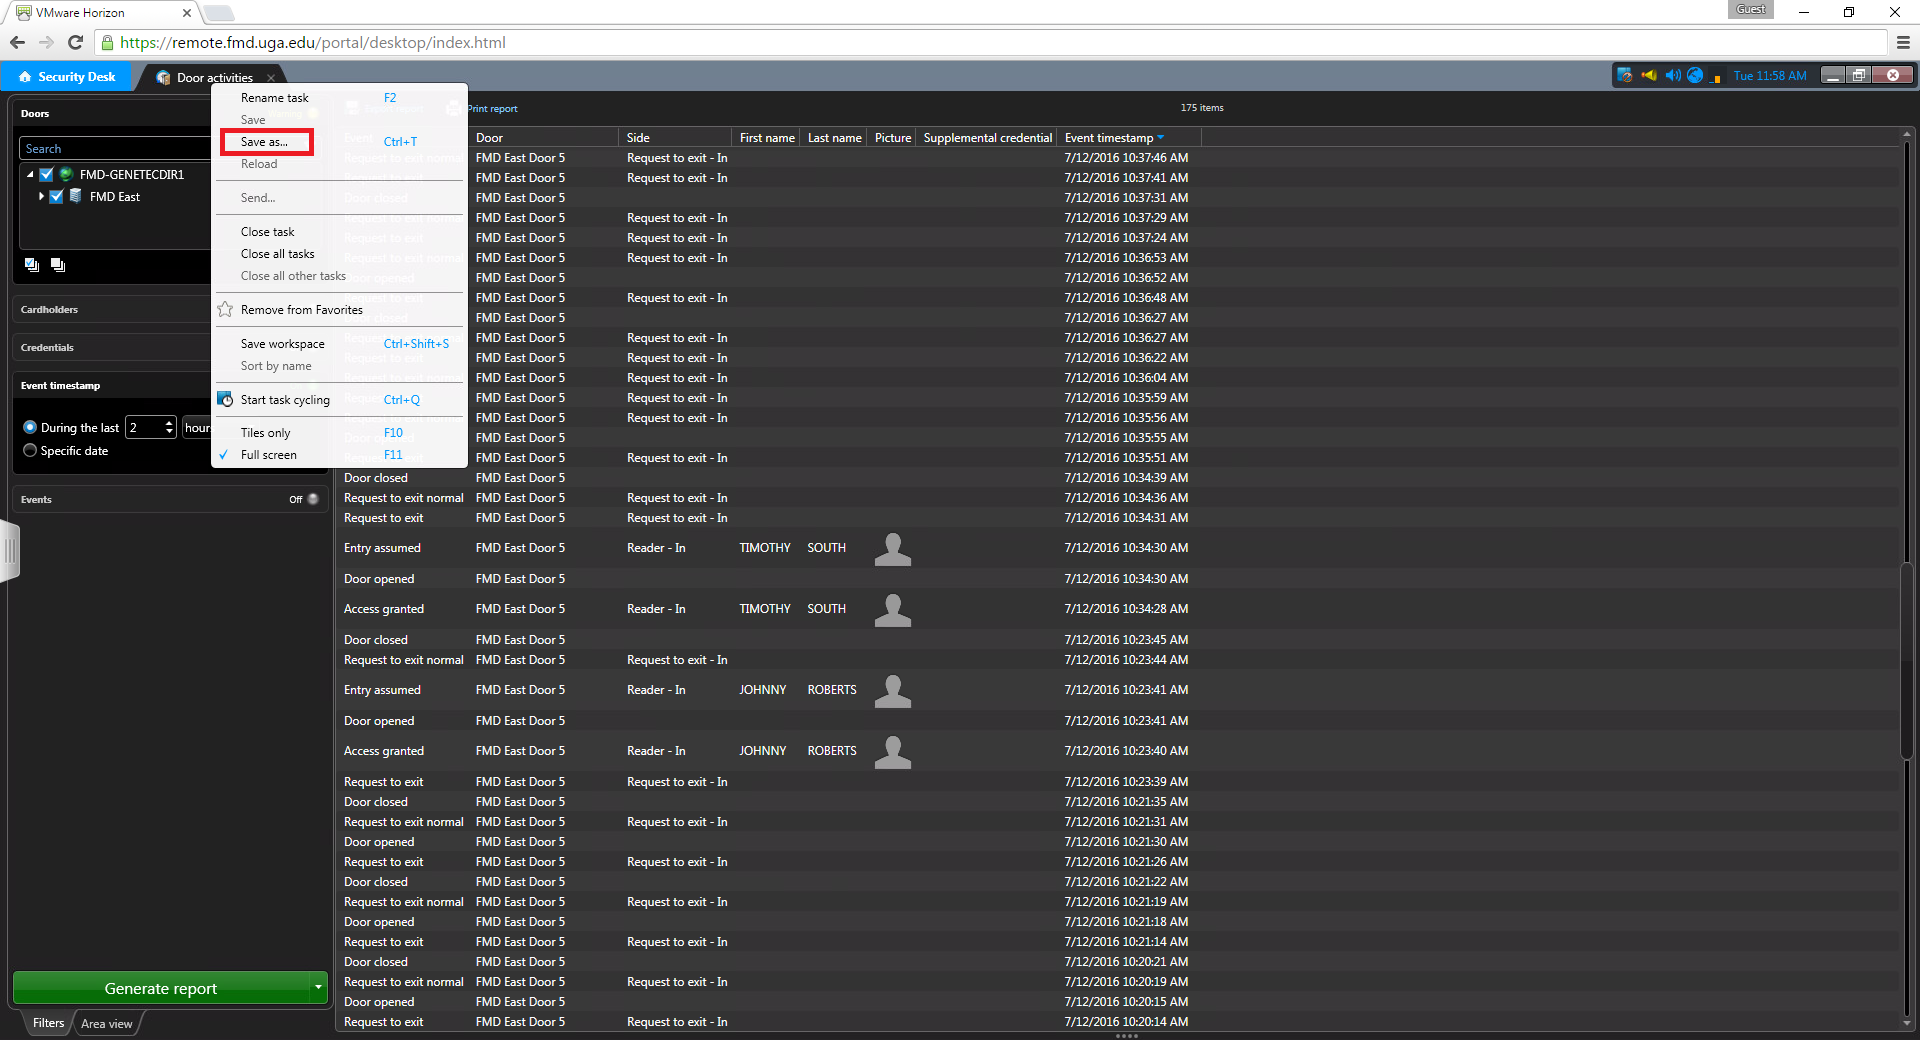
Users have the ability to create and maintain their own Private Tasks. Private Tasks can only be viewed by the user who created them. Private Tasks are created by first setting up a report with the required filters and then generating the report. Once the report has ran you can right click on the tab at the top of the screen that represents the current report you are in and then select 'Save As...'. Next, a dialog box will pop-up giving you the option to name the Private Task. Once the Private Task has been named select the save button to save the task.

Once the task has been saved it can be accessed at any time in the future by going to the 'Private Tasks' section on the main page.
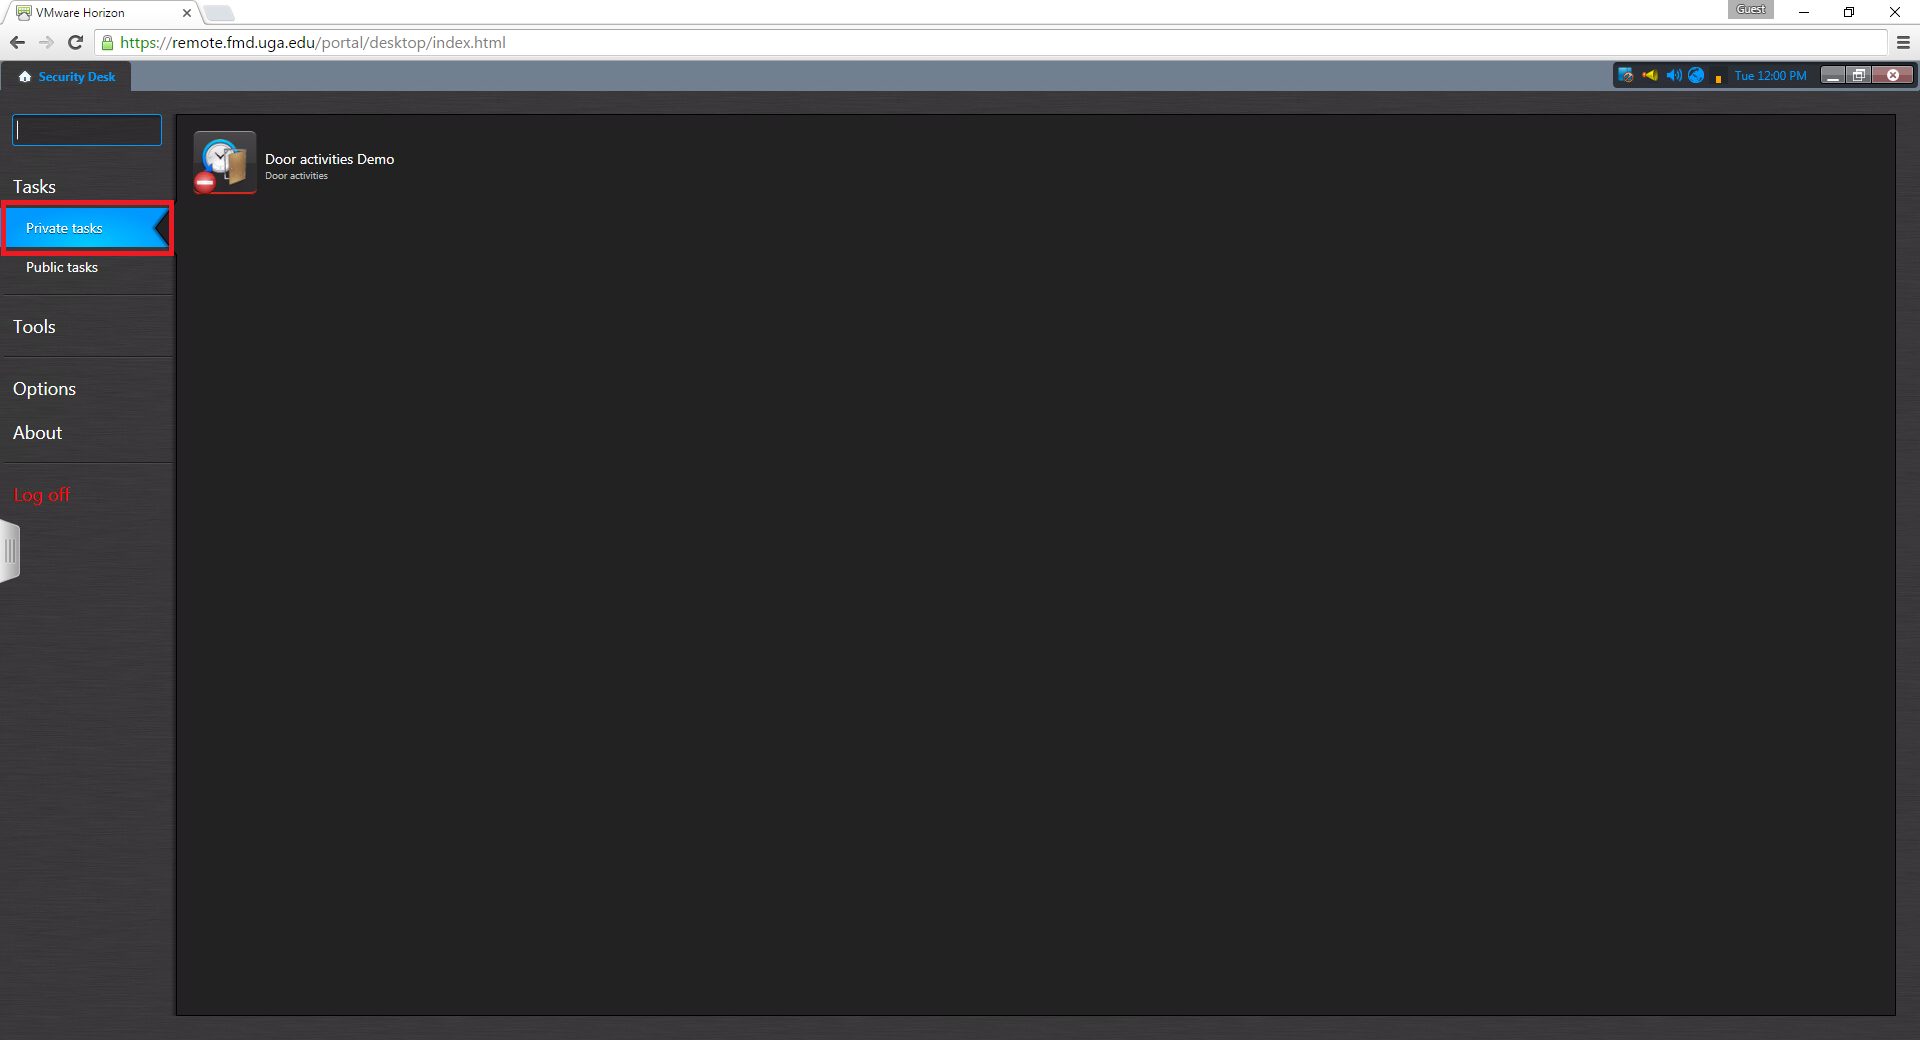
Public Tasks cannot be created by Users. Public Tasks perform the same as Private Tasks but can be assigned to a group of Users for viewing purposes. If you would like a Public Task(s) to share between multiple Users in your department you can e-mail accesscontrol@uga.edu and we will work with you to setup the report and Public Task.
If you have any questions, please feel free to email accesscontrol@uga.edu for assistance.