
How to Access your Physical Computer
If you need to install Cisco VPN
Note you do not need Cisco for any of the VMware Horizon Solutions It is Just For Remoting Into Physical PCs
- Open your web browser and go to remote.uga.edu
- The webpage will prompt you to enter your MYID and password. Once that is entered
click the Login button.
NOTE: You do not need to enter the “@uga.edu” after your MYID.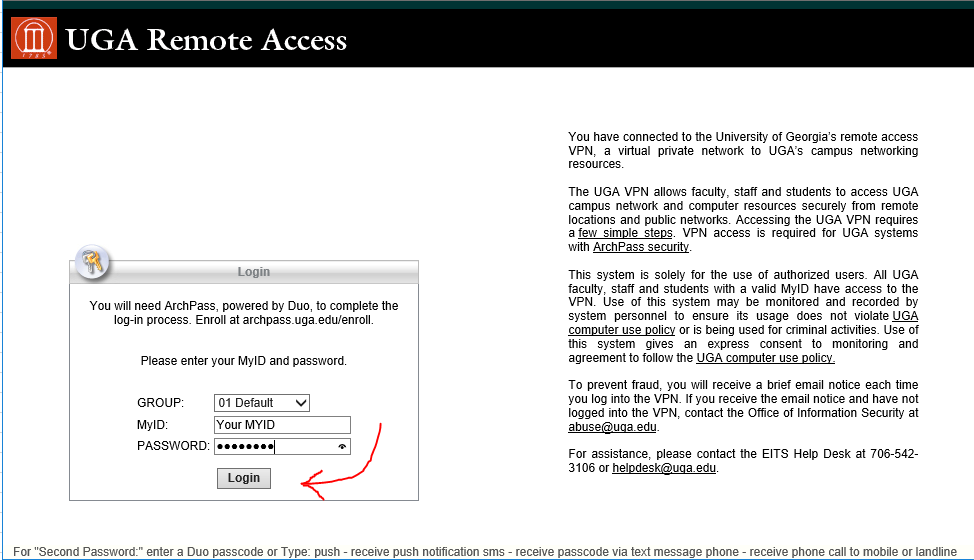
- Once you click “Login” you will be prompted with a DUO notification on your mobile
device and you will need to click accept. If you need to set up DUO on your device
please follow this link.
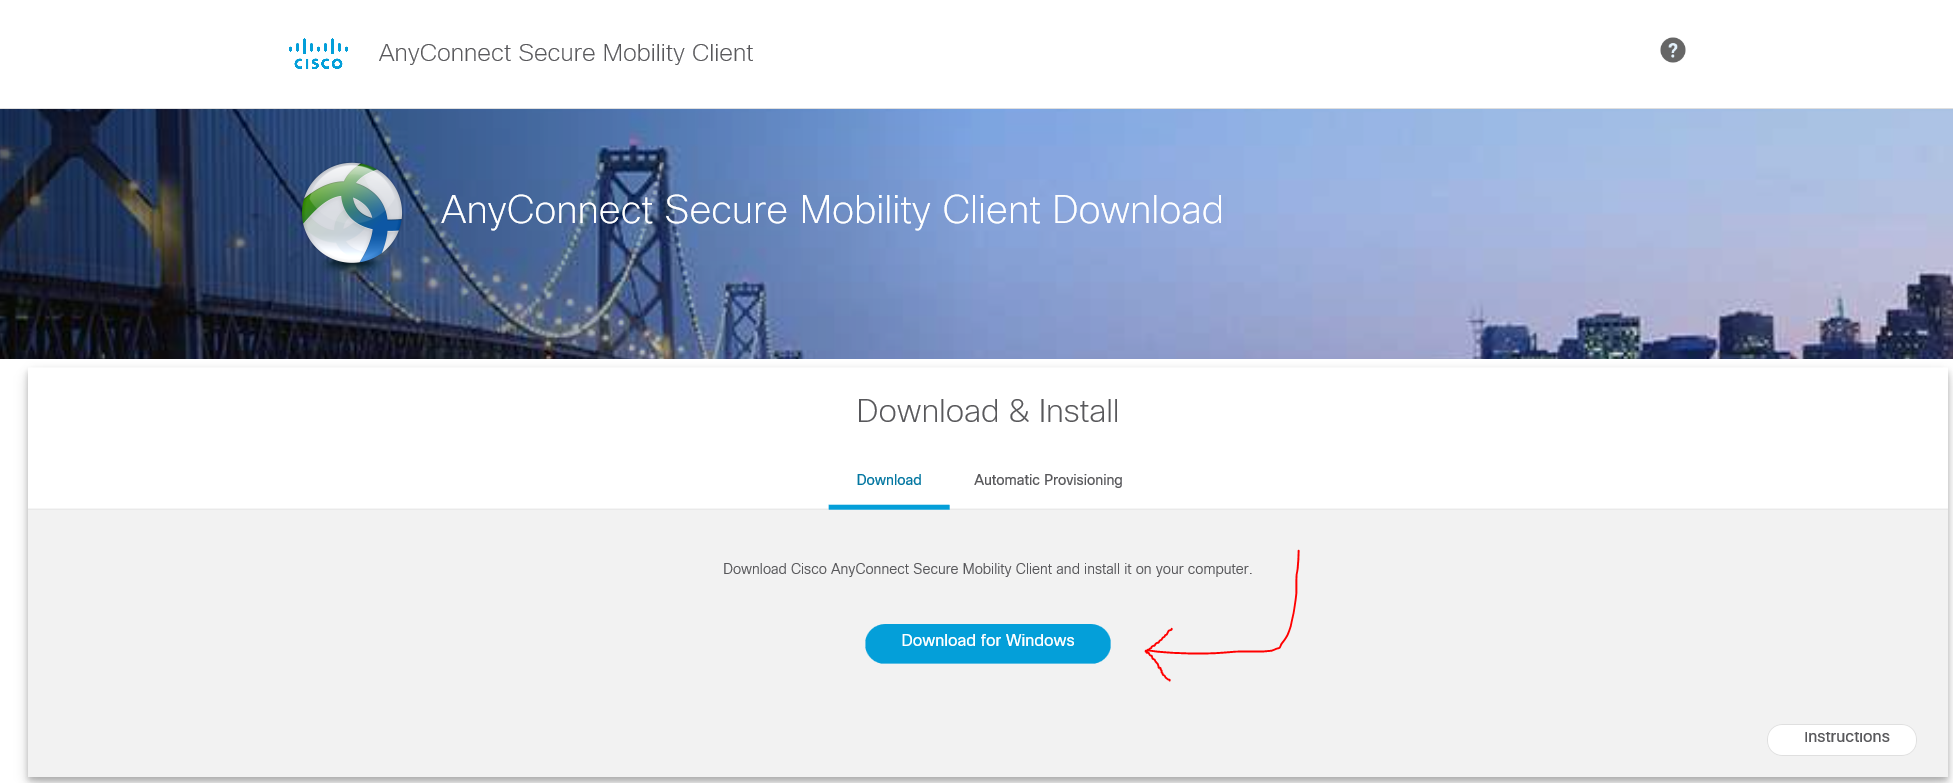
https://confluence.eits.uga.edu/display/HDSH/Enrollment+guide+for+smartphones+and+tablets - Once you are logged in you will be able to download the Cisco VPN by clicking the
“Download for Windows Button” and this will prompt the download.
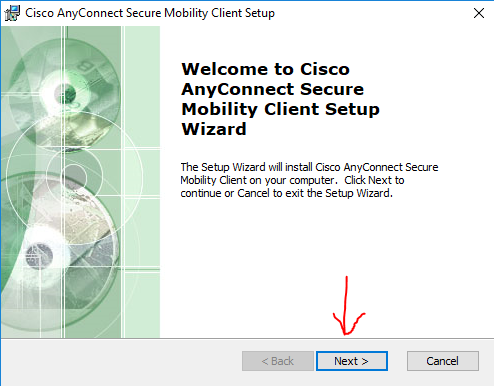
- Once the program downloads open the program.
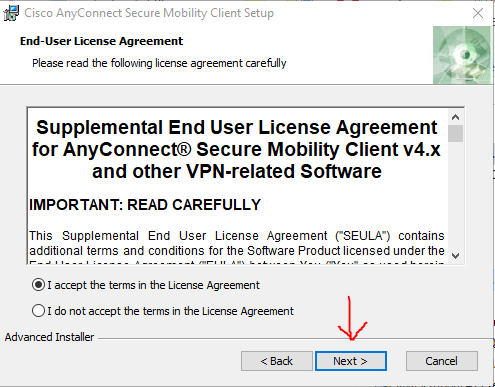
- When the program opens click the “Next” button, Next, click the “I accept the terms
in the License Agreement” button, and then click the “Install” button. The program
will now install. Please wait for it to finish.
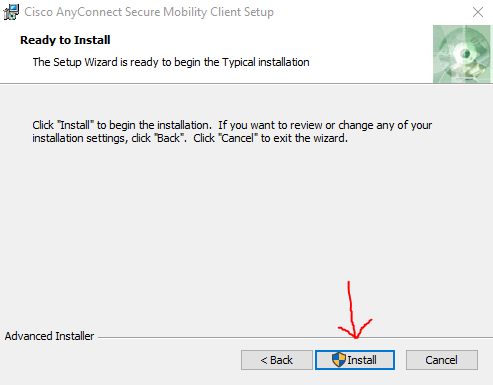
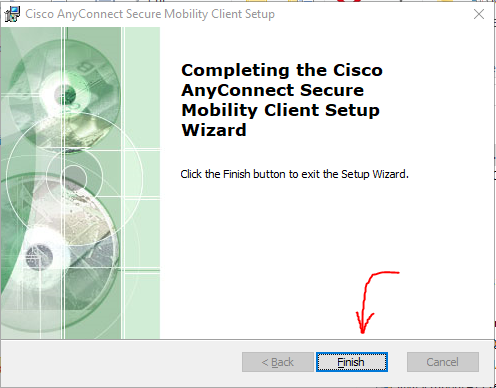
- Once it is done please click the “Finish” button.
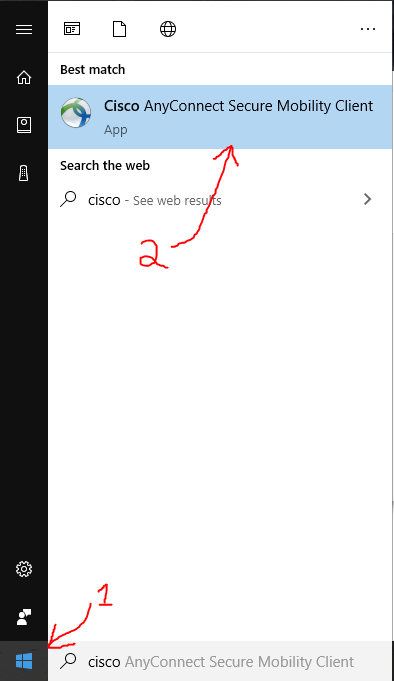
- Next click your start button and the start typing “cisco” the Cisco AnyConnect Secure
Mobility Client Icon.
- Next Click your System Tray Icon then the Cisco Icon.

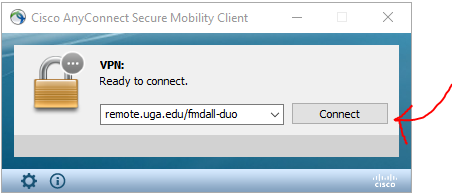
- Once Cisco VPN is opened up enter “remote.uga.edu/fmdall-duo” and then click the “Connect”
button.
- A new window will open prompting you to enter your MYID, password, and a second password.
For the second password please enter “push”. Once that is entered click the “OK” button.
NOTE: You do not need to enter the “@uga.edu” after your MYID.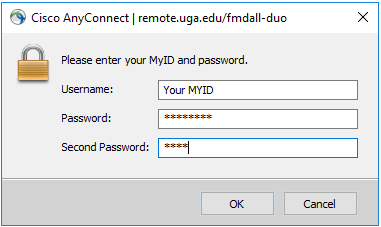
- Once you click “OK” you will be prompted with a DUO notification on your mobile device
and you will need to click accept. If you need to set up DUO on your device please
follow this link.
https://confluence.eits.uga.edu/display/HDSH/Enrollment+guide+for+smartphones+and+tablets
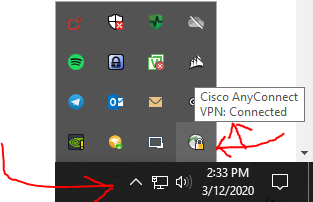
- You will now be connected but to verify the connection please open the system tray
again and hover your mouse over the cisco icon. You should see a lock and a connected
notification.
How to Remote Into Your PC
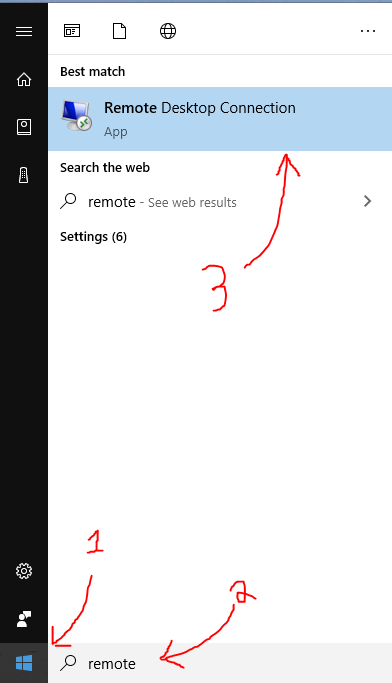
- Click the Start button then start typing “remote” then click Remote Desktop Connection.
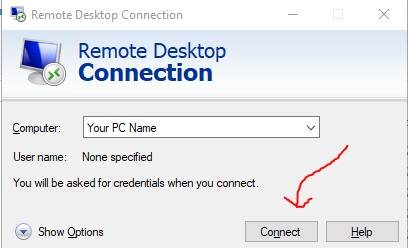
- Type in your “PC name” and click the “Connect” button. Please make sure that you enter
you “PC Name” as such “YourPCName.msmyid.uga.edu”
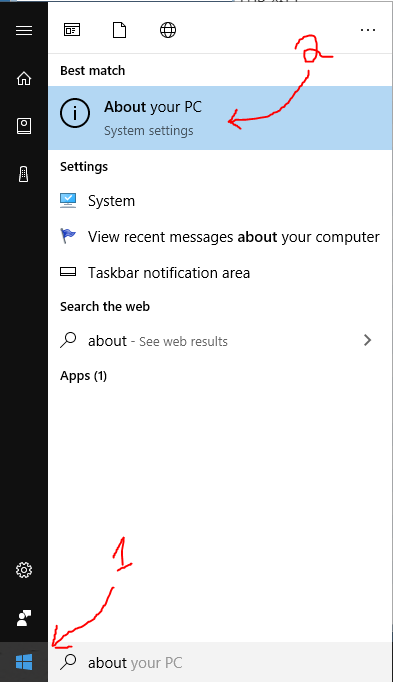
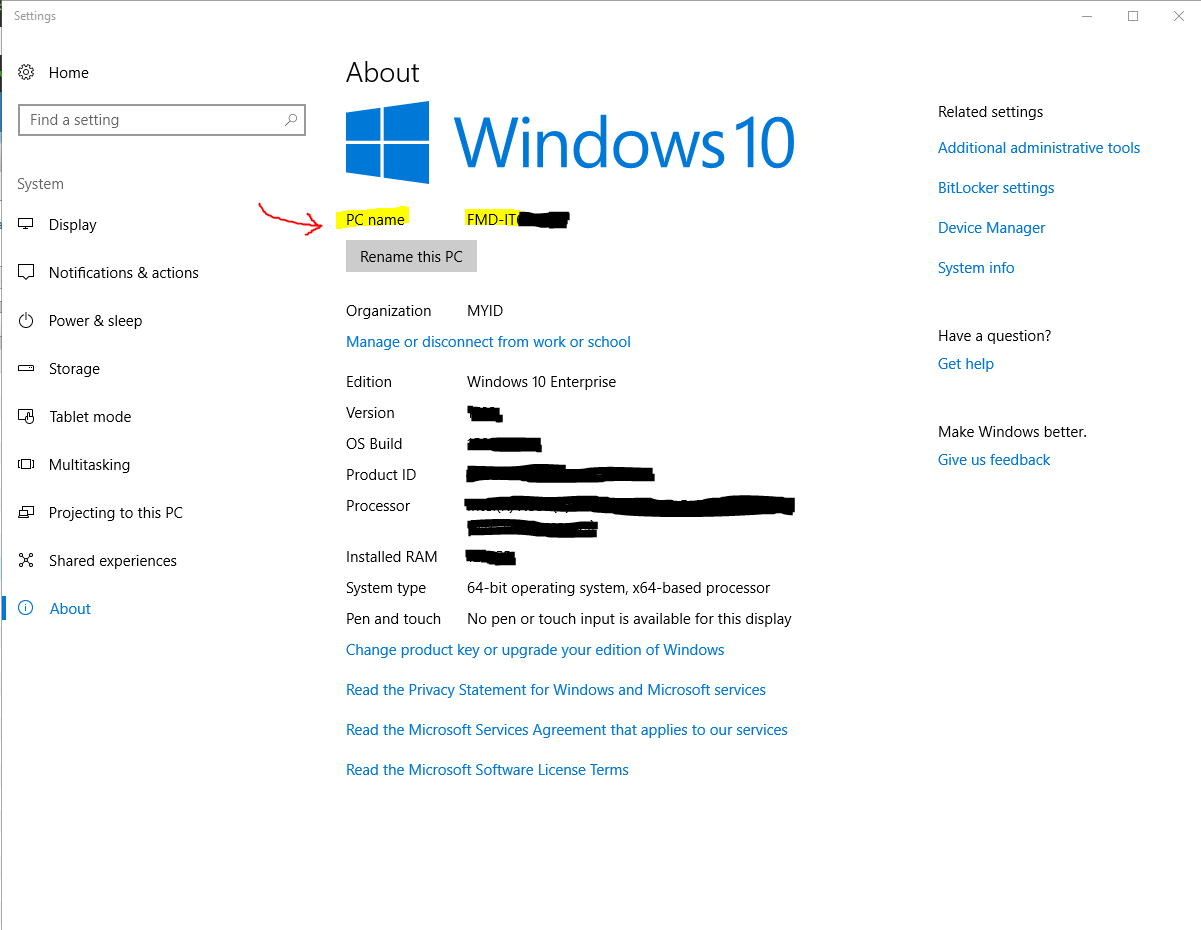
NOTE: If you need to find your “PC Name” please click the Start button and then type “about” then click “About your PC”. Your “PC Name” will be listed here.
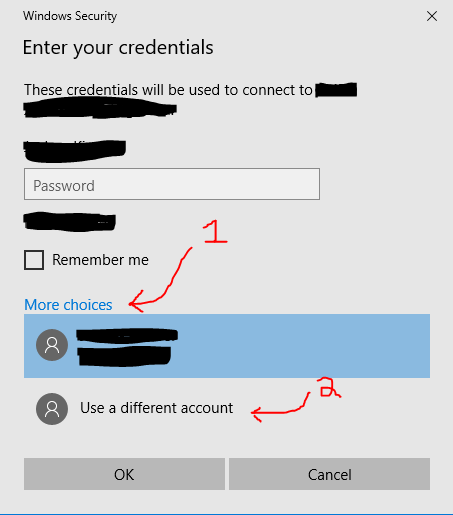
- A new box will pop up and asking for your login information. Click the “More Choices”
button then click “Use a Different Account” button.
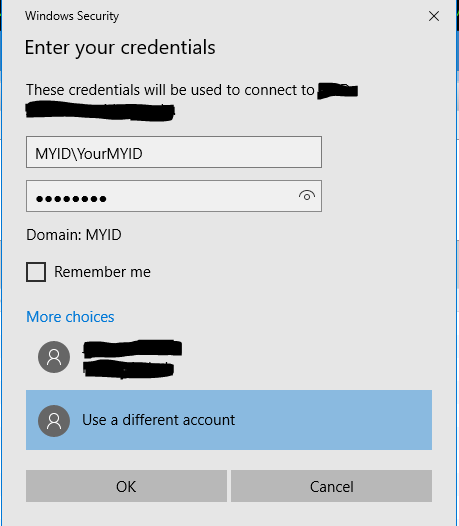
- Now enter your MYID and Password. Please enter your MYID as such: MYID\YourMYID.
Then click the “OK” button.
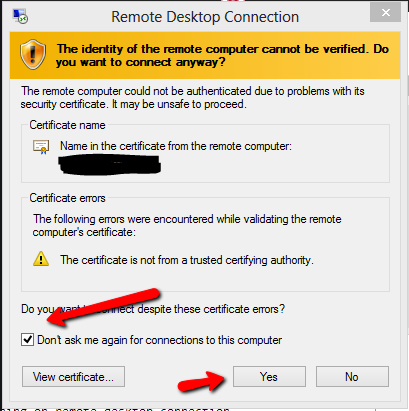
- If you are prompted with a security prompt please select the box for “Don’t ask me
again for connections to this computer” and then click “Yes” button.
- You should now be connected. As always please let FMD-IT know if you have any issues.
Note: Your computer will need to be powered on for you to be able to remote into it.